
Acceptable Digital Signatures
How to Find Out What Version of Adobe You Have
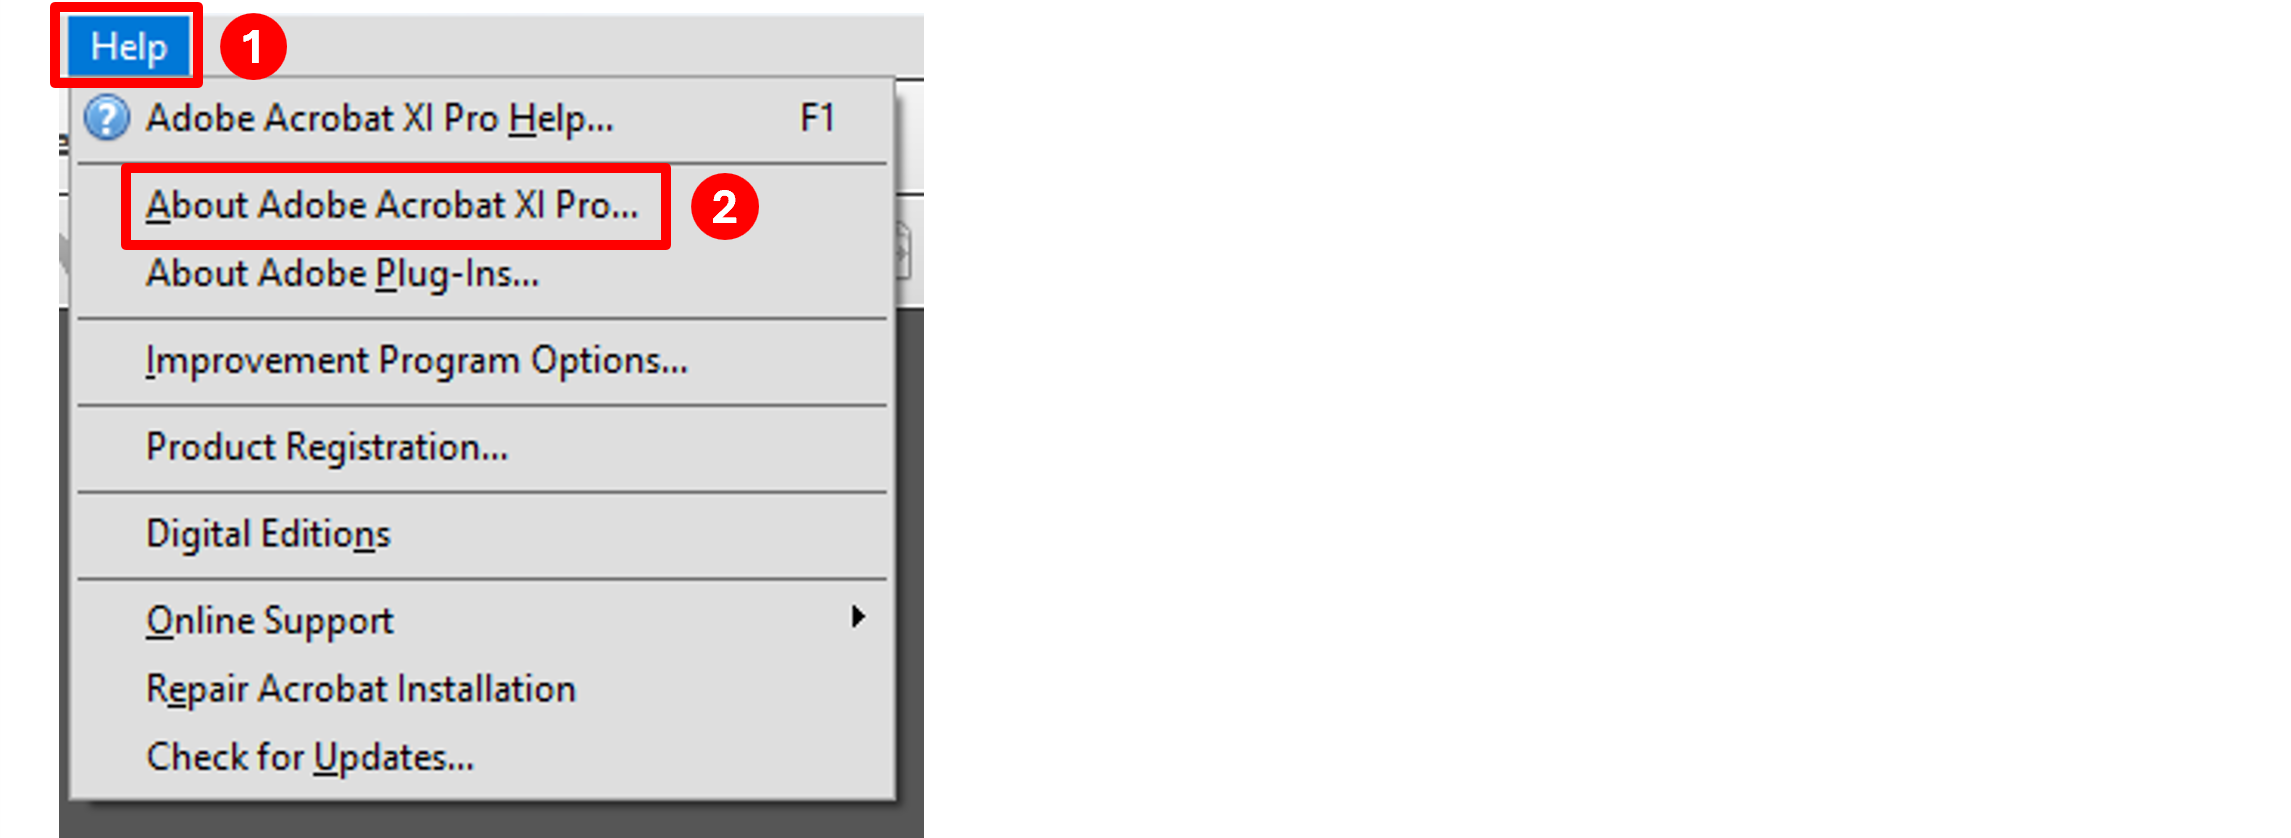
Open the version of Adobe that you have.
If you see a Help option on the menu across the top, you have an older version. If you do not see a Help option on the menu, you have a new version. Please refer to the section for Newer Versions.
Click the Help menu, then click on About Adobe Acrobat... (the wording will vary depending what version you have:
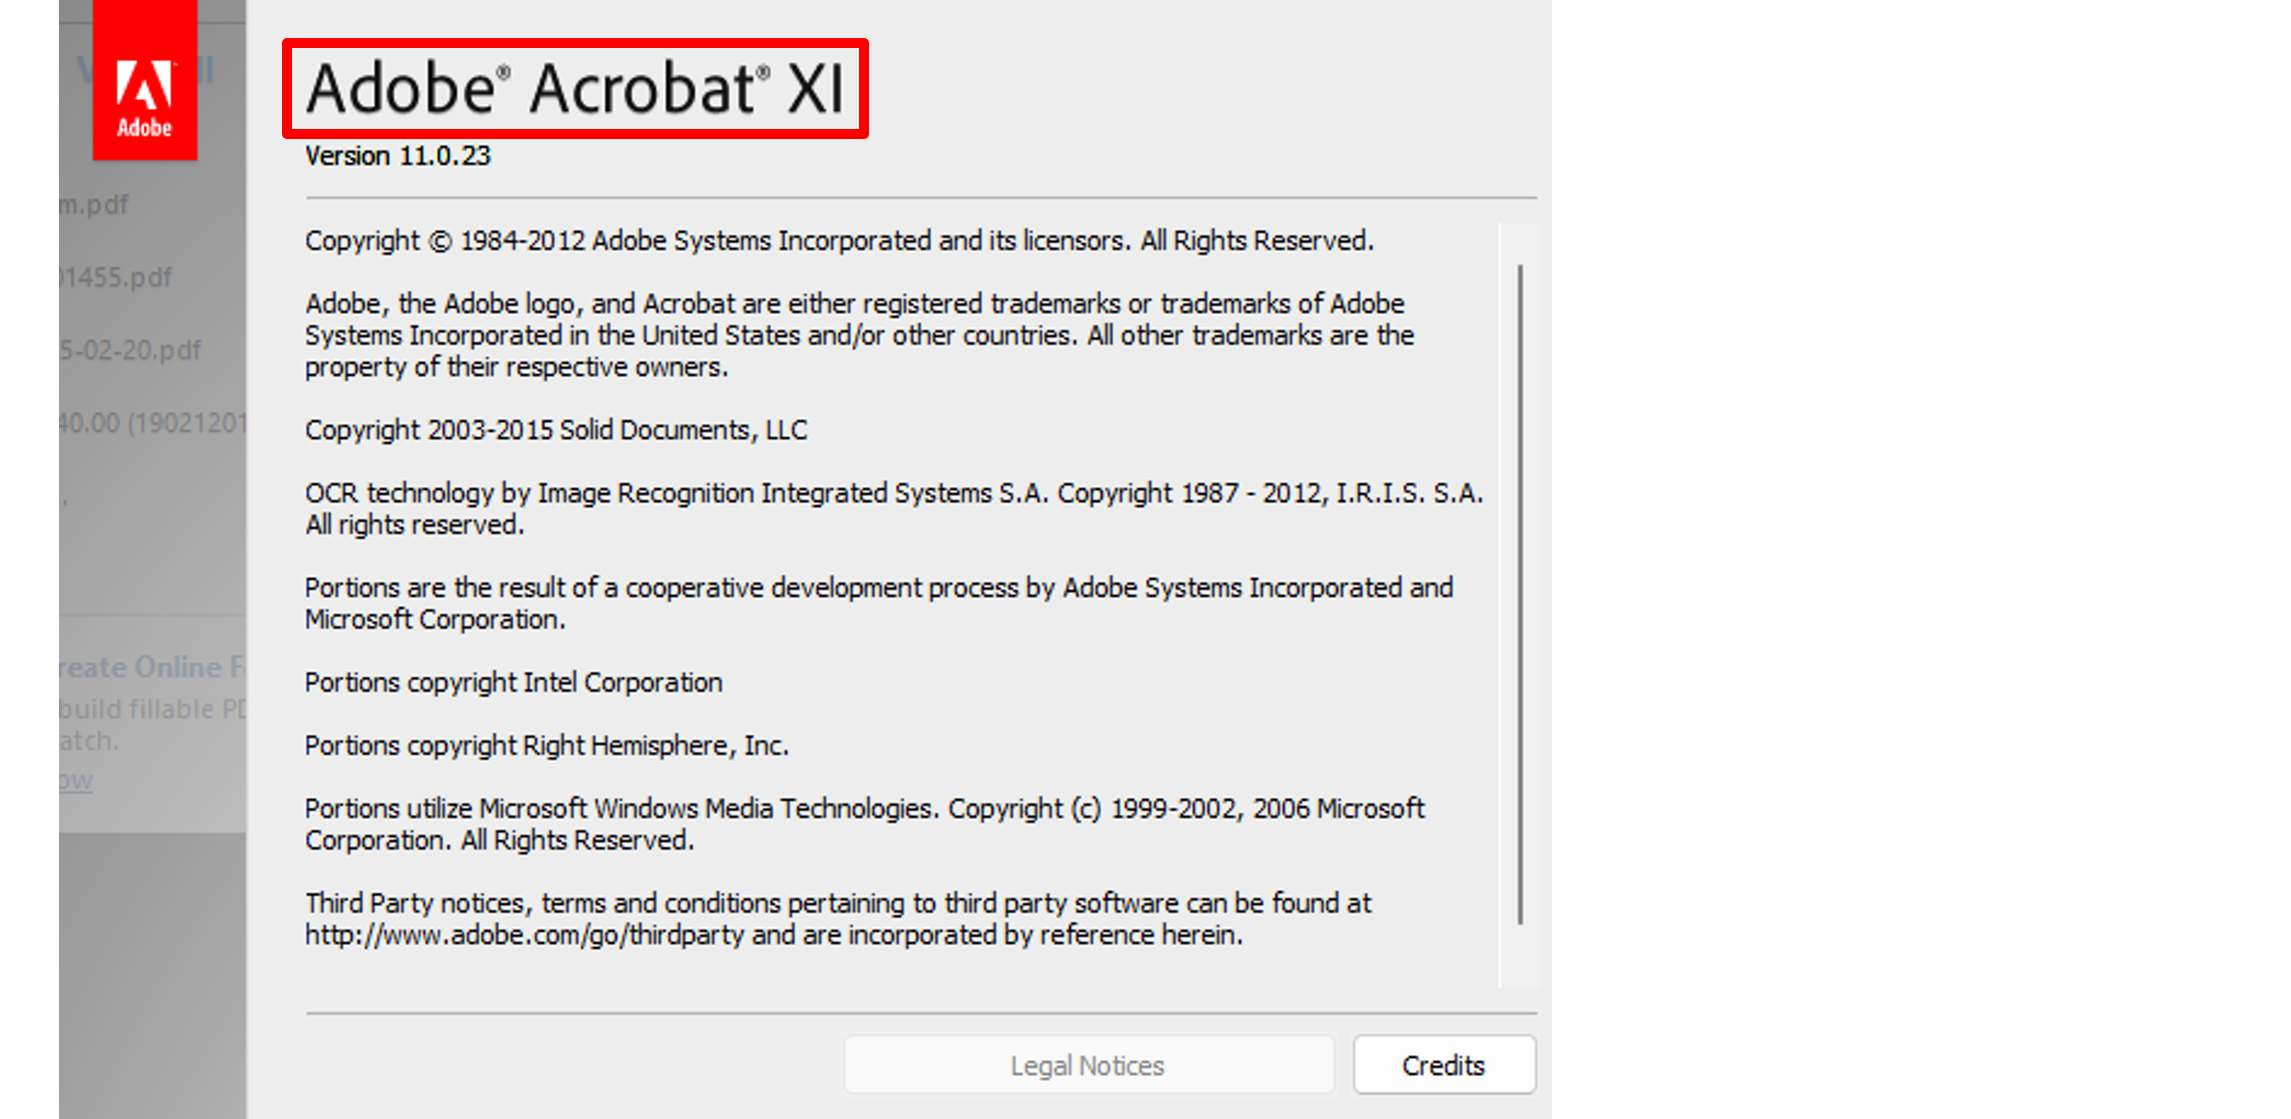
That will open another window. The version will be shown at the top of the window:
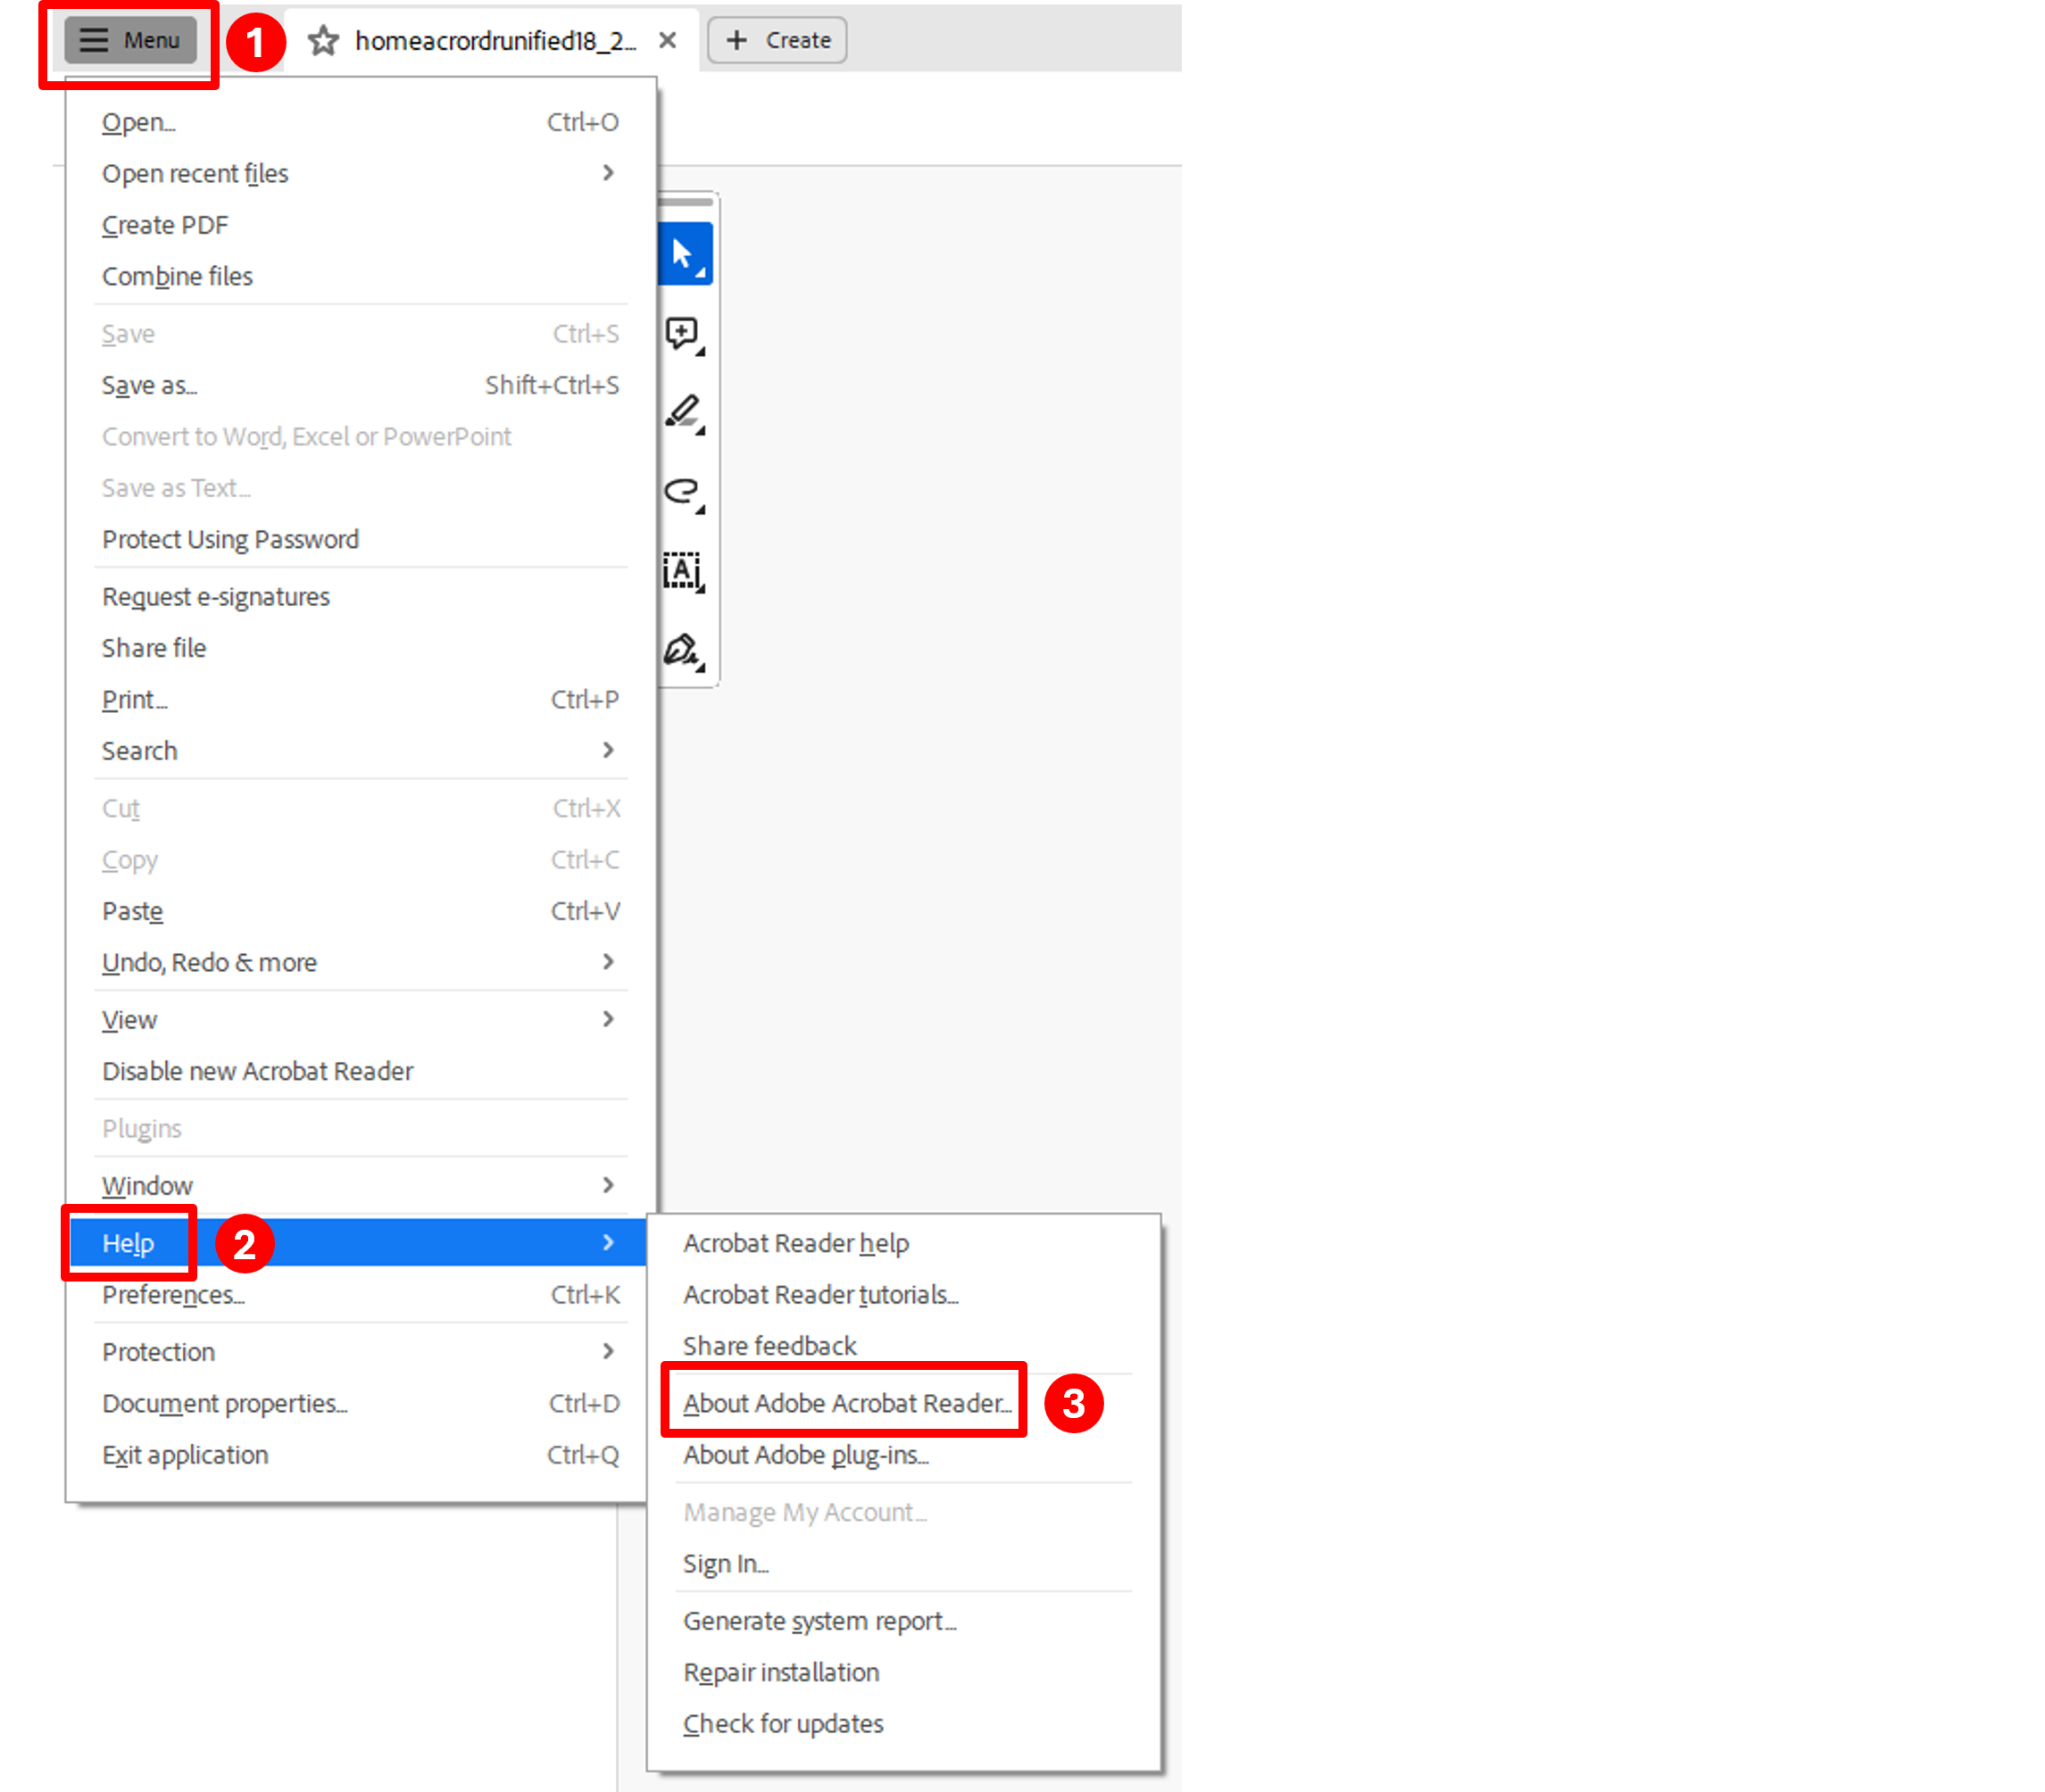
Open the version of Adobe that you have.
If you see a Help option on the menu across the top, you have an older version. Please refer to the section for Older versions. If you do not see a Help Option on the menu across the top, follow the steps below:
Click the Menu option with the 3 lines in the top left corner, hover your mouse over Help, then click on About Adobe... from the sub-menu (again, the wording will vary depending what version you have):
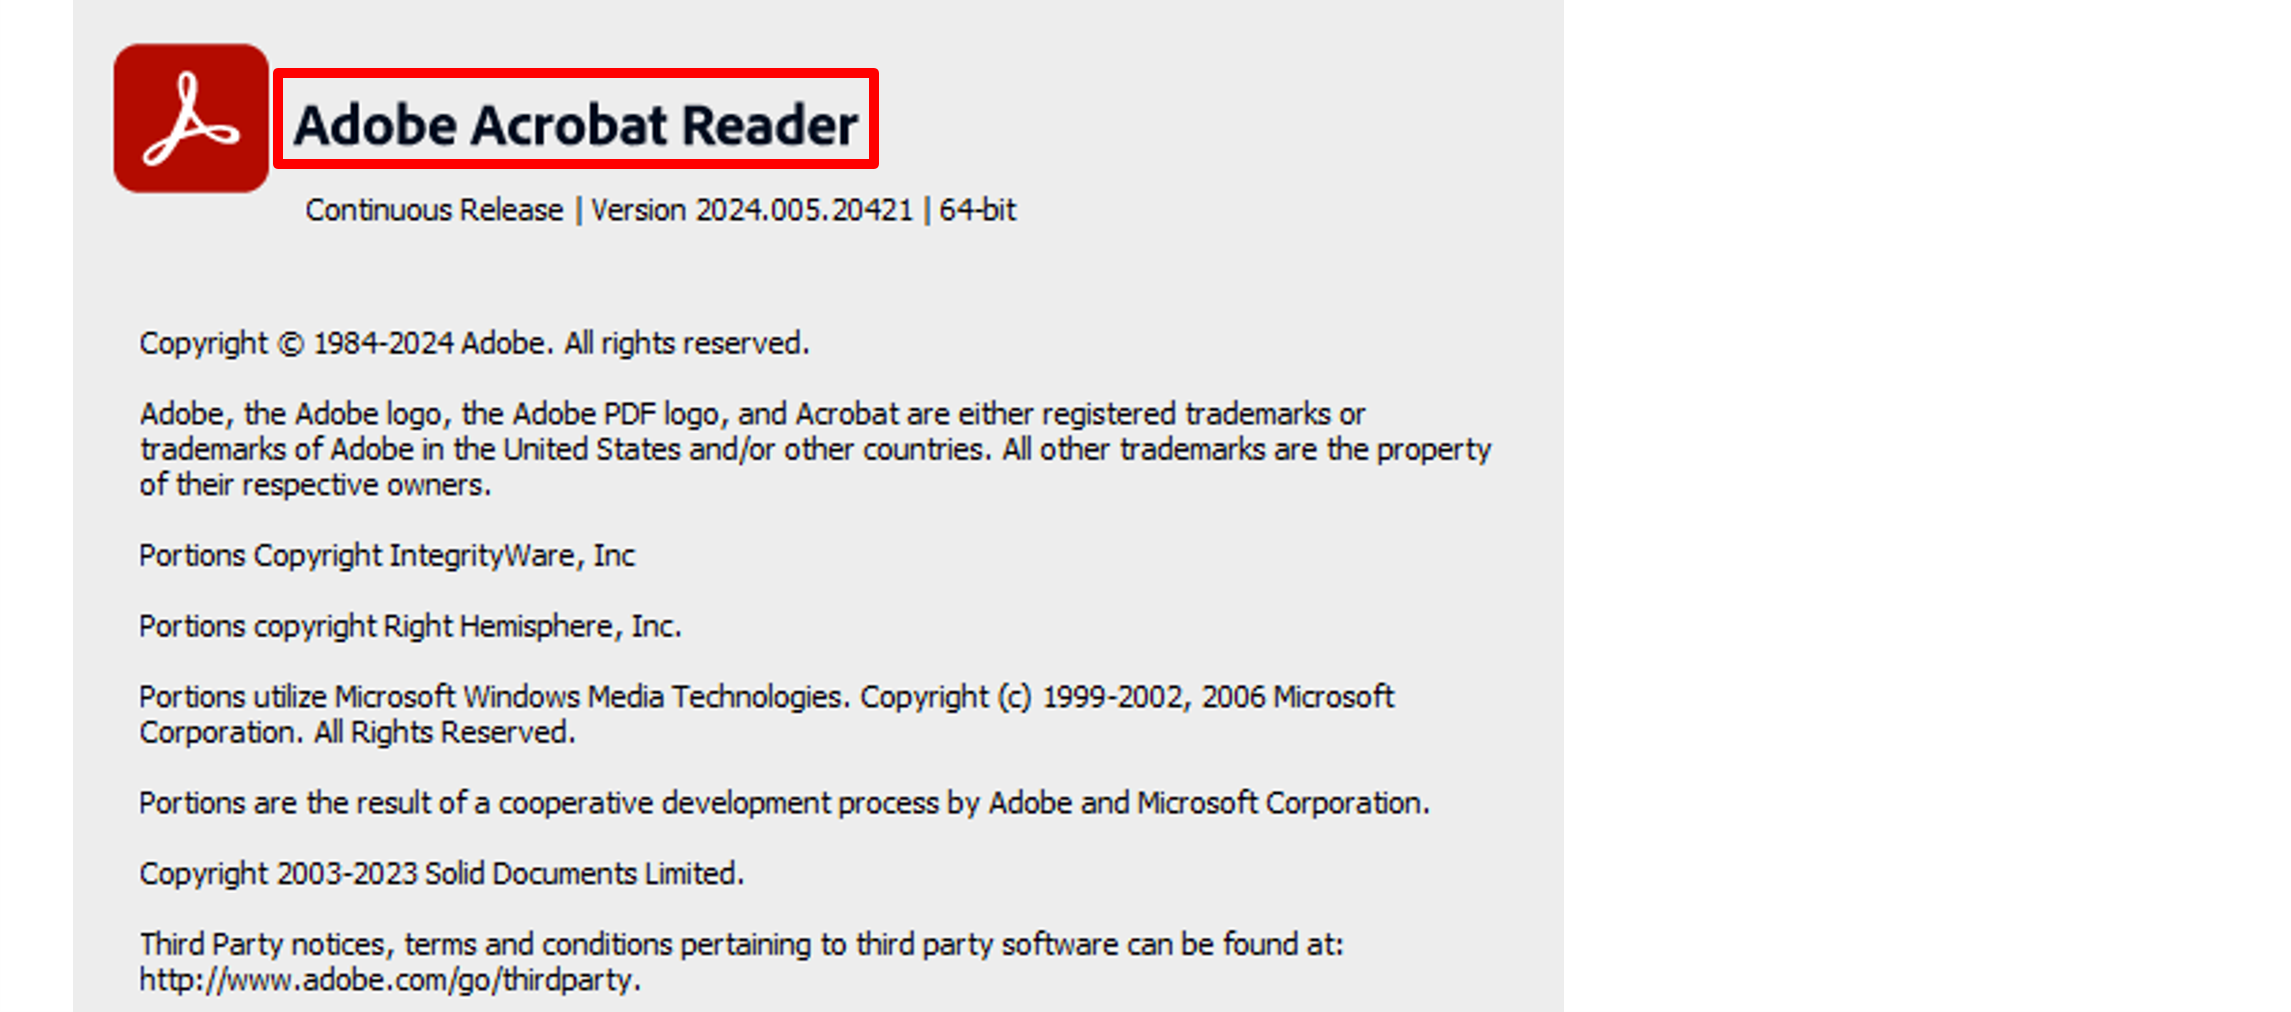
That will open another window. The version will be shown at the top of the window:
Creating a Digital Signature For the First Time
NOTE: You must have an Adobe file opened in order to create the certificate.
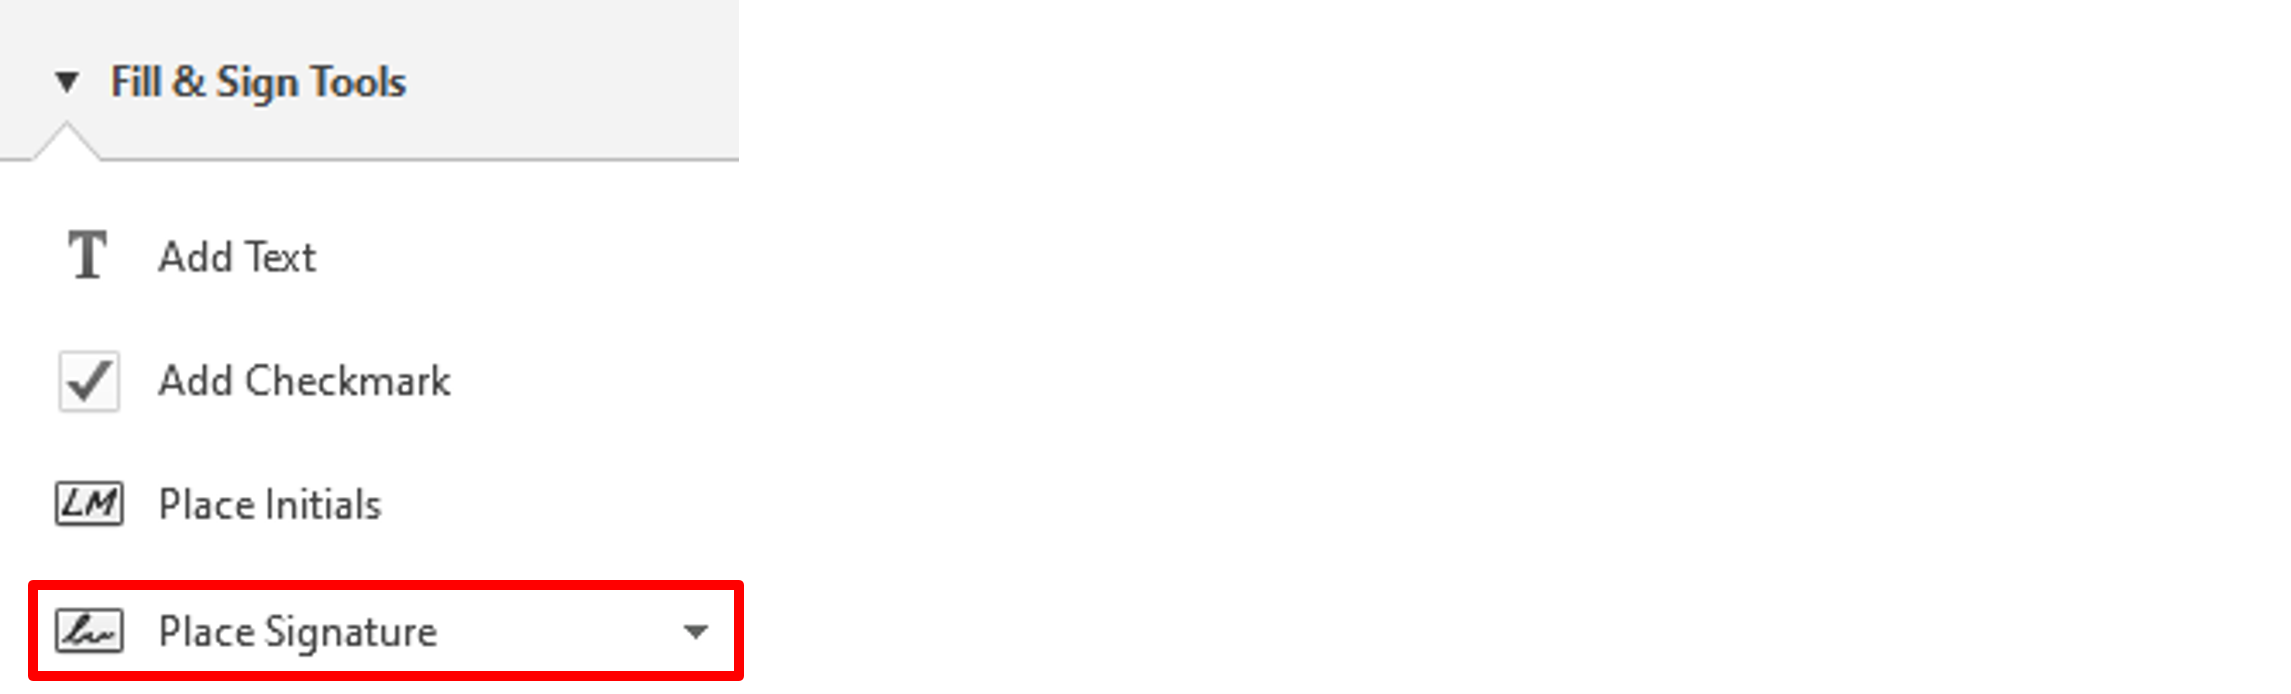
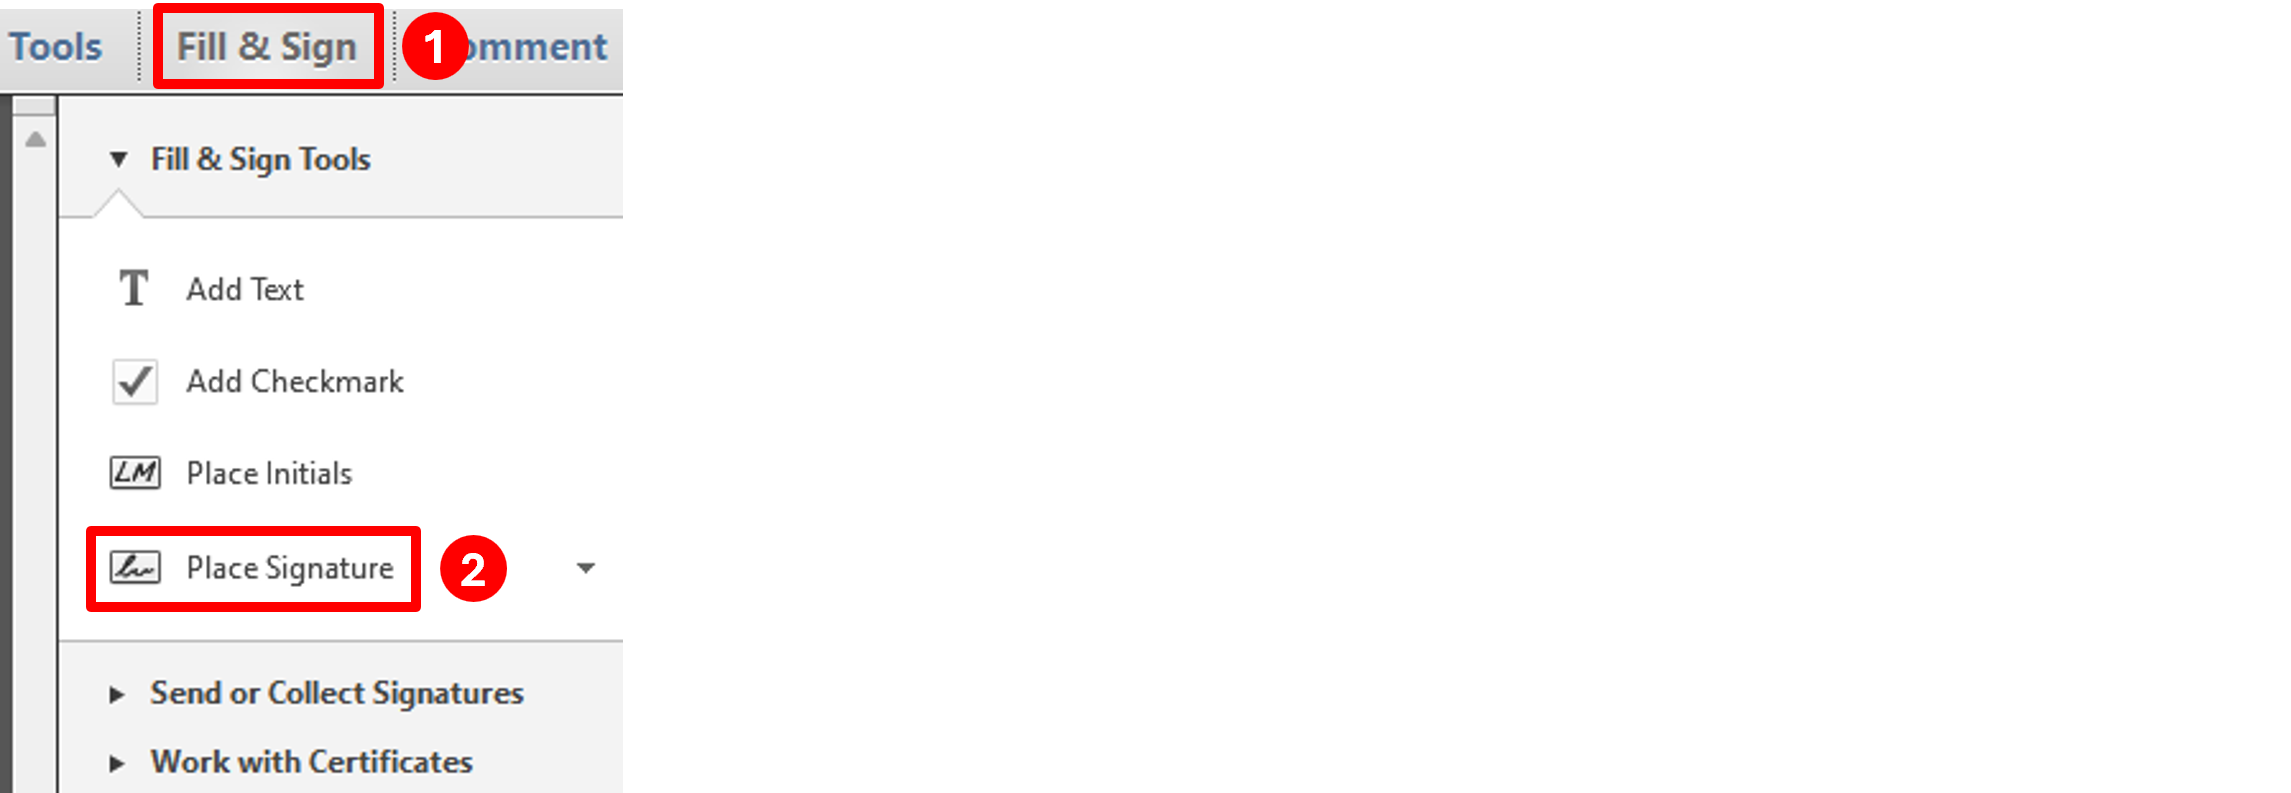
Click on Fill & Sign in the top-right corner:

Select Place Signature:
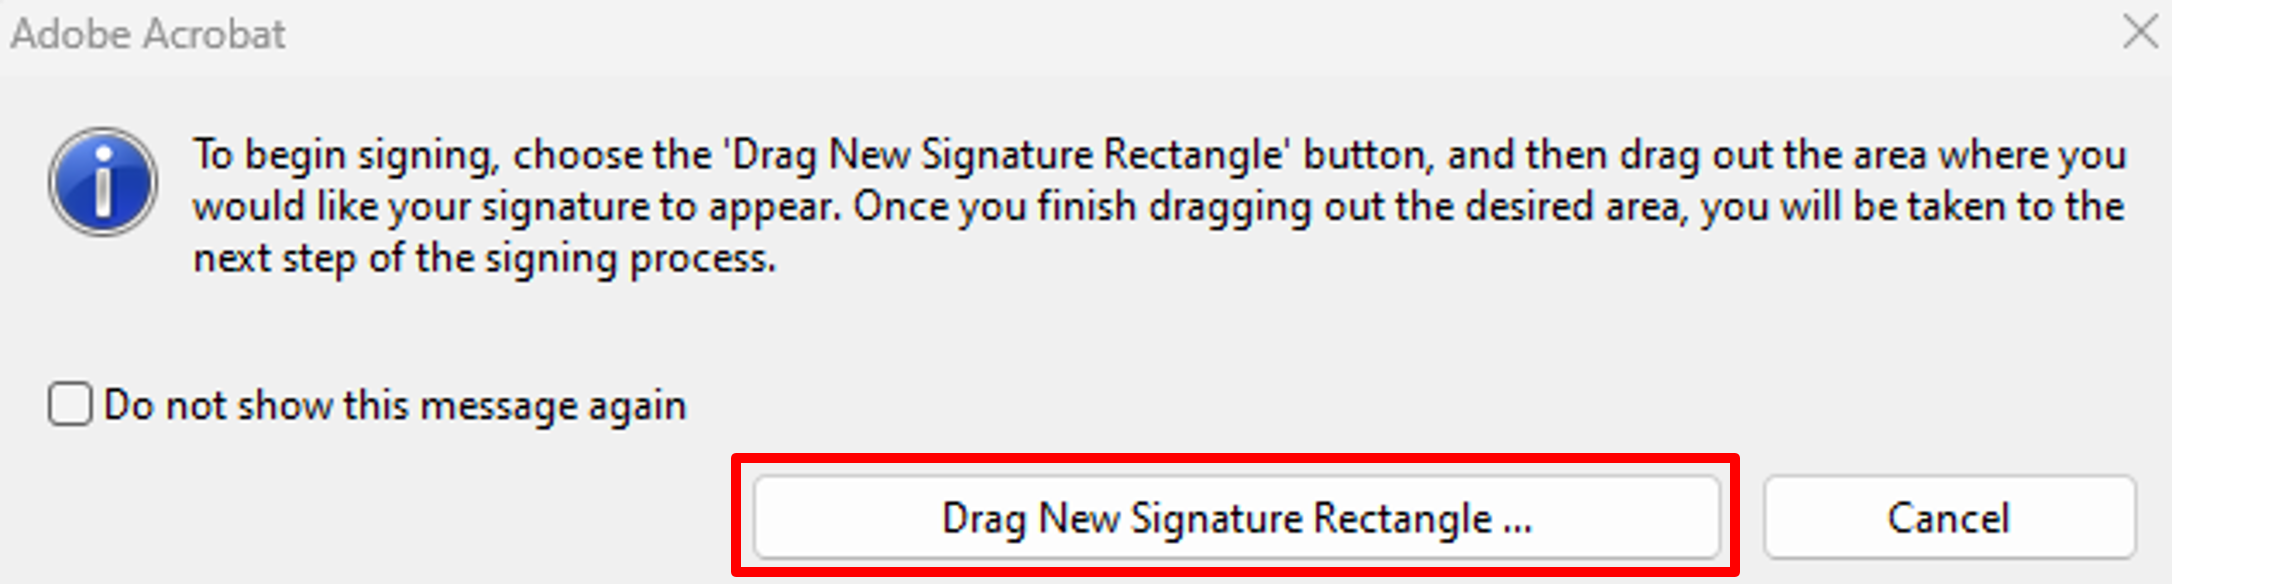
Click the Drag New Signature Rectangle button:
Draw a rectangle in your Adobe document, then you will get the Sign Document window. From the Sign As dropdown box, select New ID:

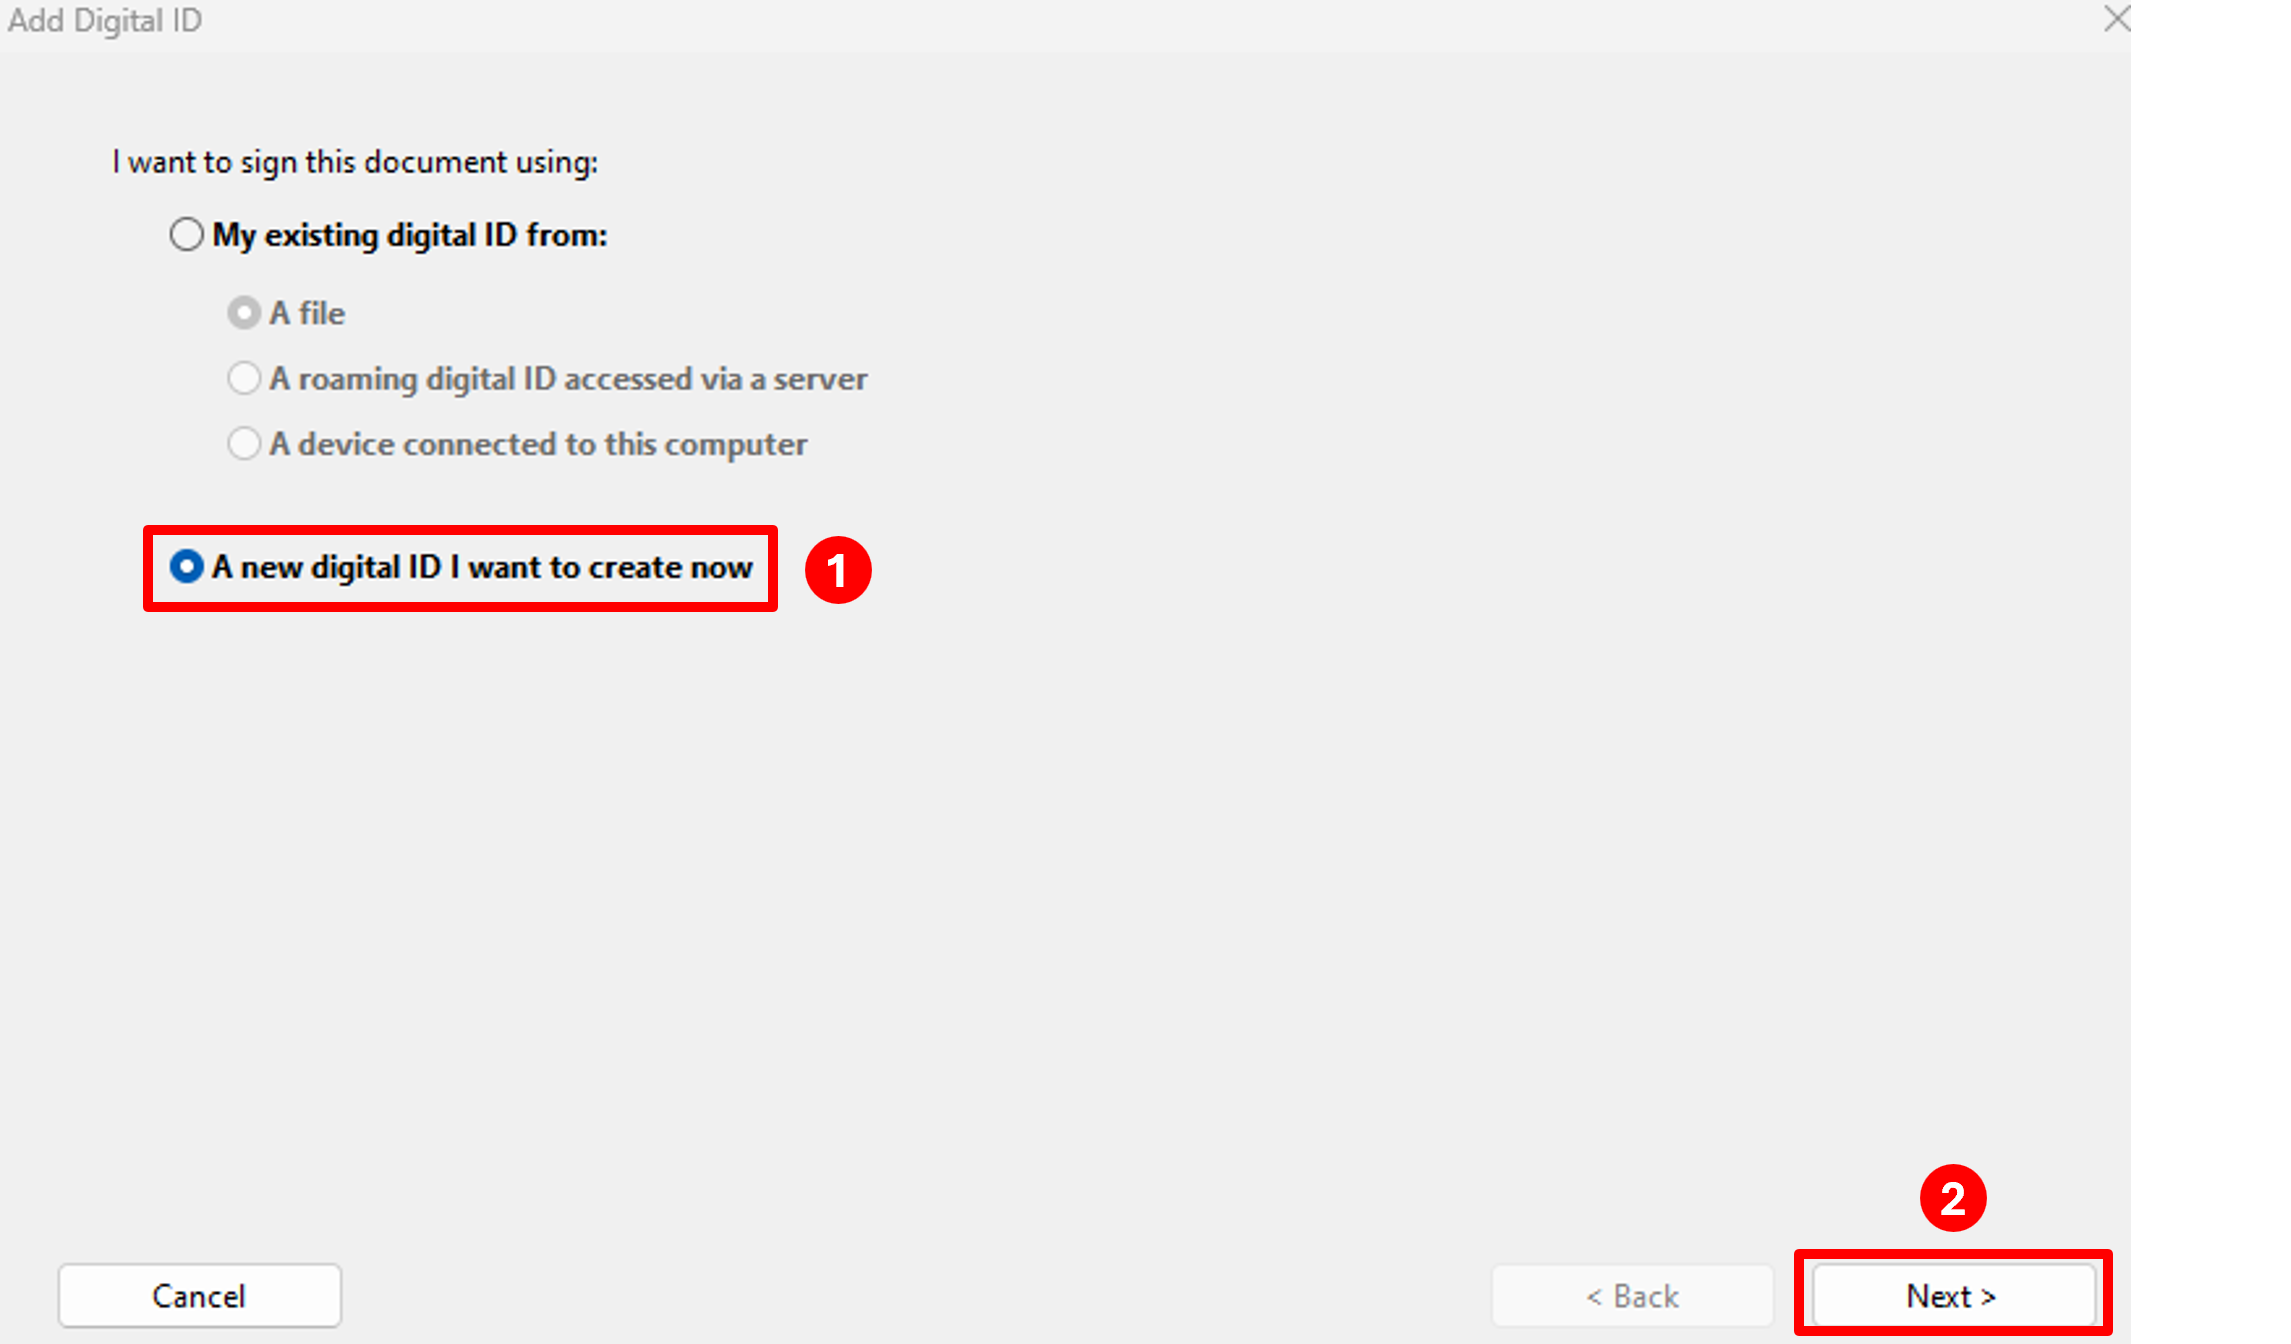
On the Add Digital ID screen, select A new digital ID I want to create now, then click the Next button:
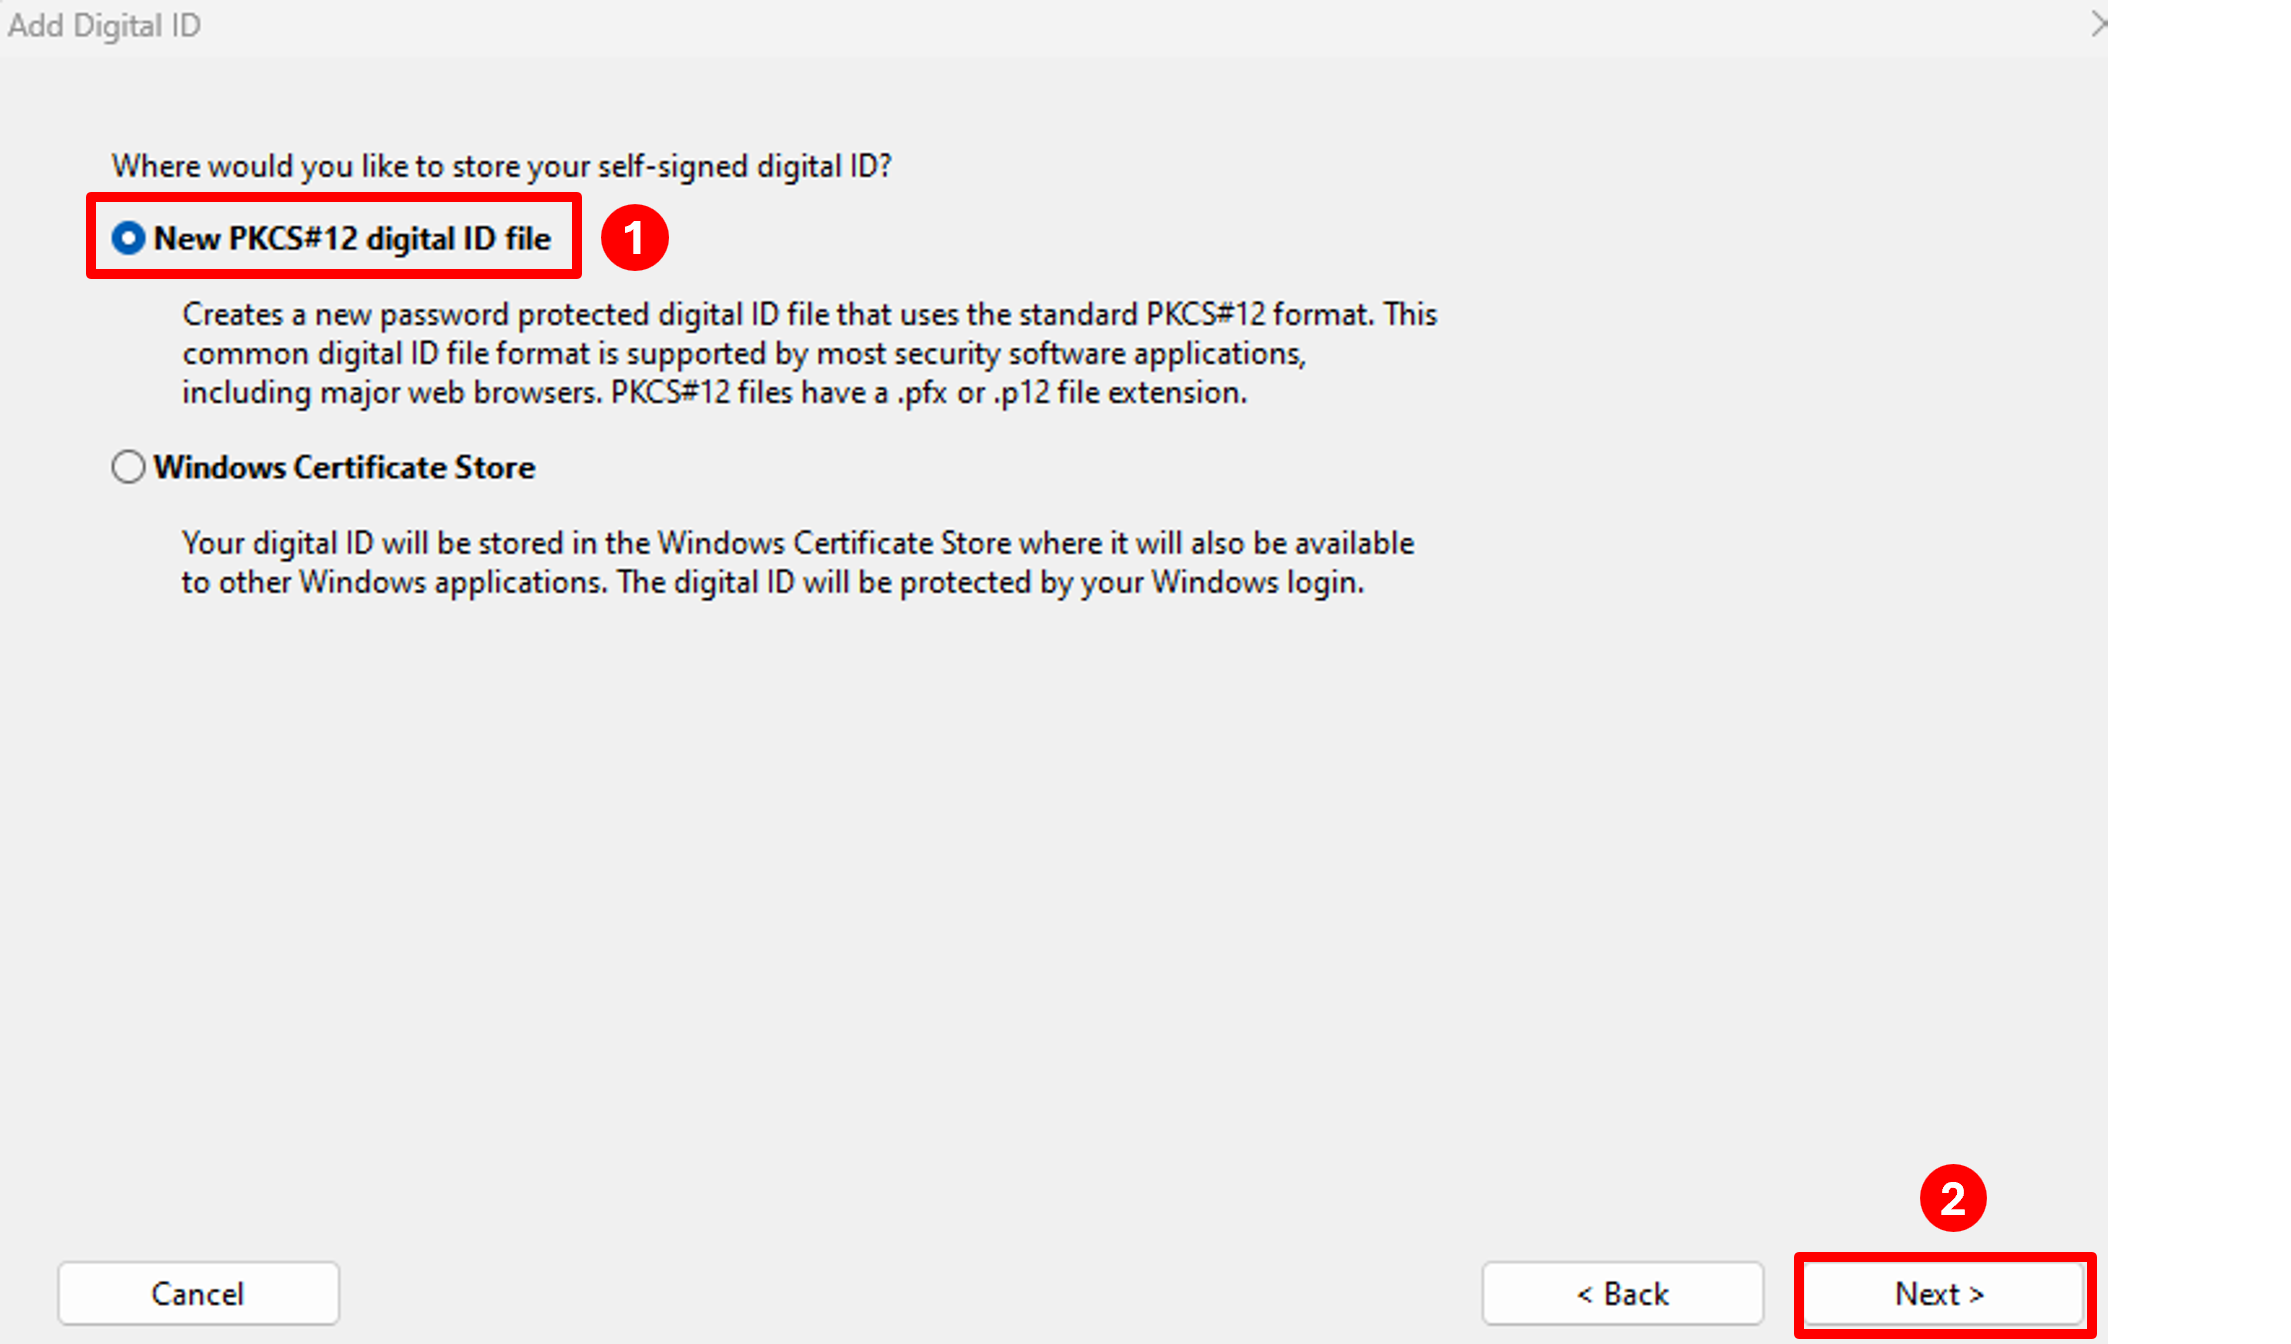
On the next screen, select New PKCS#12 digital ID file, then click the Next button:
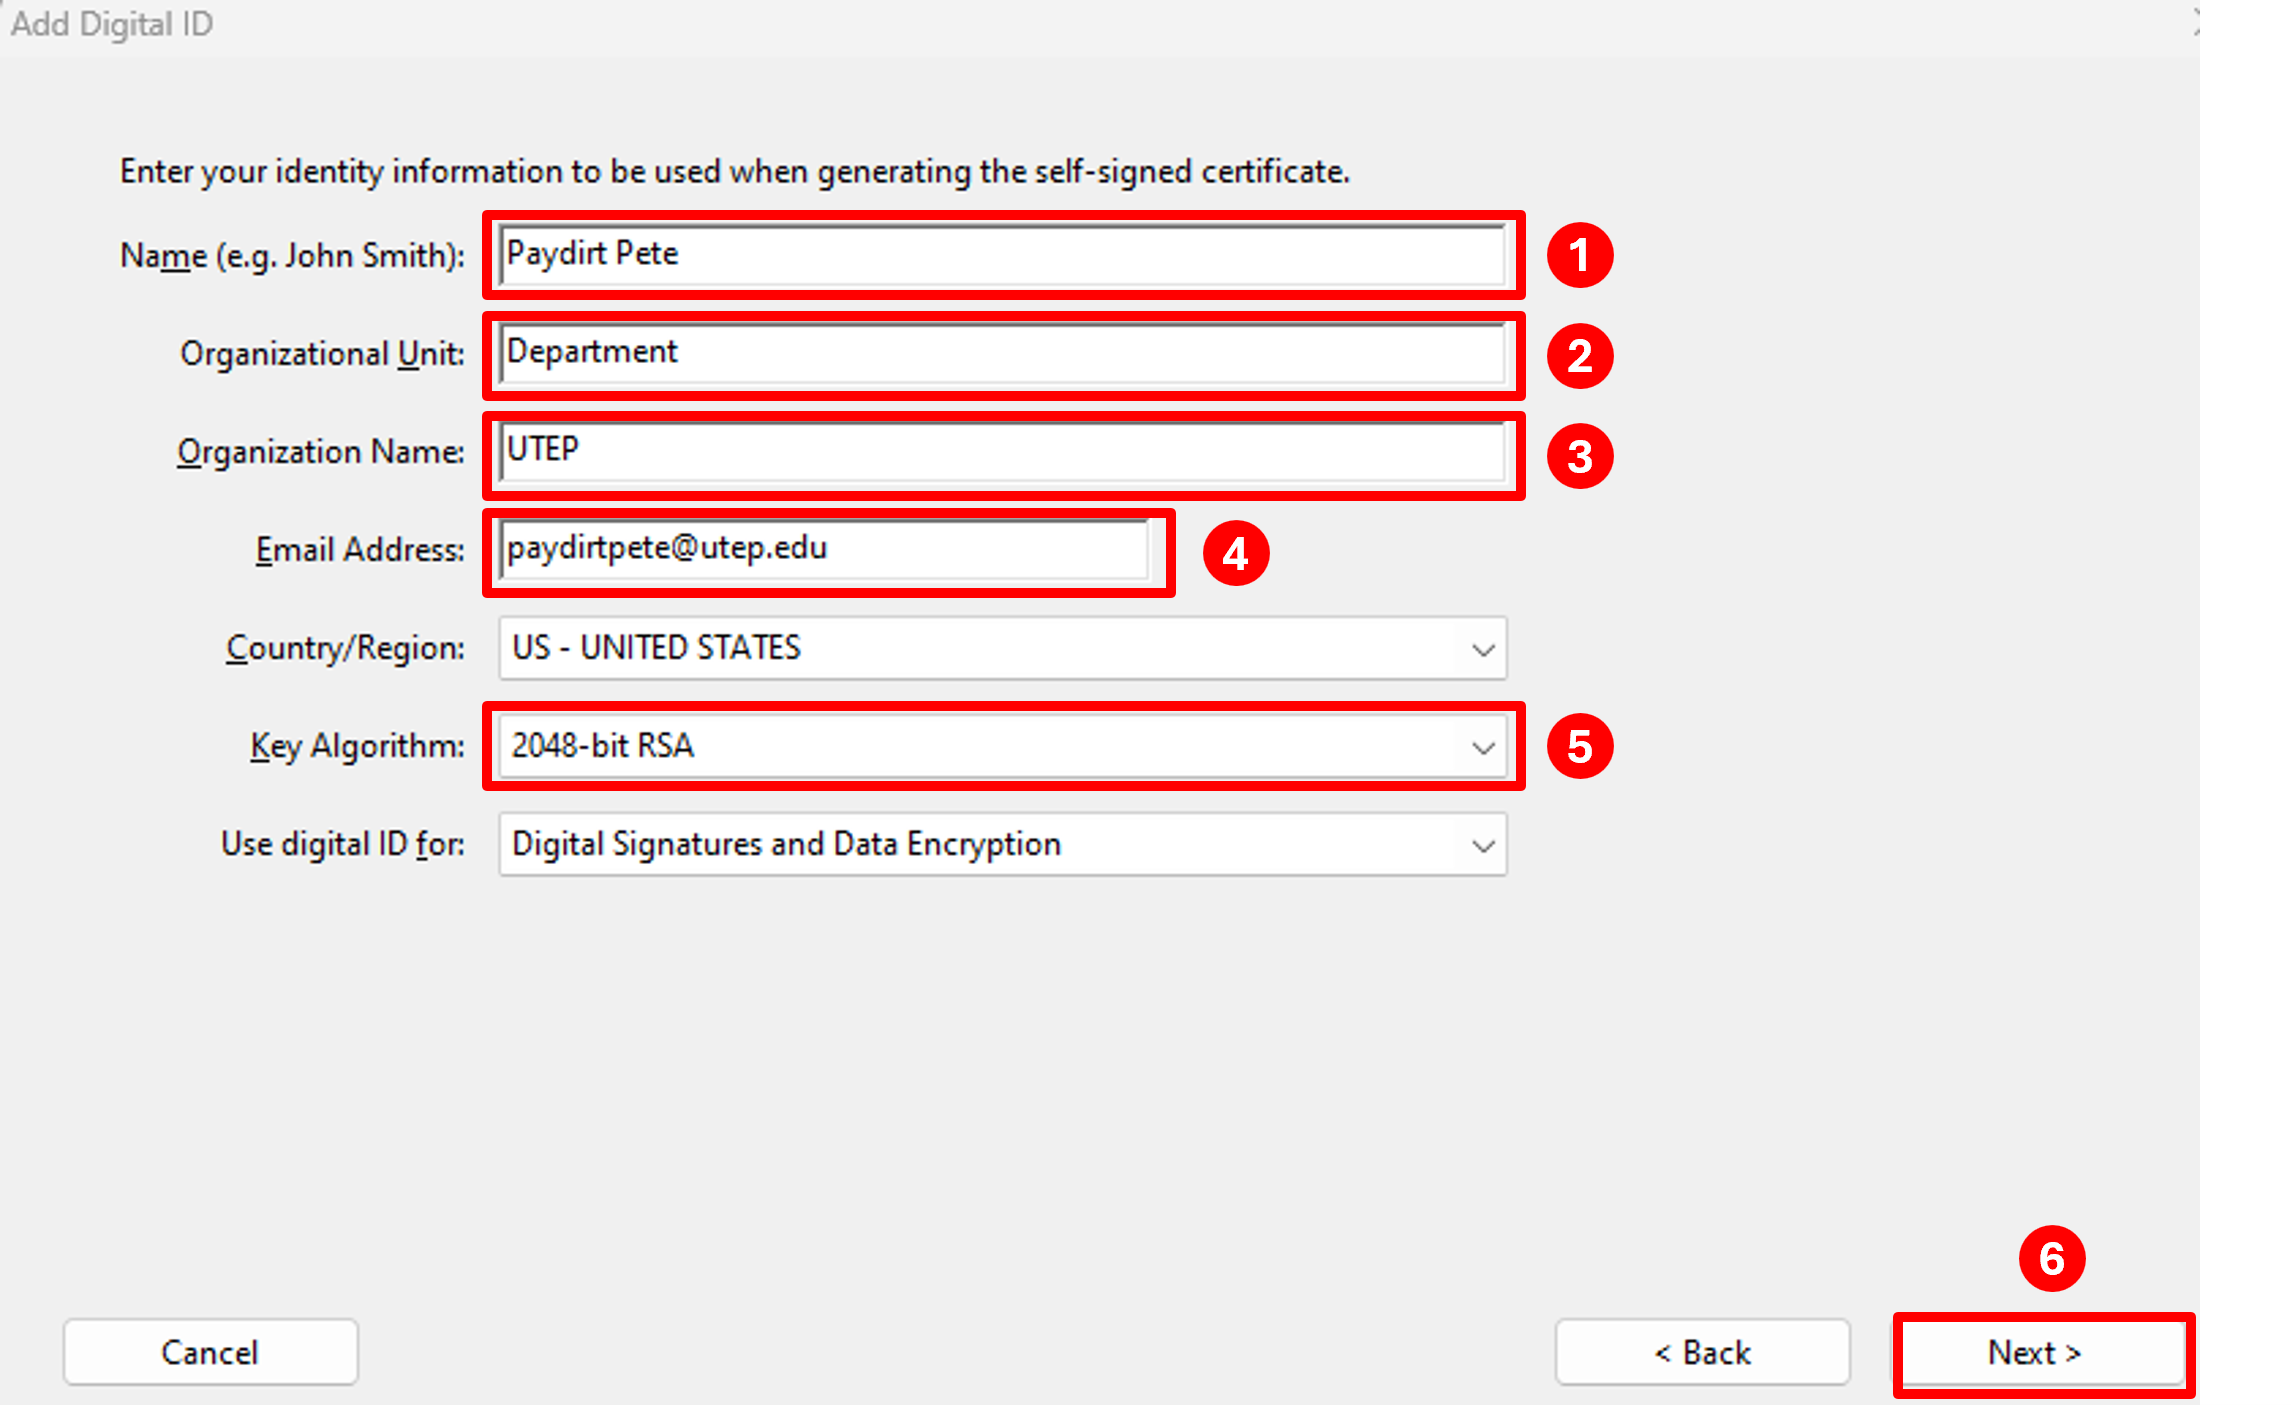
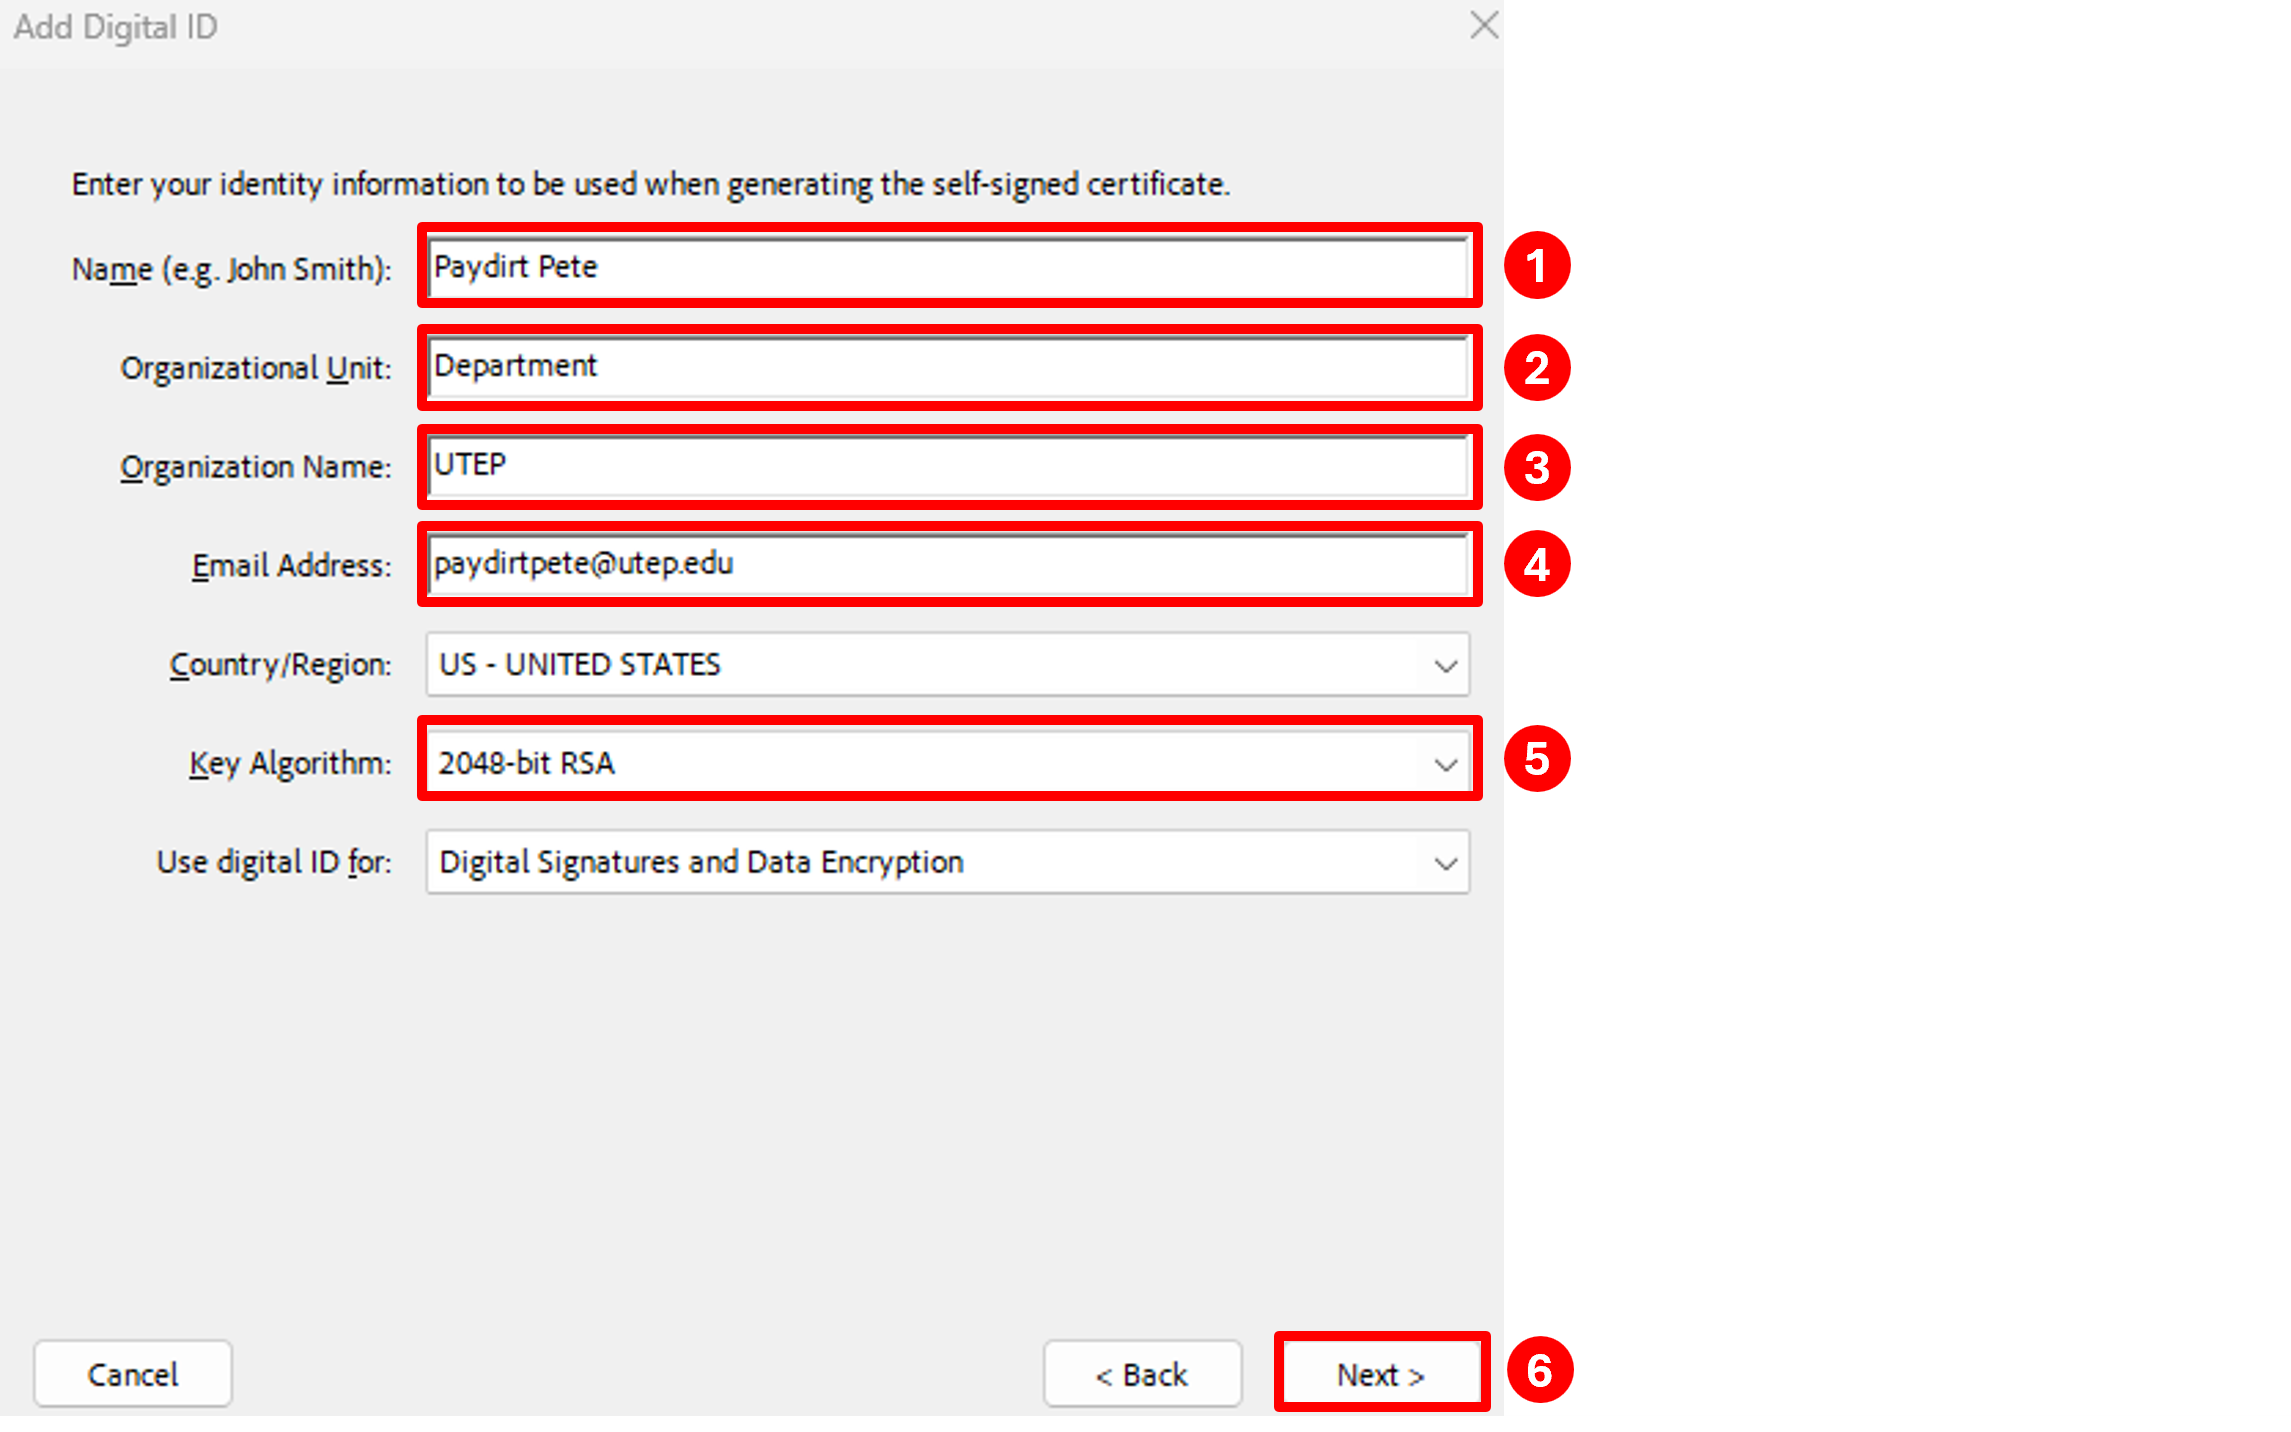
Fill in your Name, Organization Unit (Department), Organization Name (UTEP) and Email Address in the corresponding fields, change Key Algorithm to 2048-bit RSA, then click the Next button:
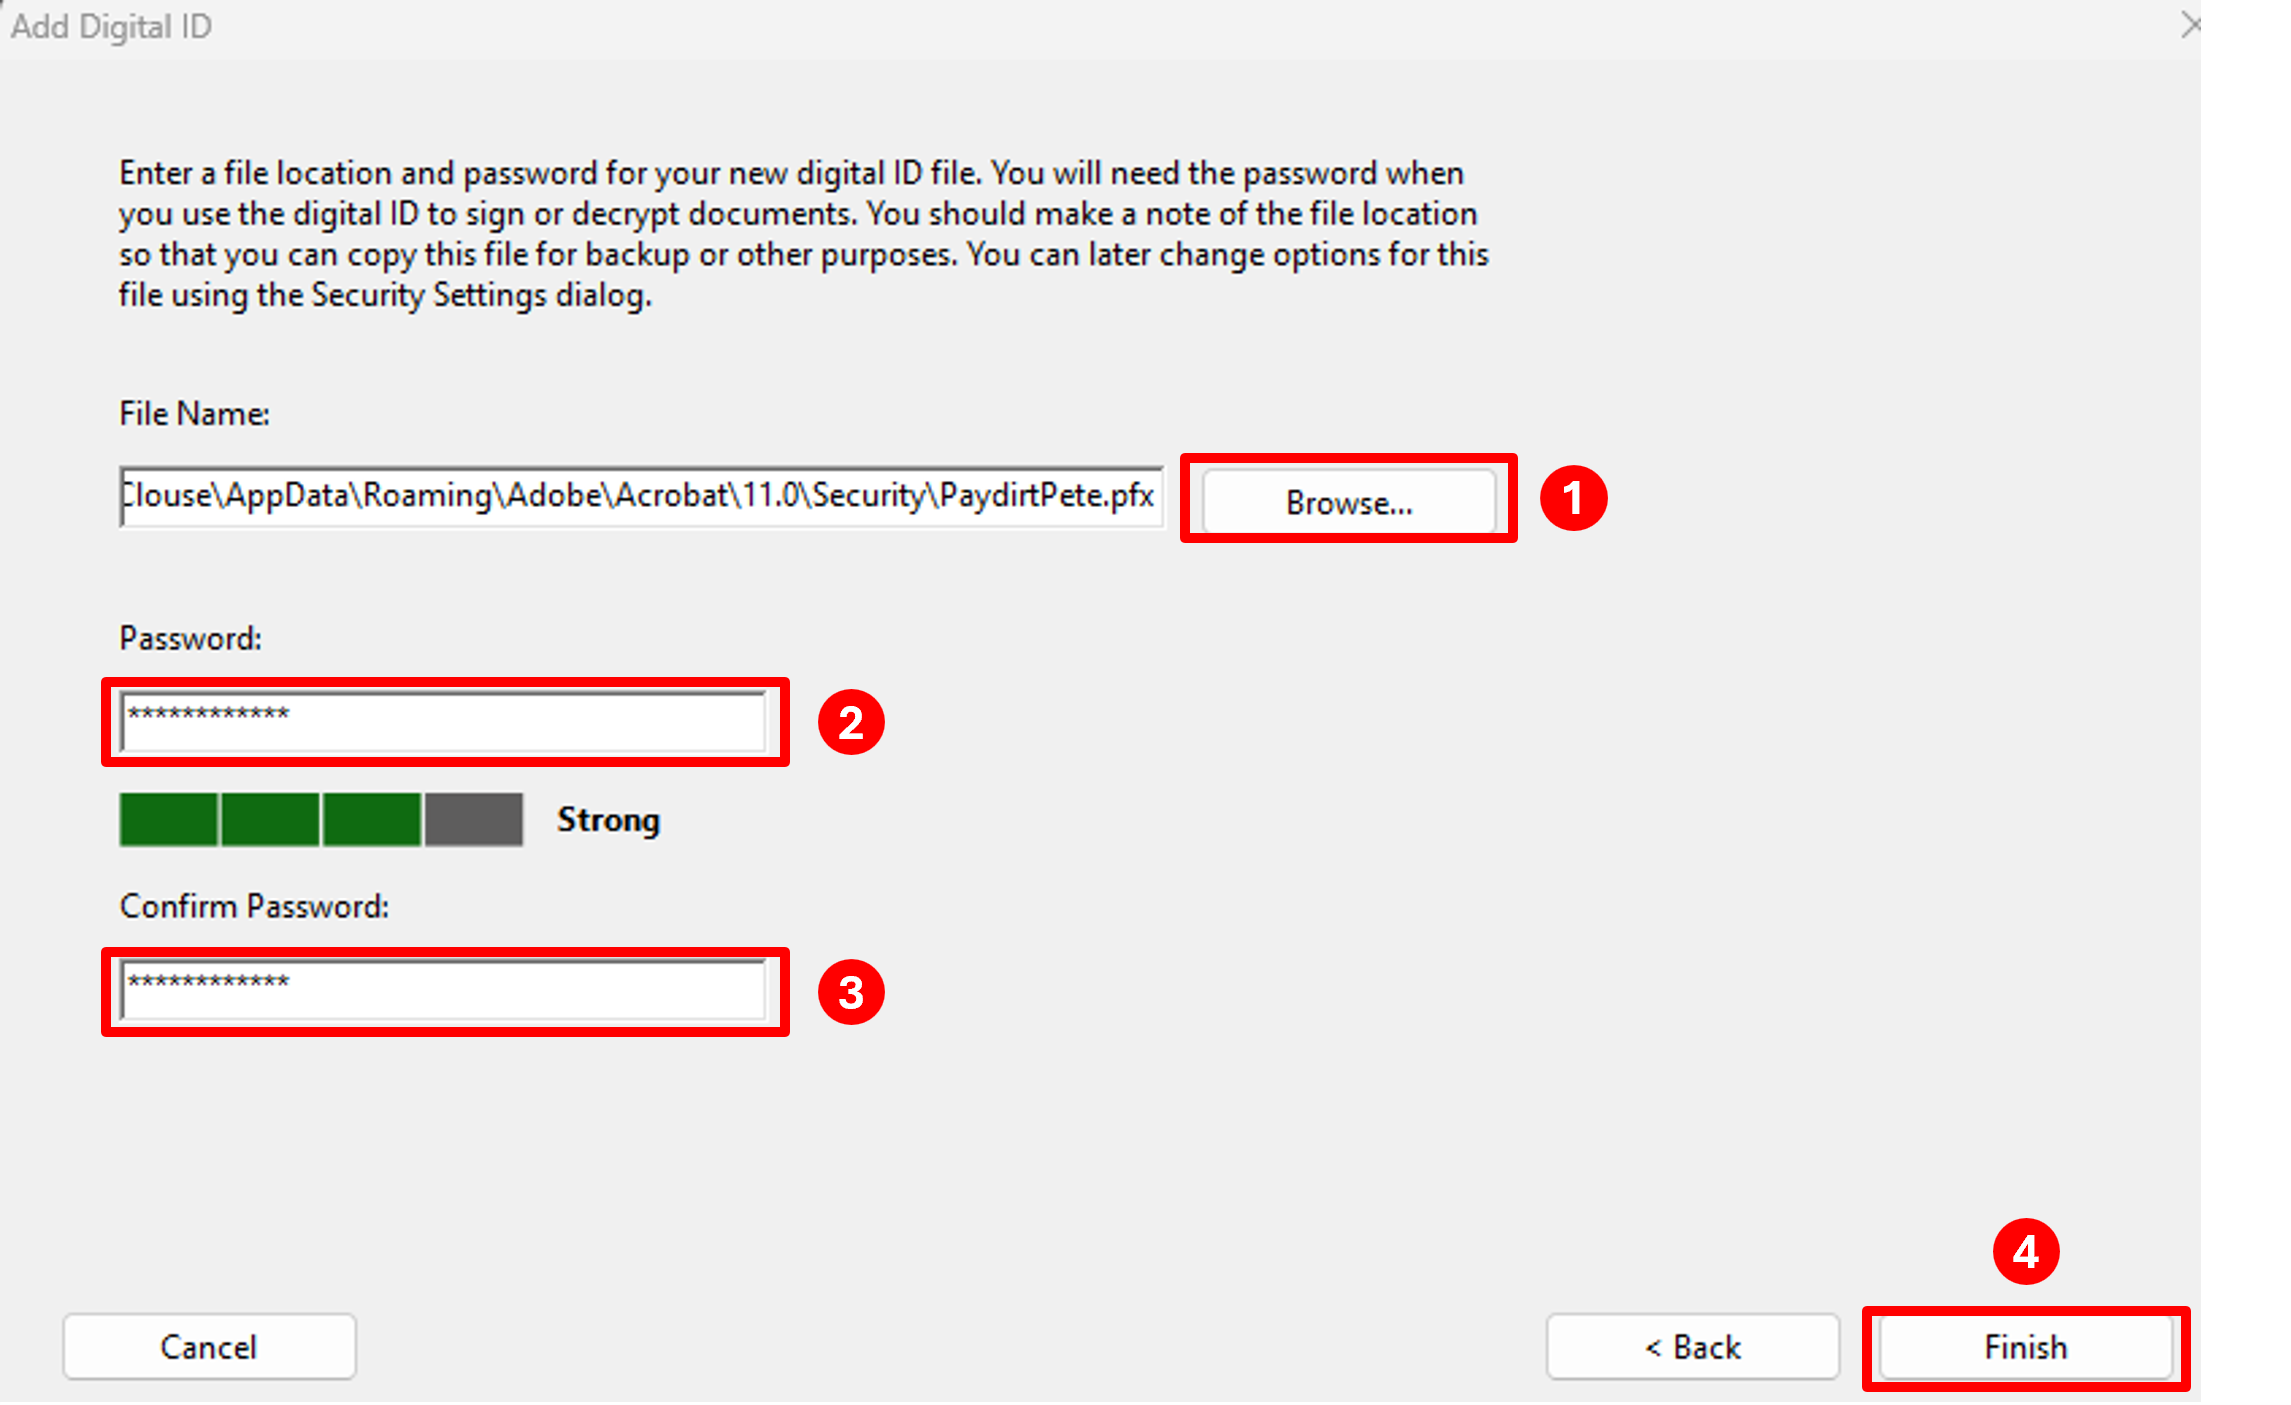
The next screen will prompt you for the location to save your certificate file and name of the file. You can either use the default location and name or click the Browse button and select a location that is easier to find, such as your Desktop or Documents folder. Once you have selected the location you want to save it to, click the Save button.
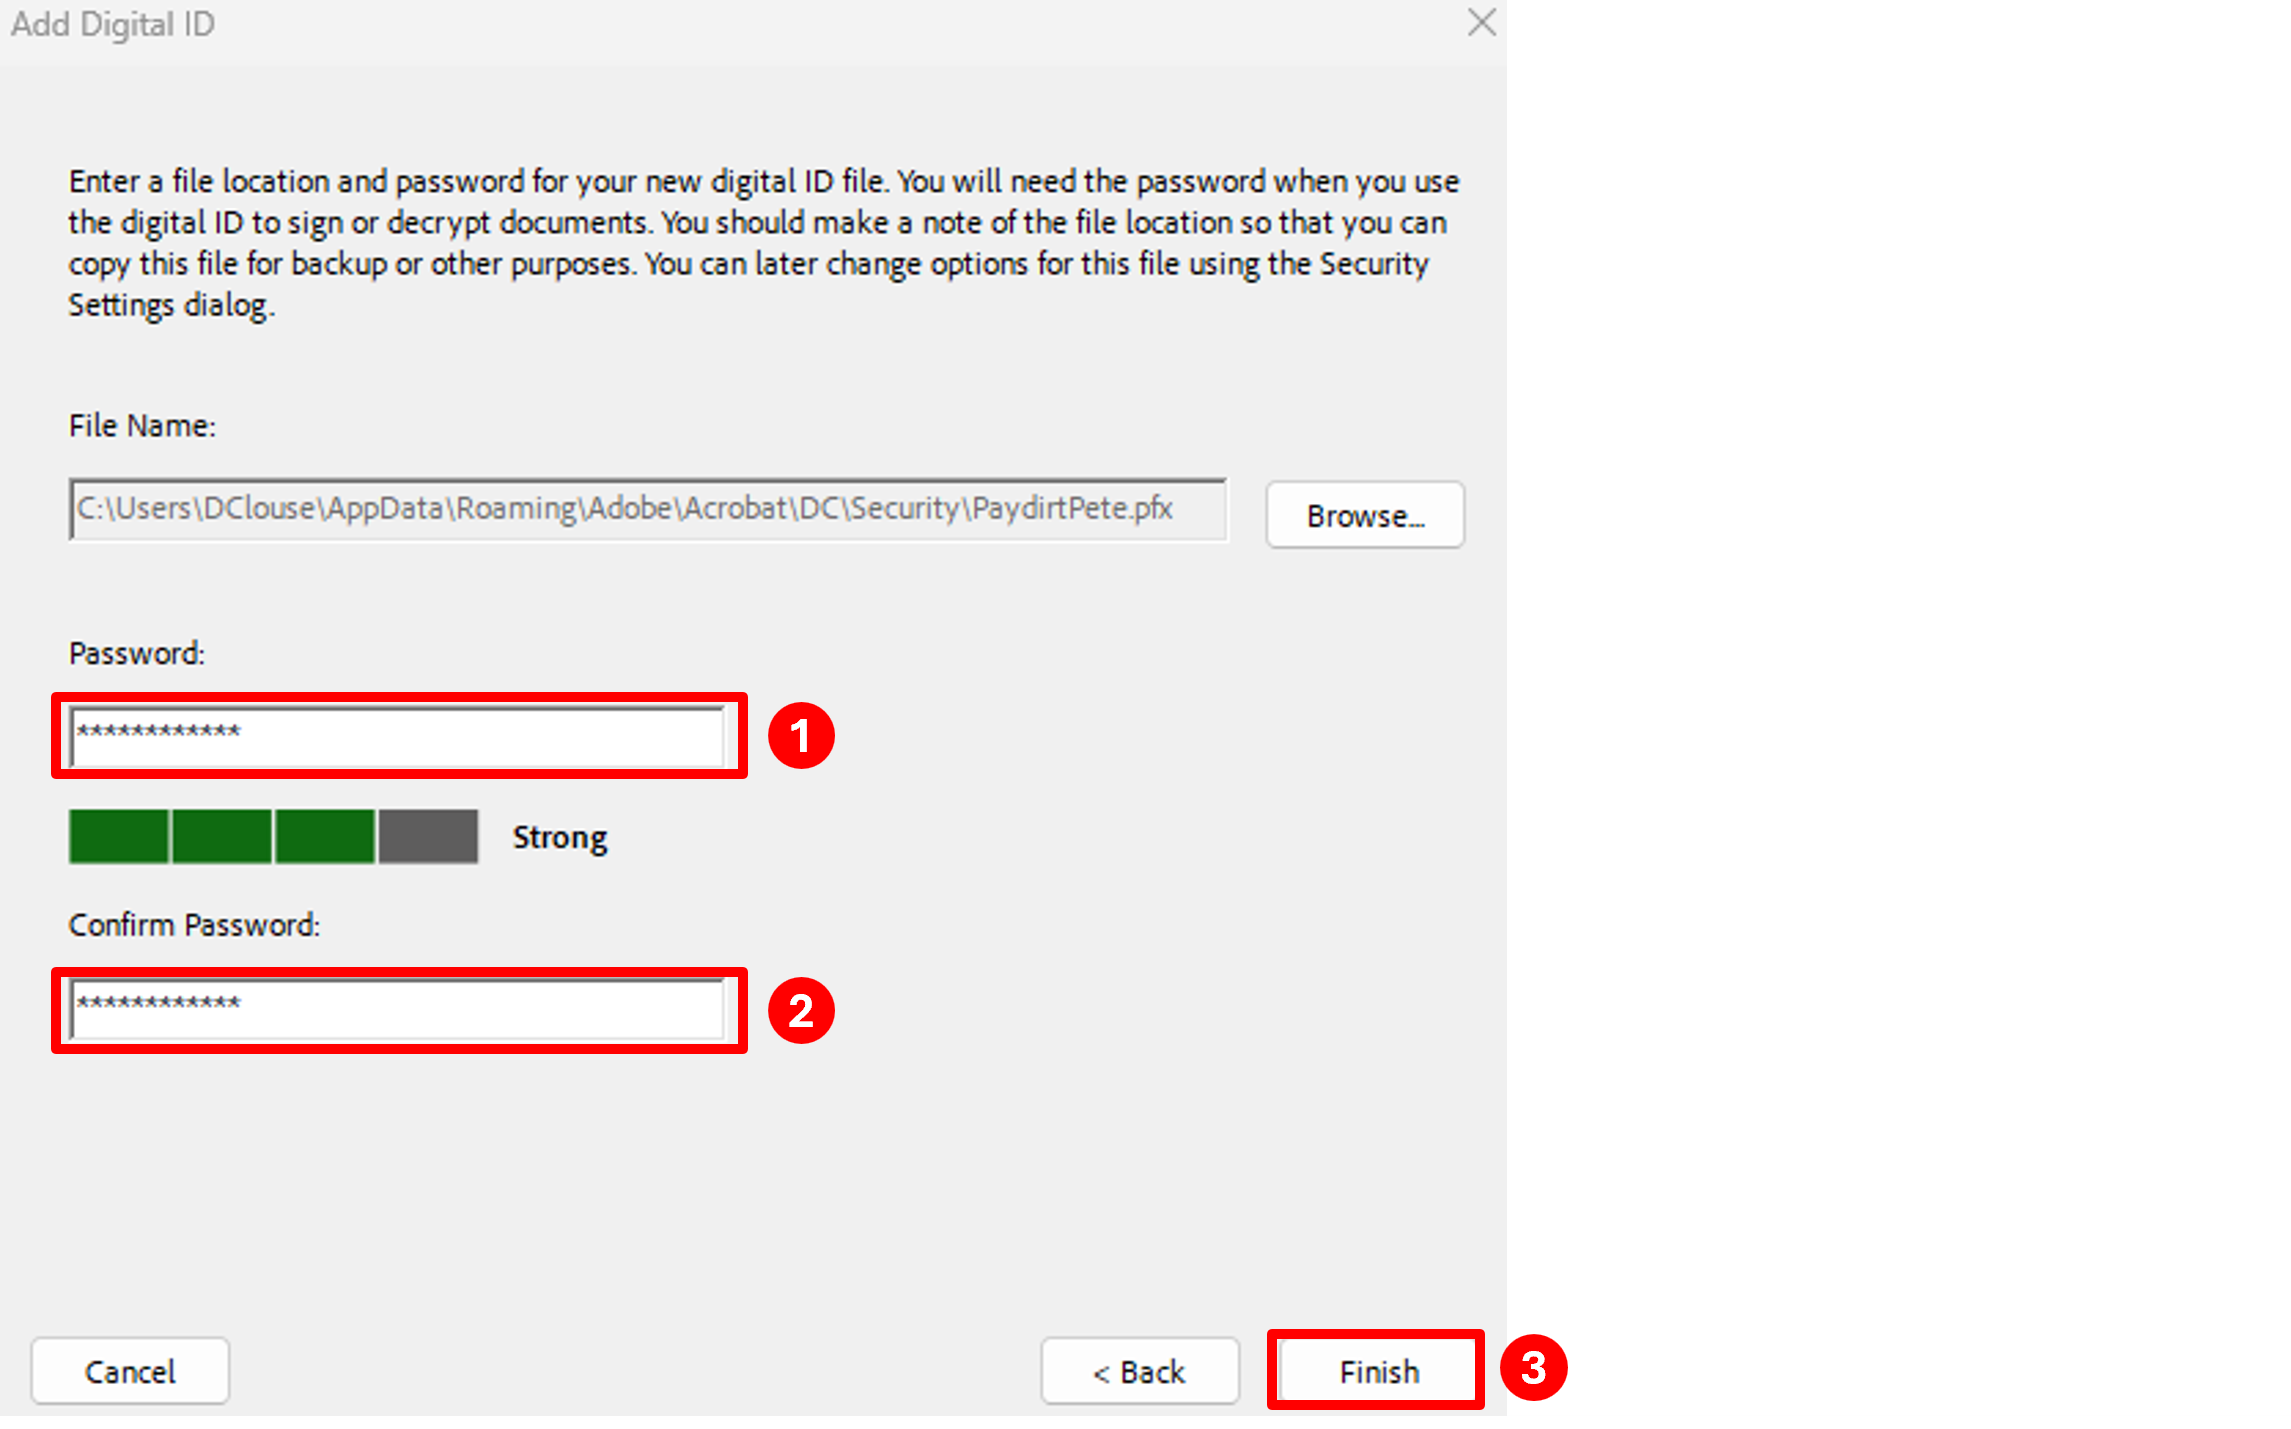
Type a password that is at least 6-8 characters long in both the Password and Confirm Password boxes, then click the Finish button:
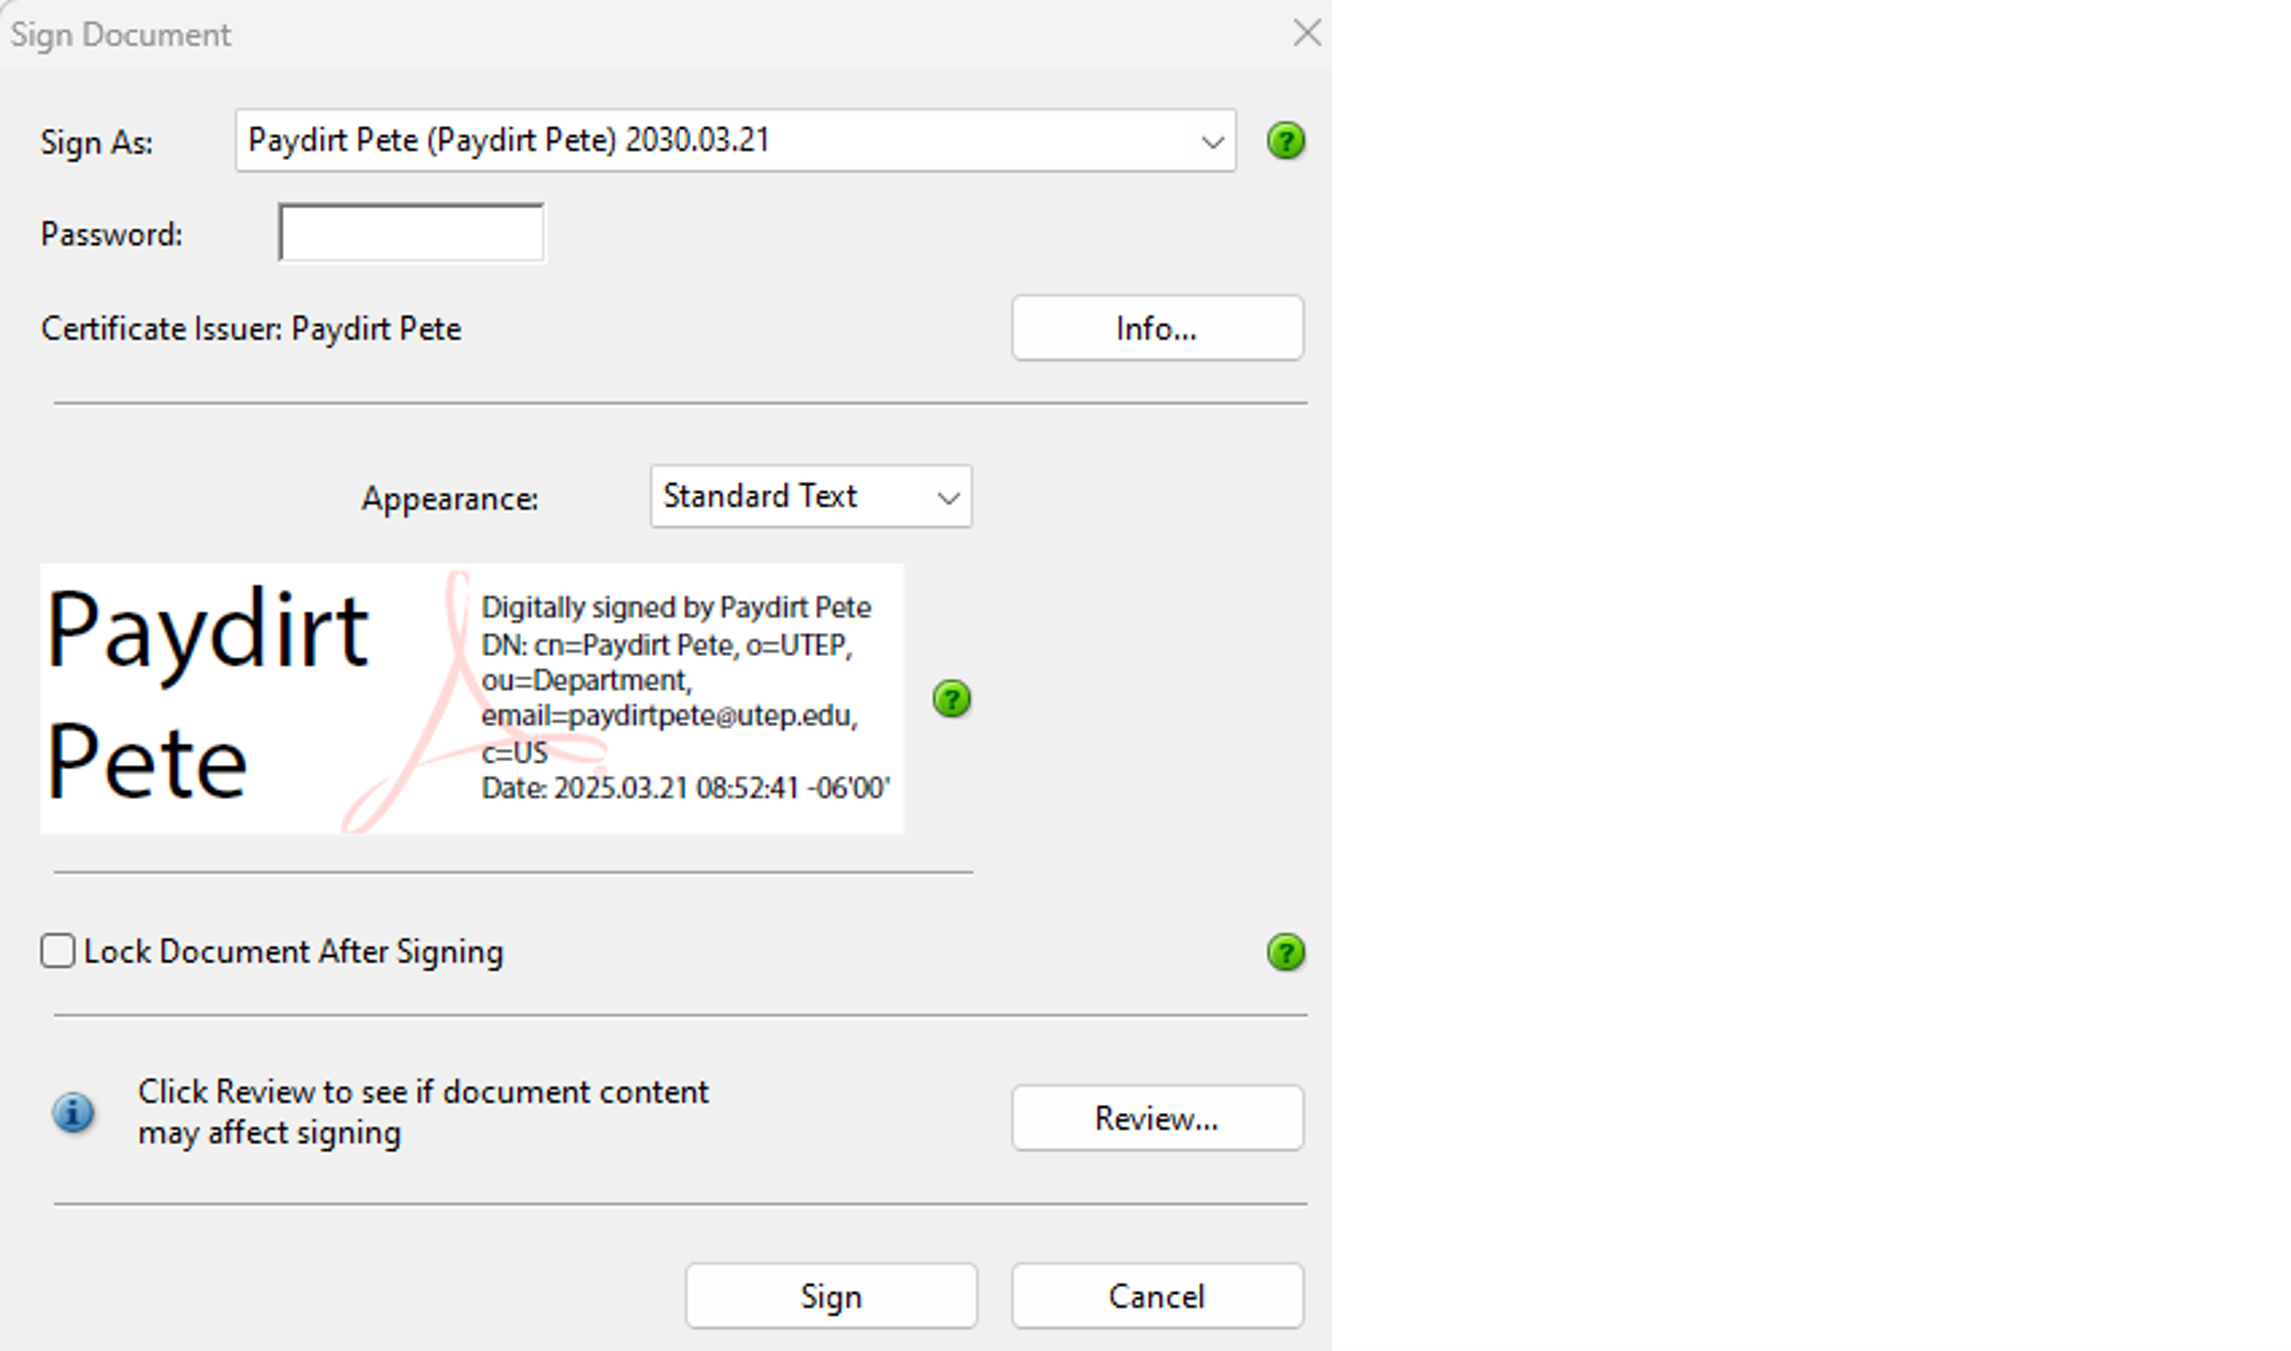
You will then get the Sign Document screen that shows your digital signature - this is how your digital signature will appear on documents when you sign them:
These instructions are for the latest version of Adobe Reader. If you don't have the latest version of Adobe Reader, download it from Adobe.
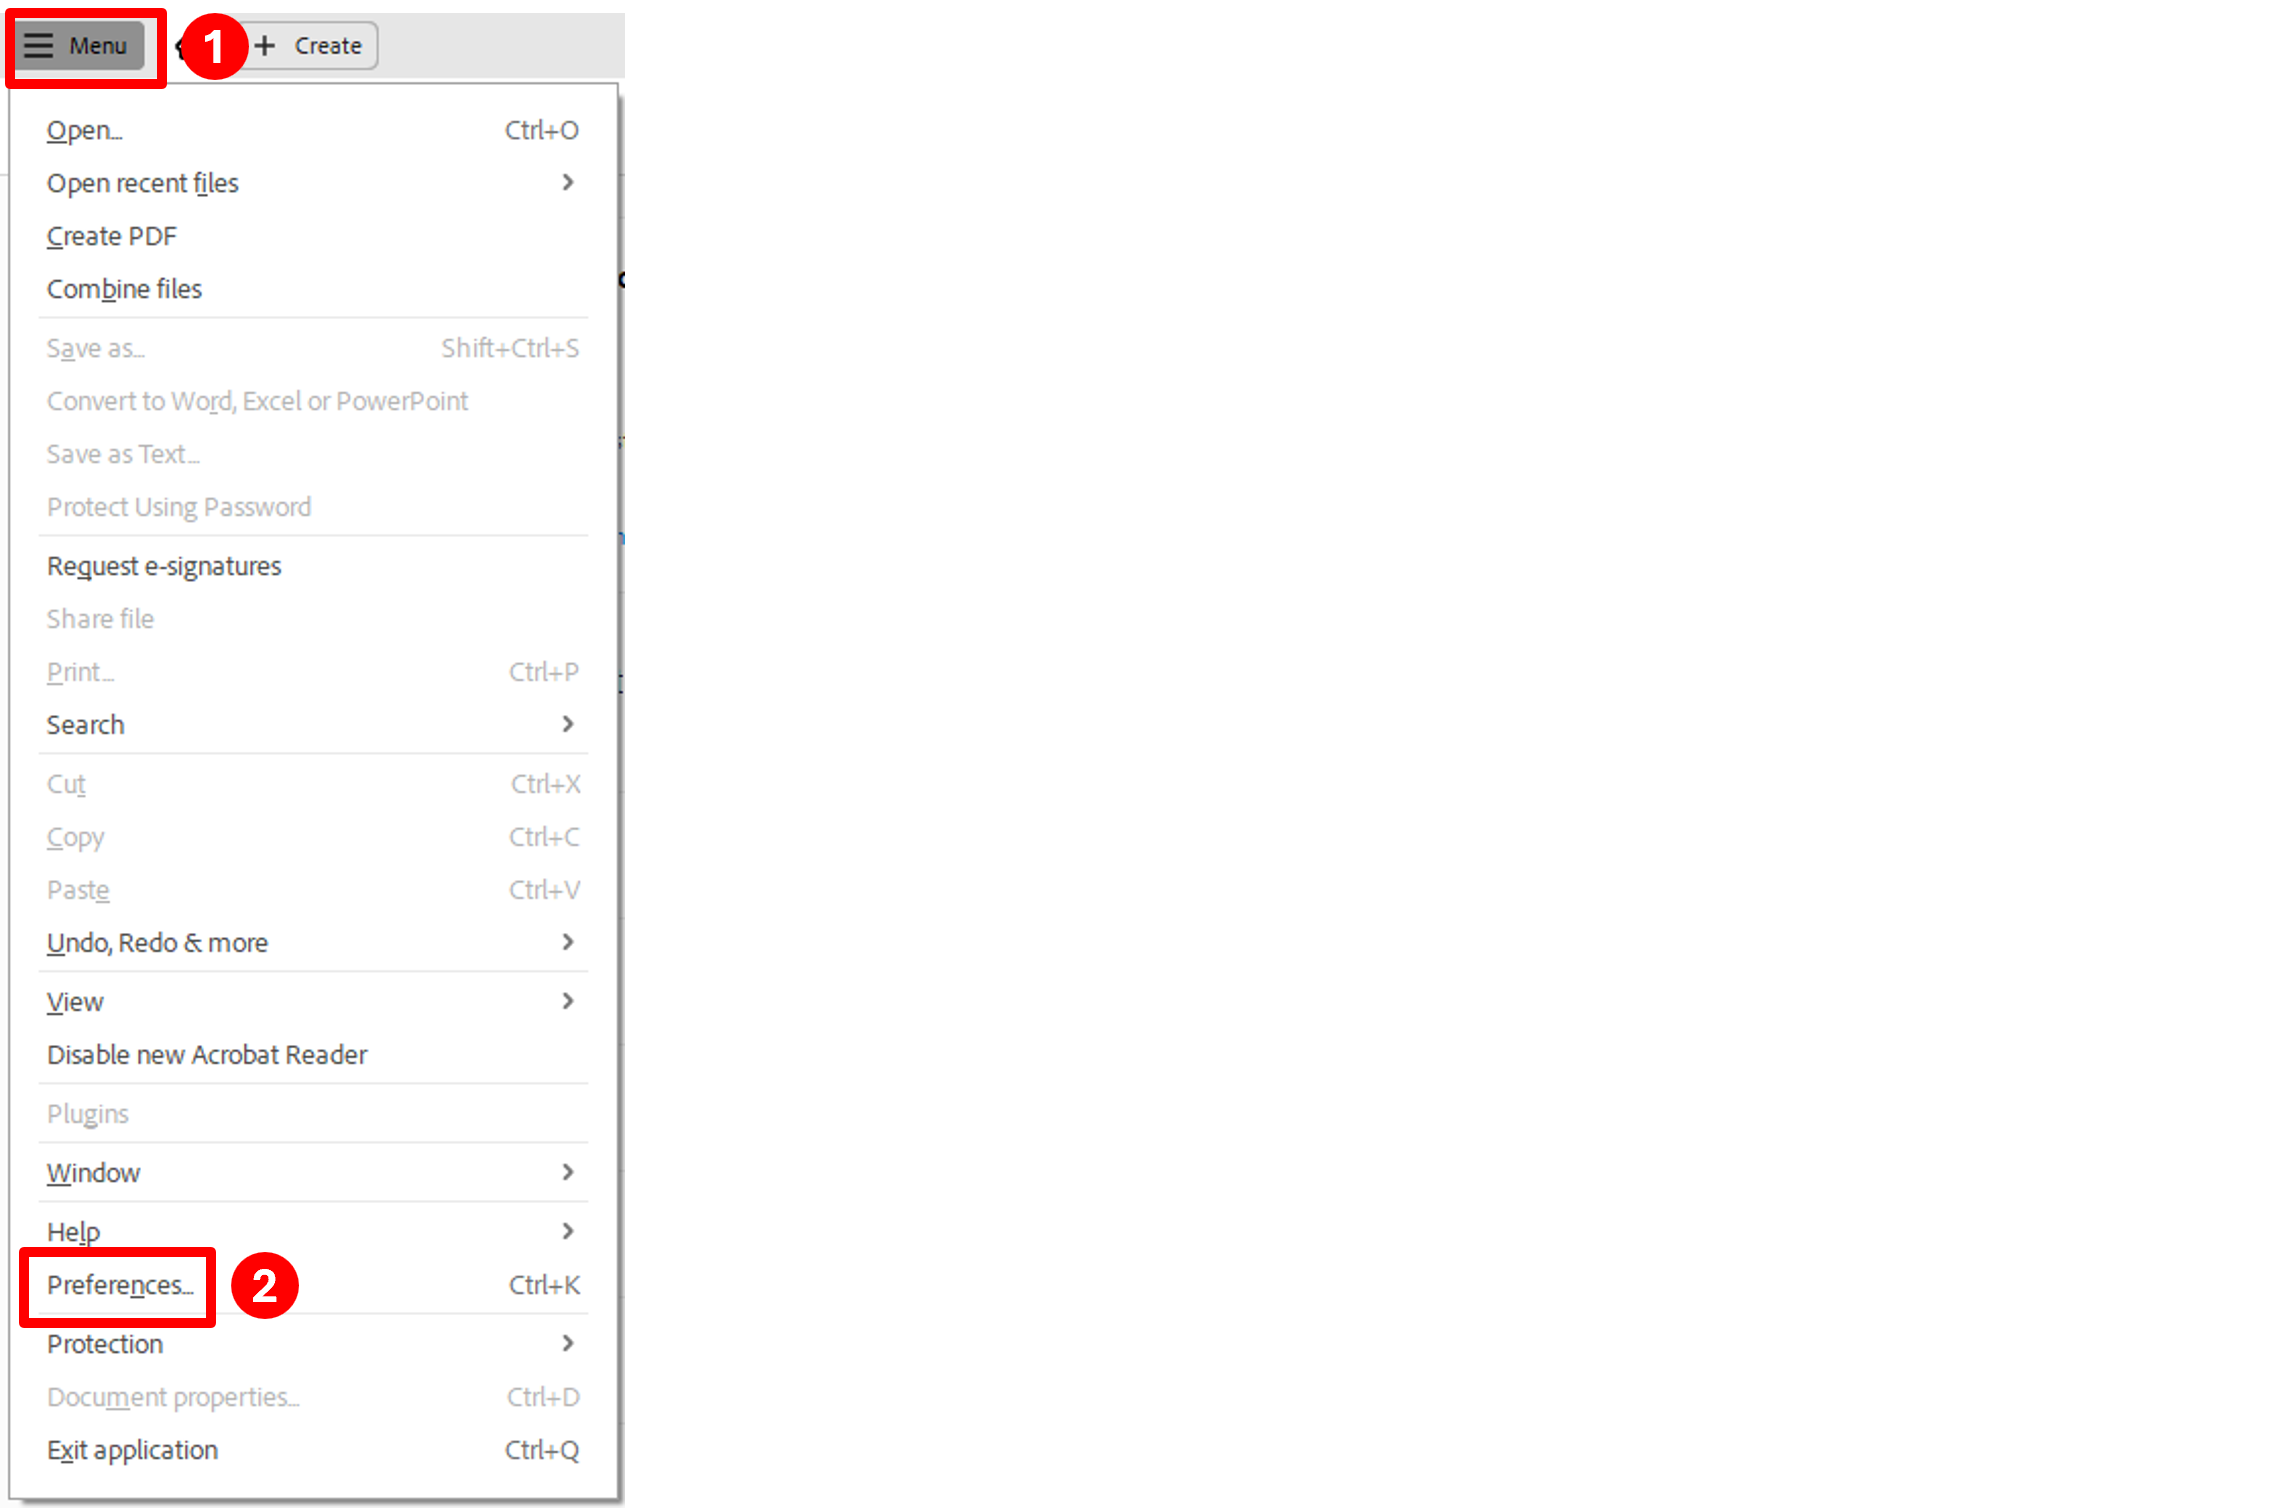
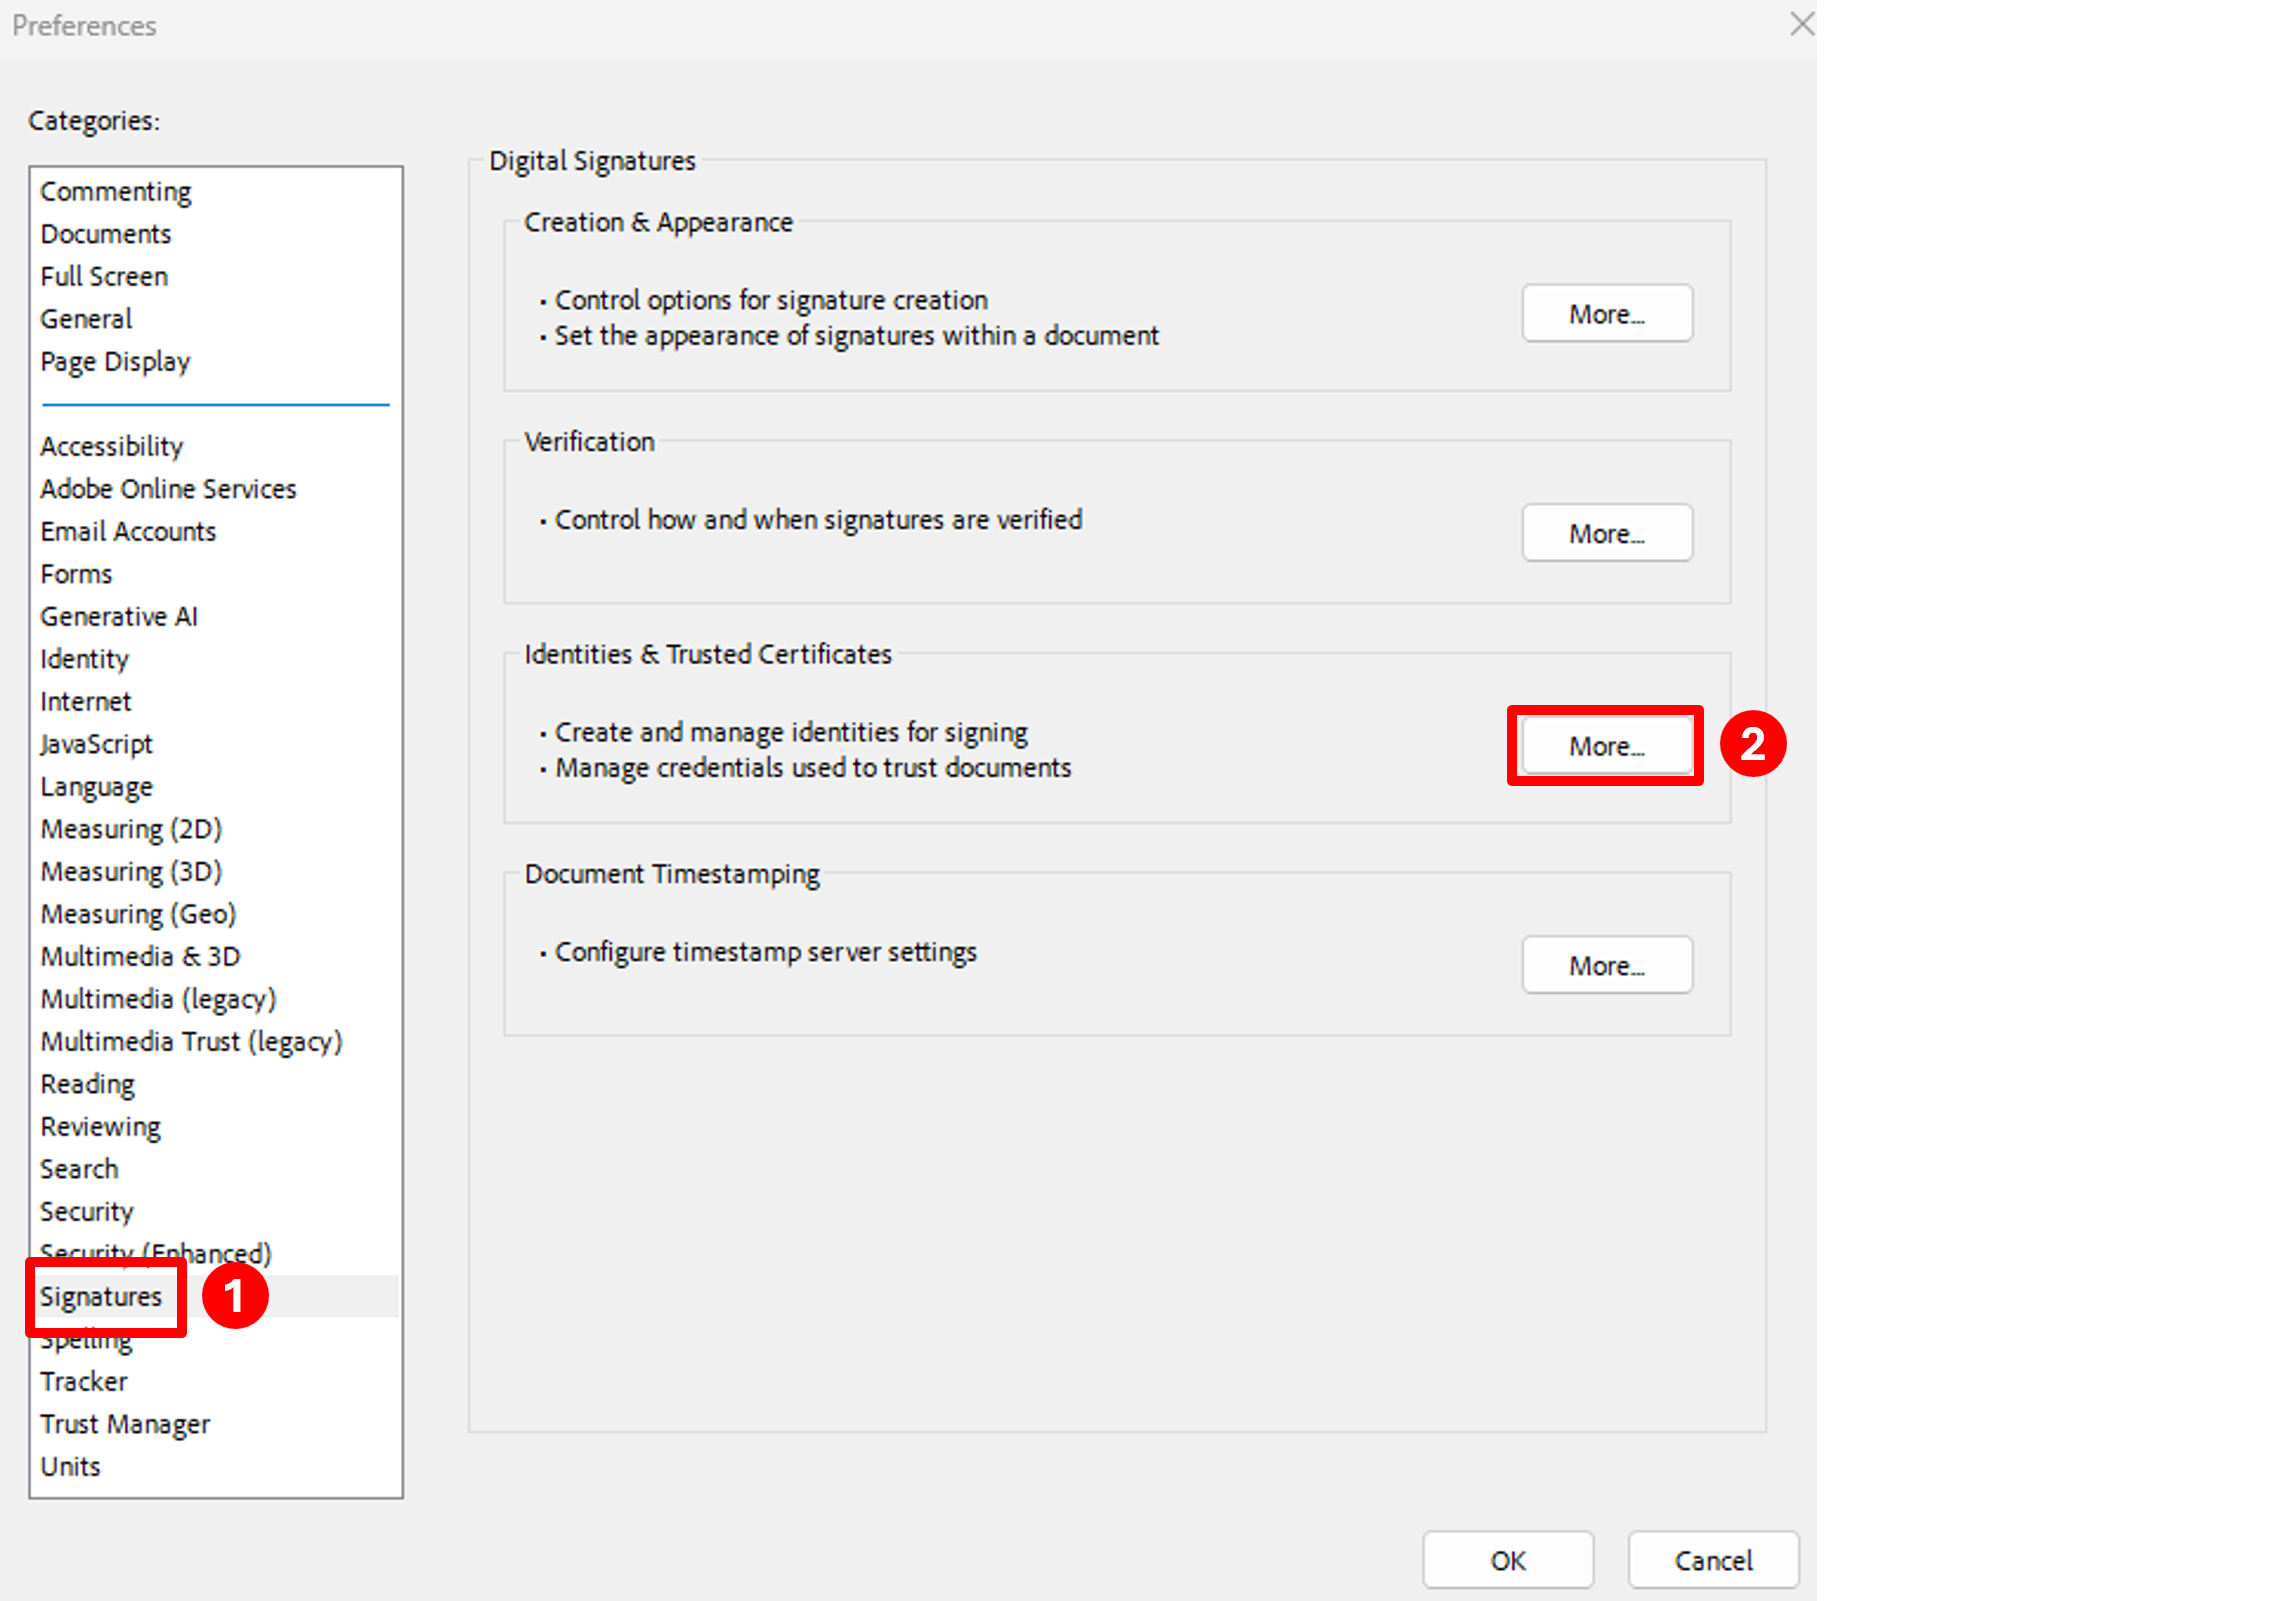
Select Menu from the top left corner, then select Preferences:
Select Signatures from the list down the left side, then click the More button under the Identities & Trusted Certificates section:
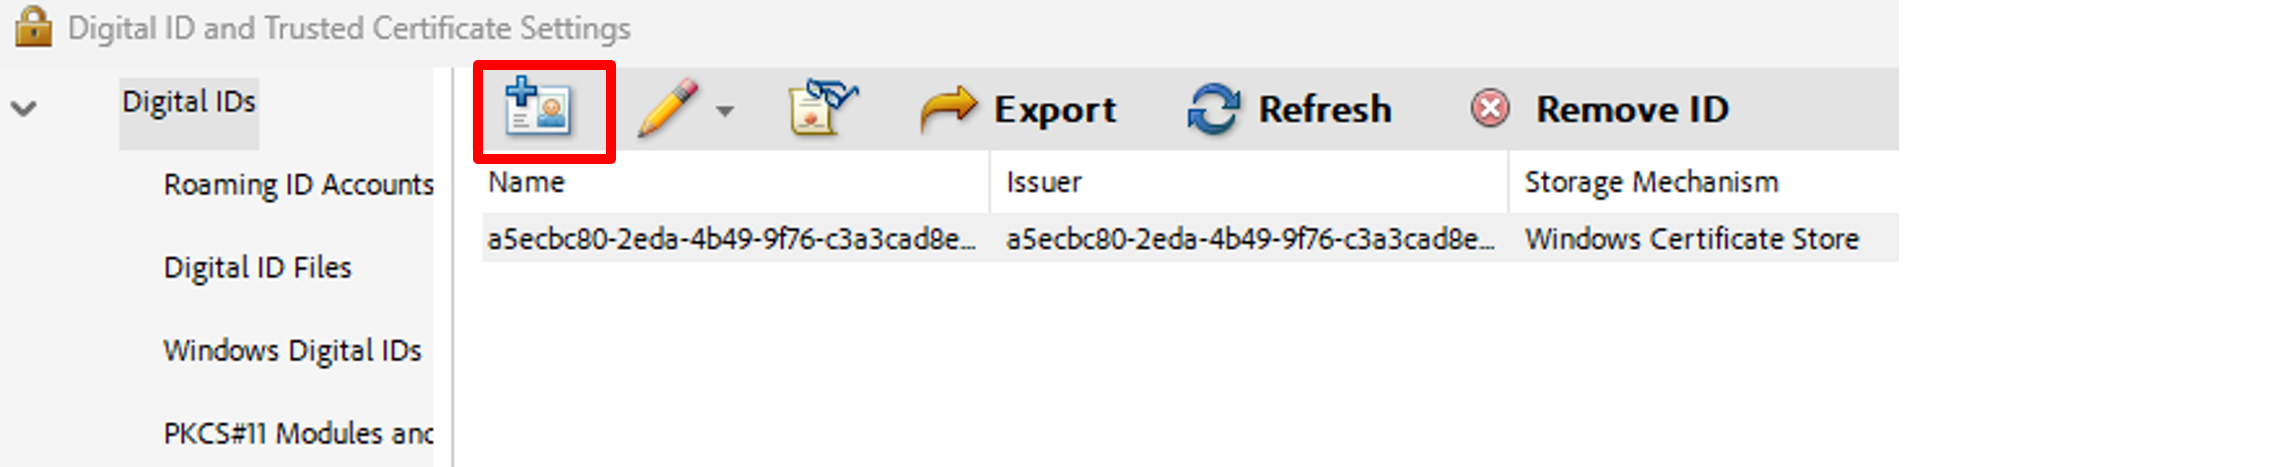
Click the Add Digital ID button on the top:
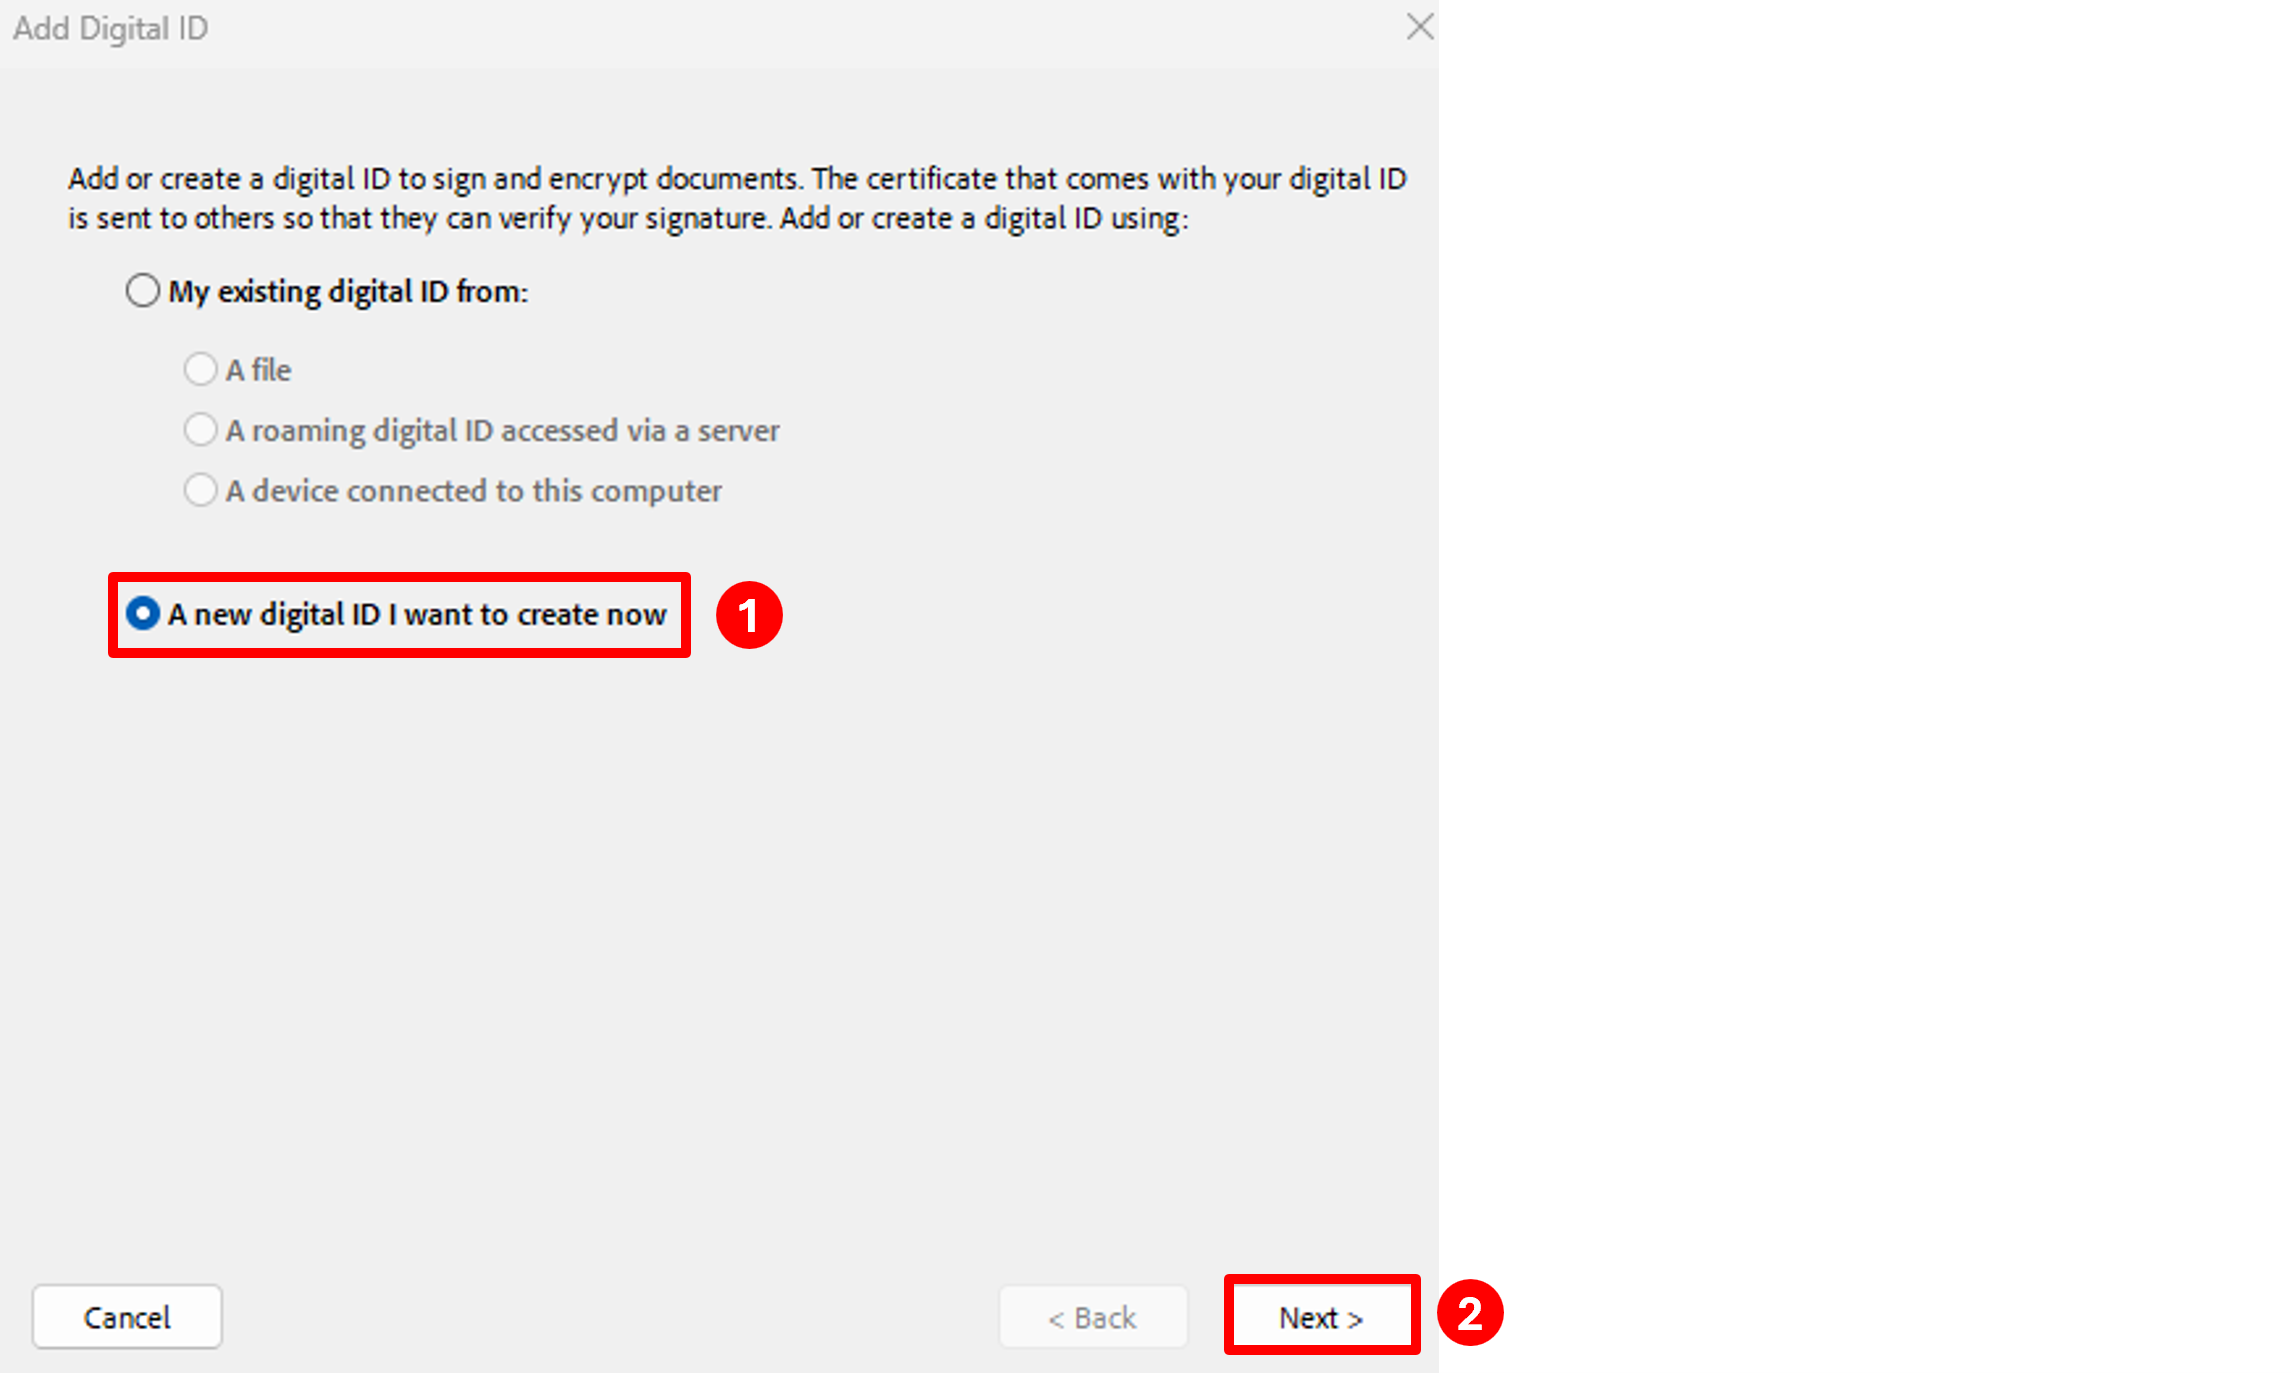
Select A new digital ID I want to create now and click the Next button:
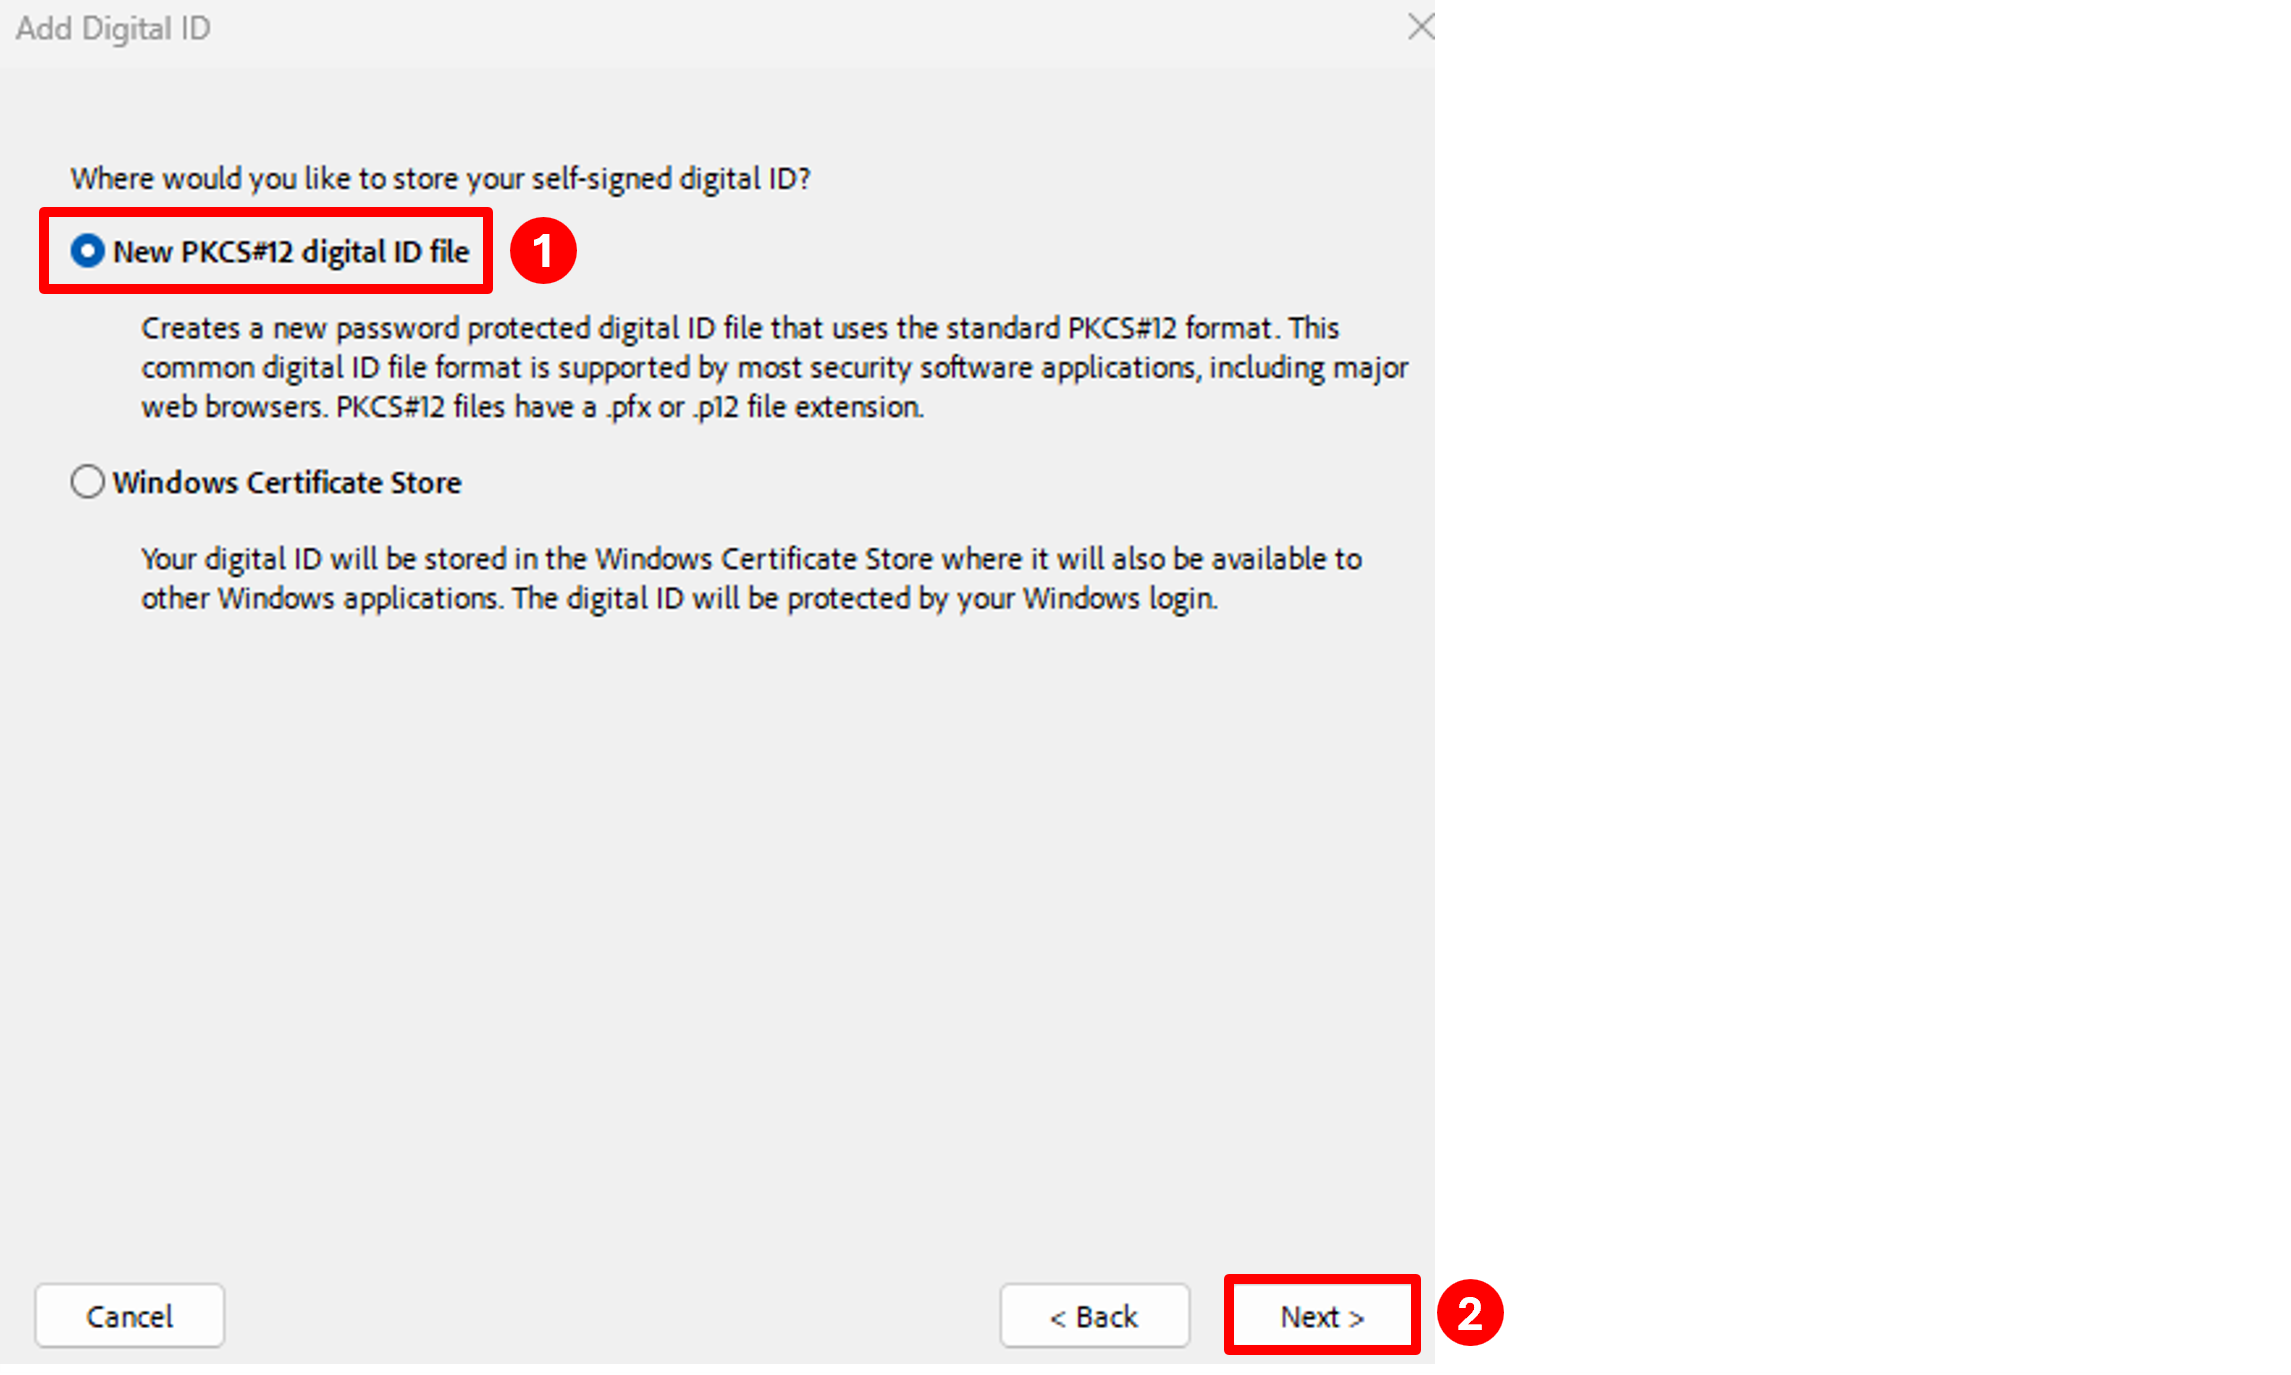
Select New PKCS#12 digital ID file and click the Next button:
Fill in the Name, Organizational Unit (Department), Organization Name (UTEP) and Email Address boxes, make sure the Key Algorithm box is set to 2048-bit RSA, then click the Next button:
The next screen will prompt you for the location to save your certificate file and name of the file. You can either use the default location and name or click the Browse button and select a location that is easier to find, such as your Desktop or Documents folder. Once you have selected the location you want to save it to, click the Save button.
Type a password that is at least 6-8 characters long in both the Password and Confirm Password boxes, then click the Finish button:
Close the Digital ID and Trusted Certification Settings window and click OK to close the Preferences window.
Digitally Signing Documents
Open the Adobe document you want to sign.
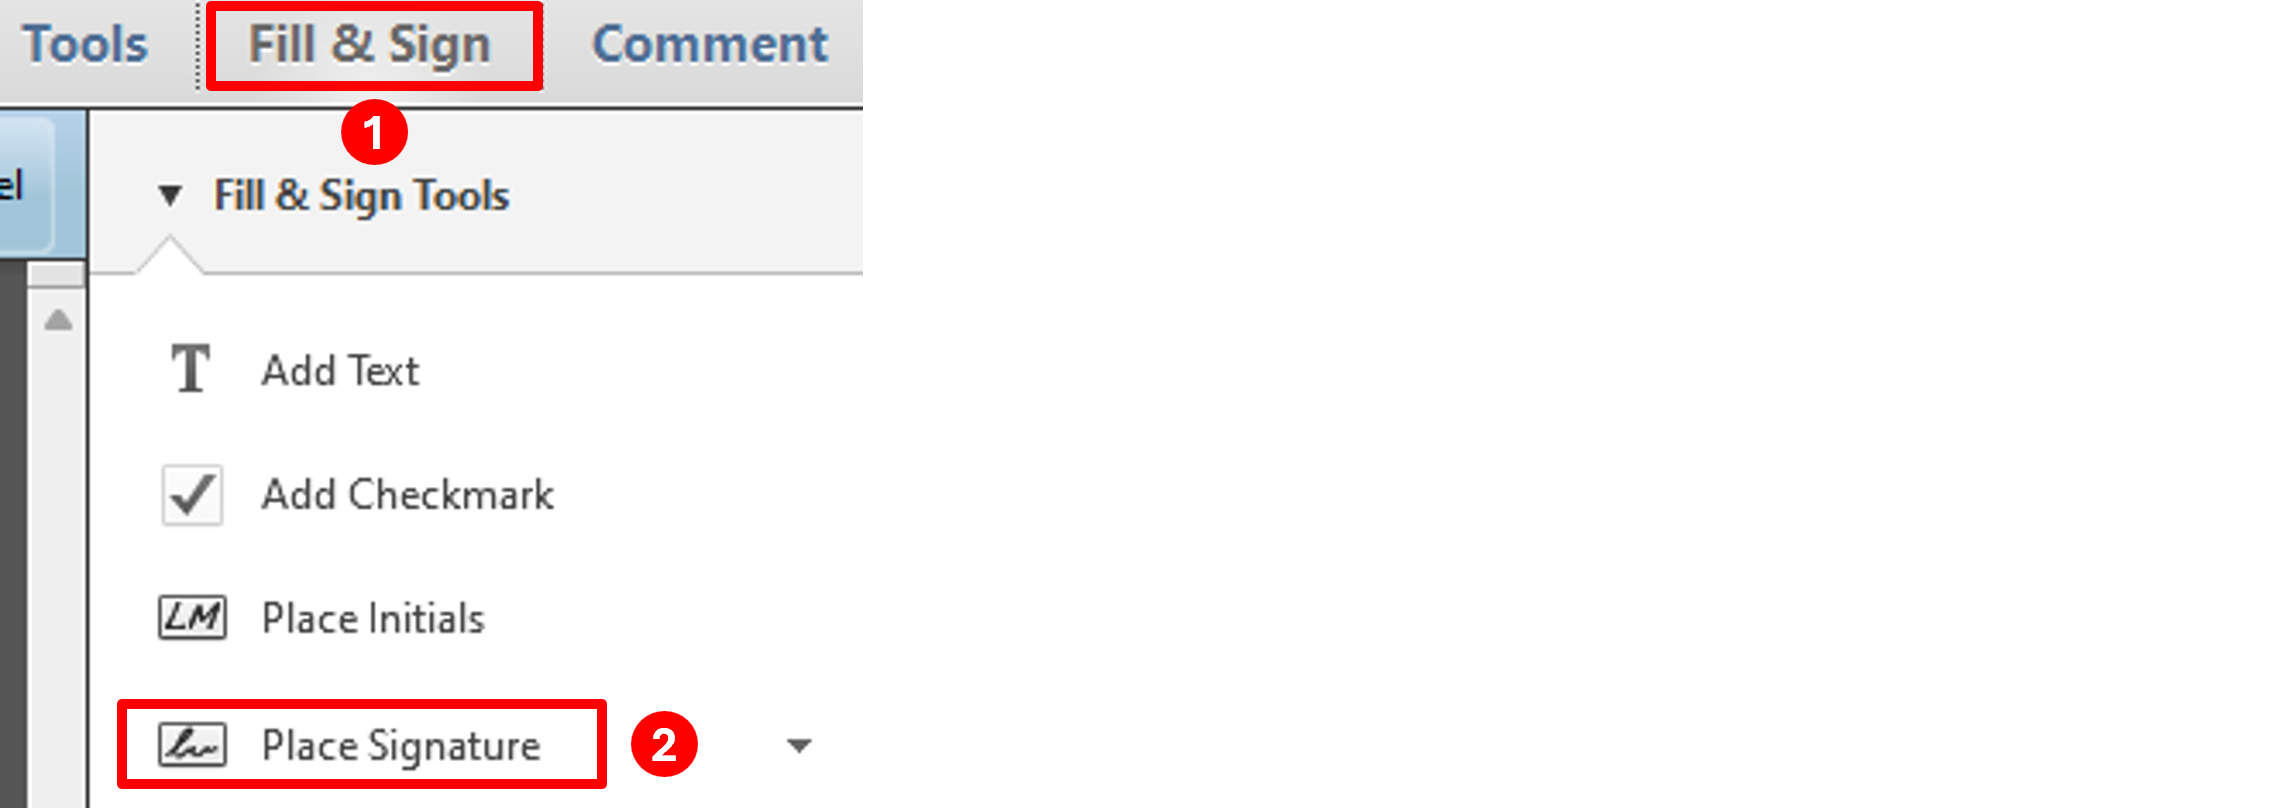
Click on Fill & Sign in the top-right corner and select Place Signature:
Click the Drag New Signature Rectangle button:
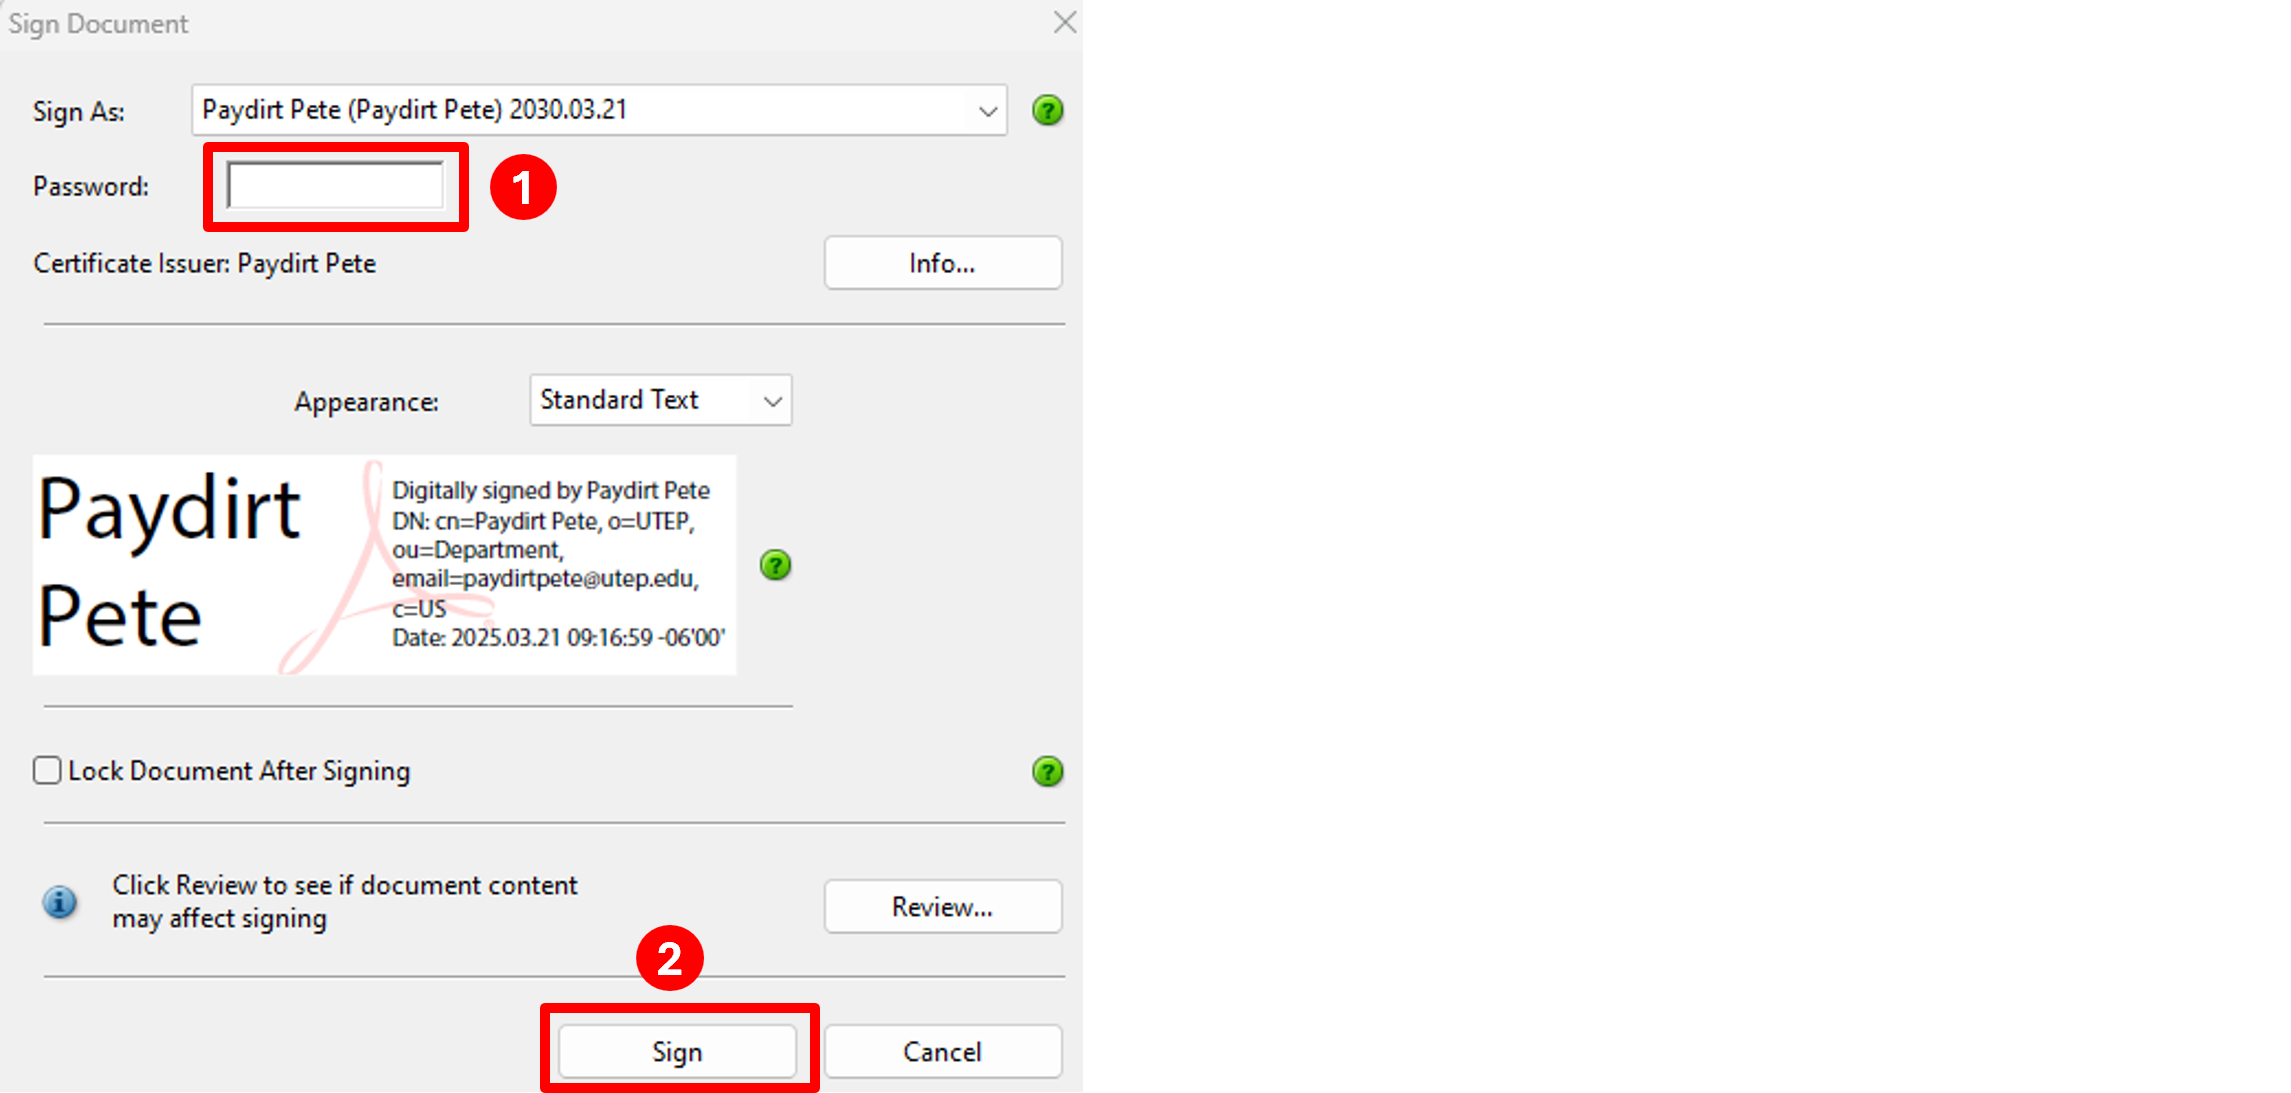
Type your digital signature password in the Password box and click the Sign button:
You will be prompted to save the file. You can either overwrite the existing file, which will be the default name filled into the File name box, or type a different name. Once you select the file name, click the Save button. If you selected the same file, you will be prompted to confirm that you want to replace the existing file. Click Yes.
You will now see your digital signature with the time stamp that has been digitally signed:

These instructions are for the latest version of Adobe Reader. If you don't have the latest version of Adobe Reader, download it from Adobe.
Open the Adobe document you want to sign.
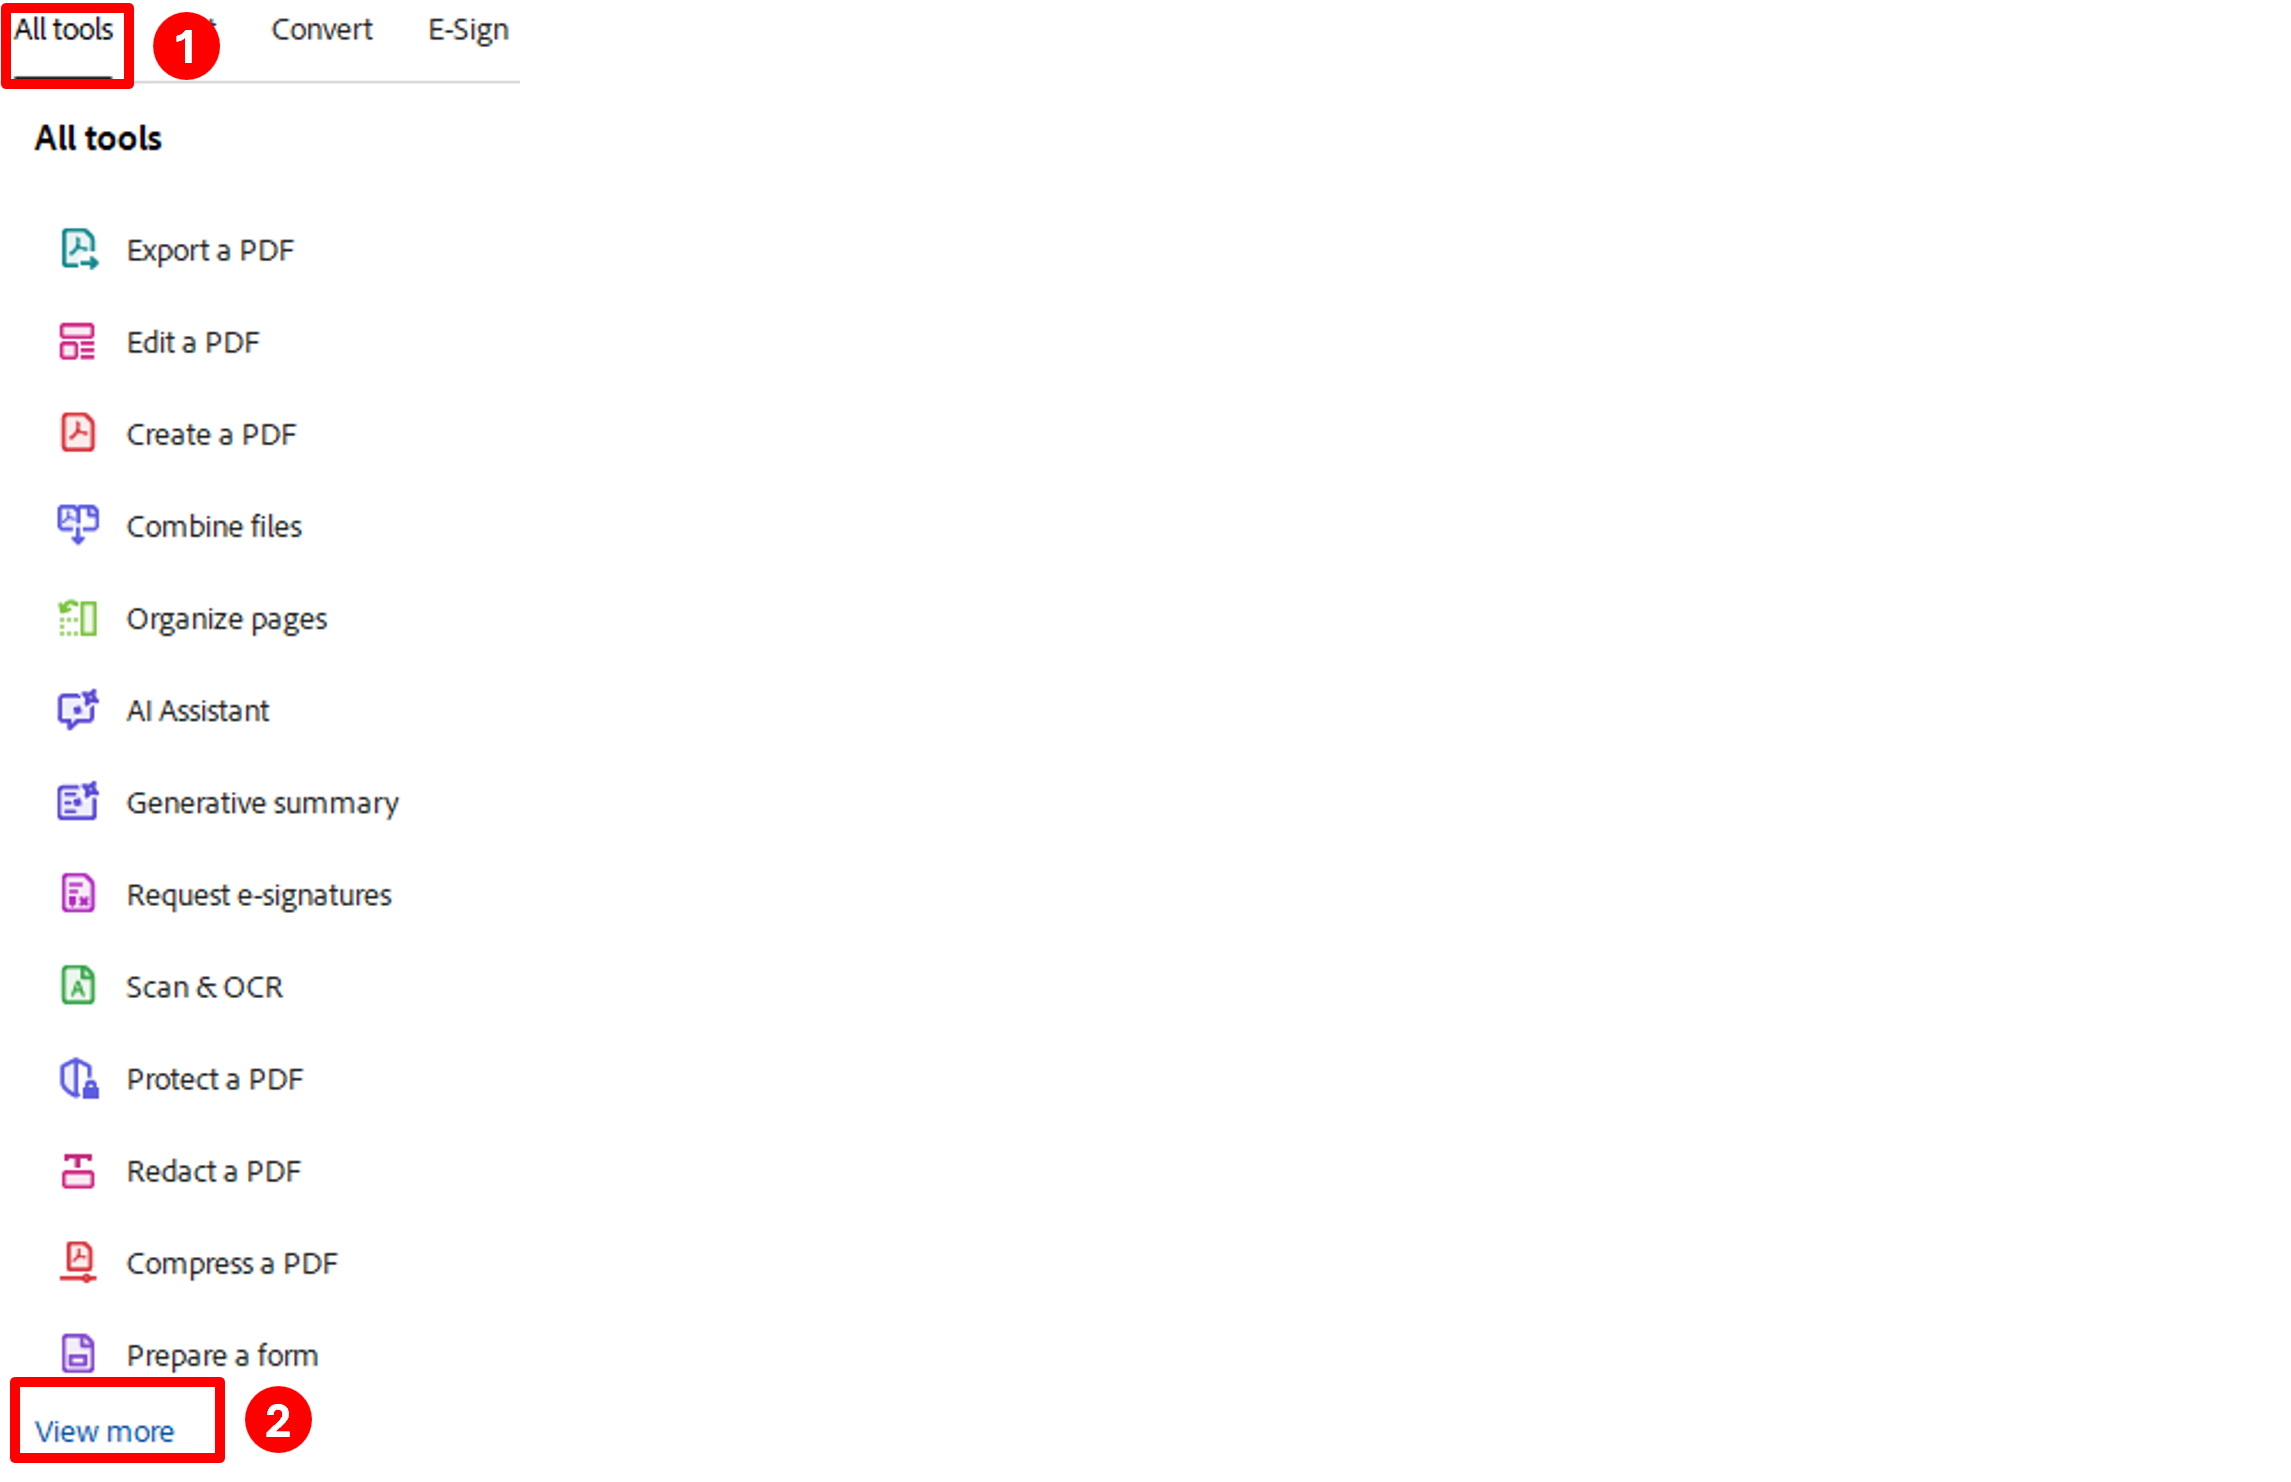
Select All Tools from the menu on the top, then click the link for View more:
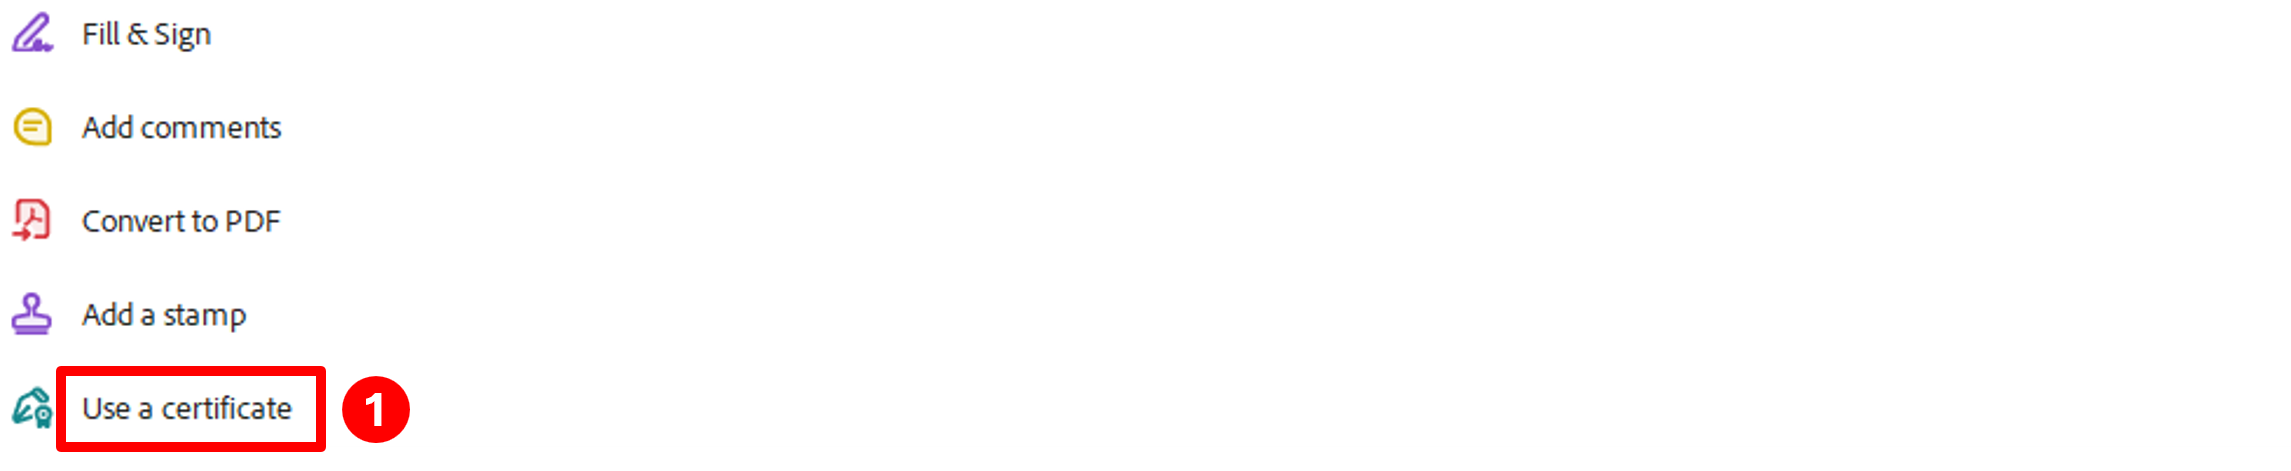
That will expand the All tools menu with more options. Select Use a certificate:
It will then open the Use a certificate menu, select Digitally sign:

You will be prompted with a window do draw the area where you would like your signature. Click the OK button, then draw a rectangle on your document where you want your signature to appear:

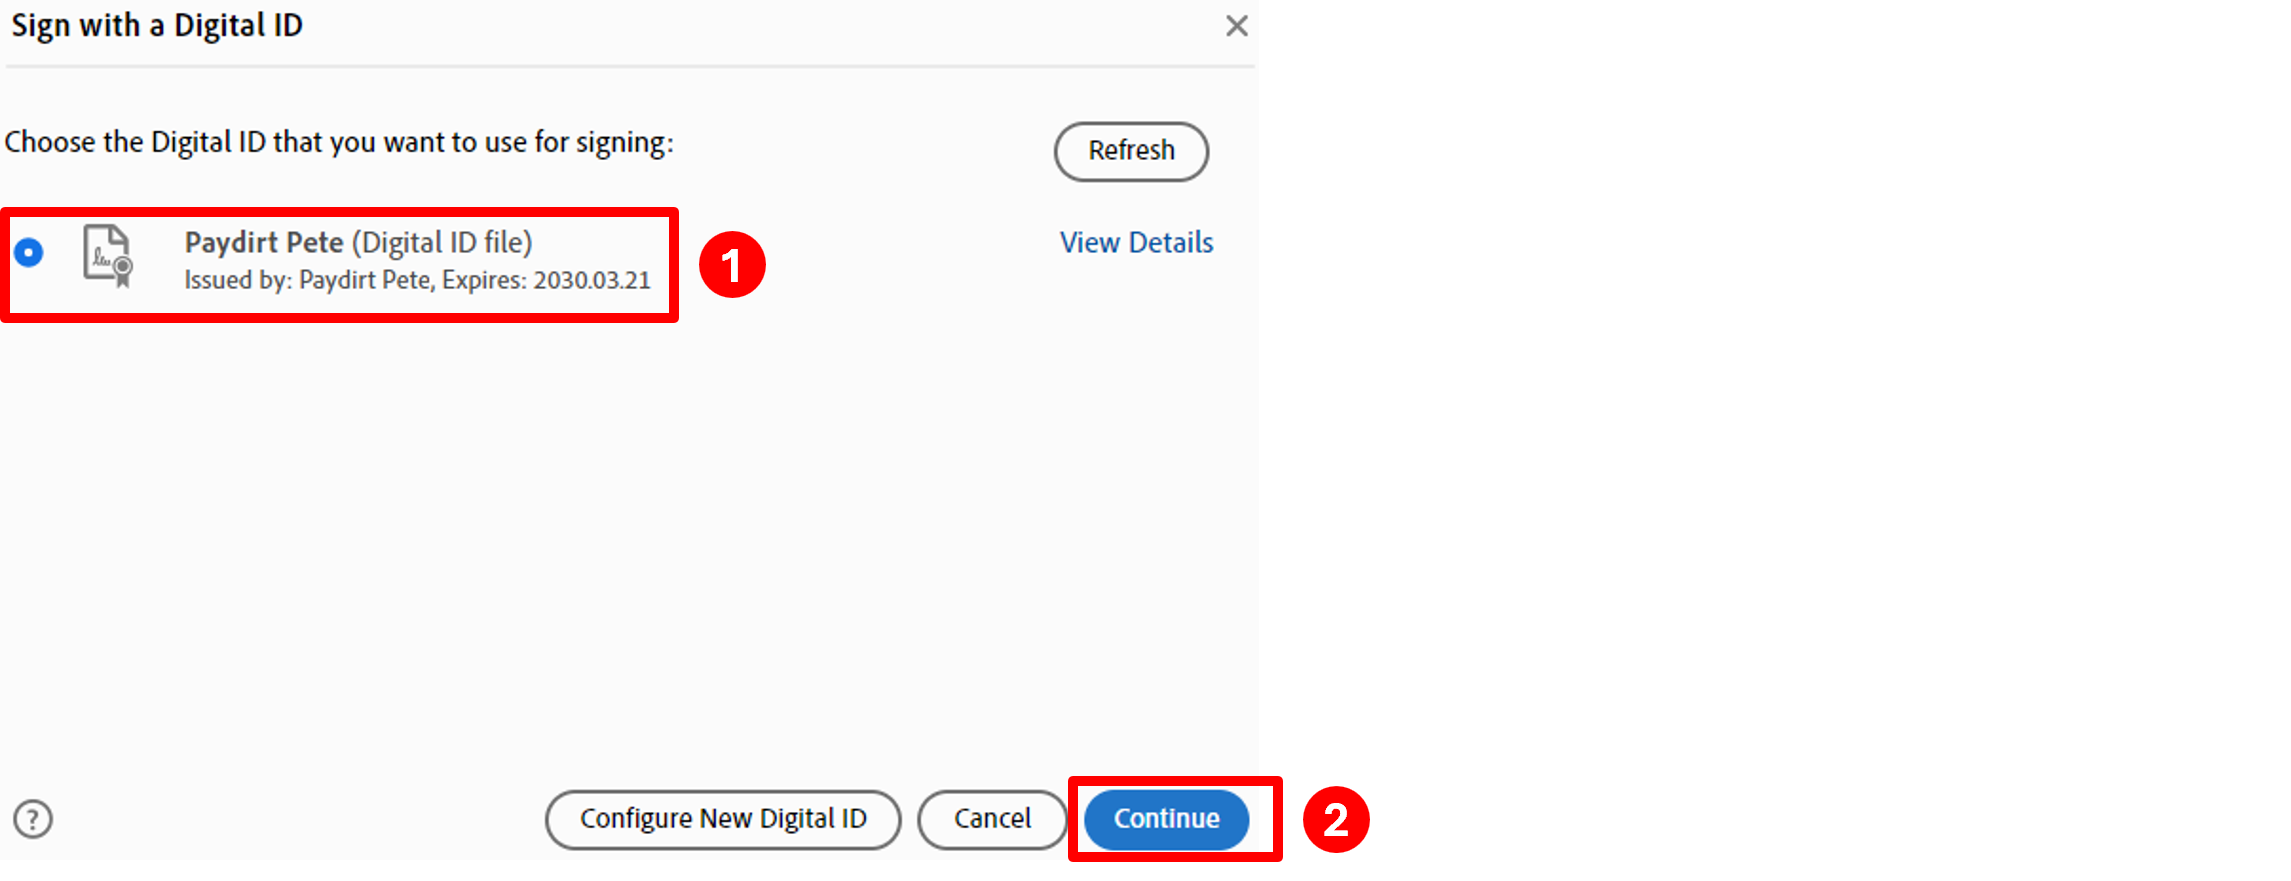
You will be prompted to Sign with a Digital ID. Make sure the signature is selected and Click the Continue button:
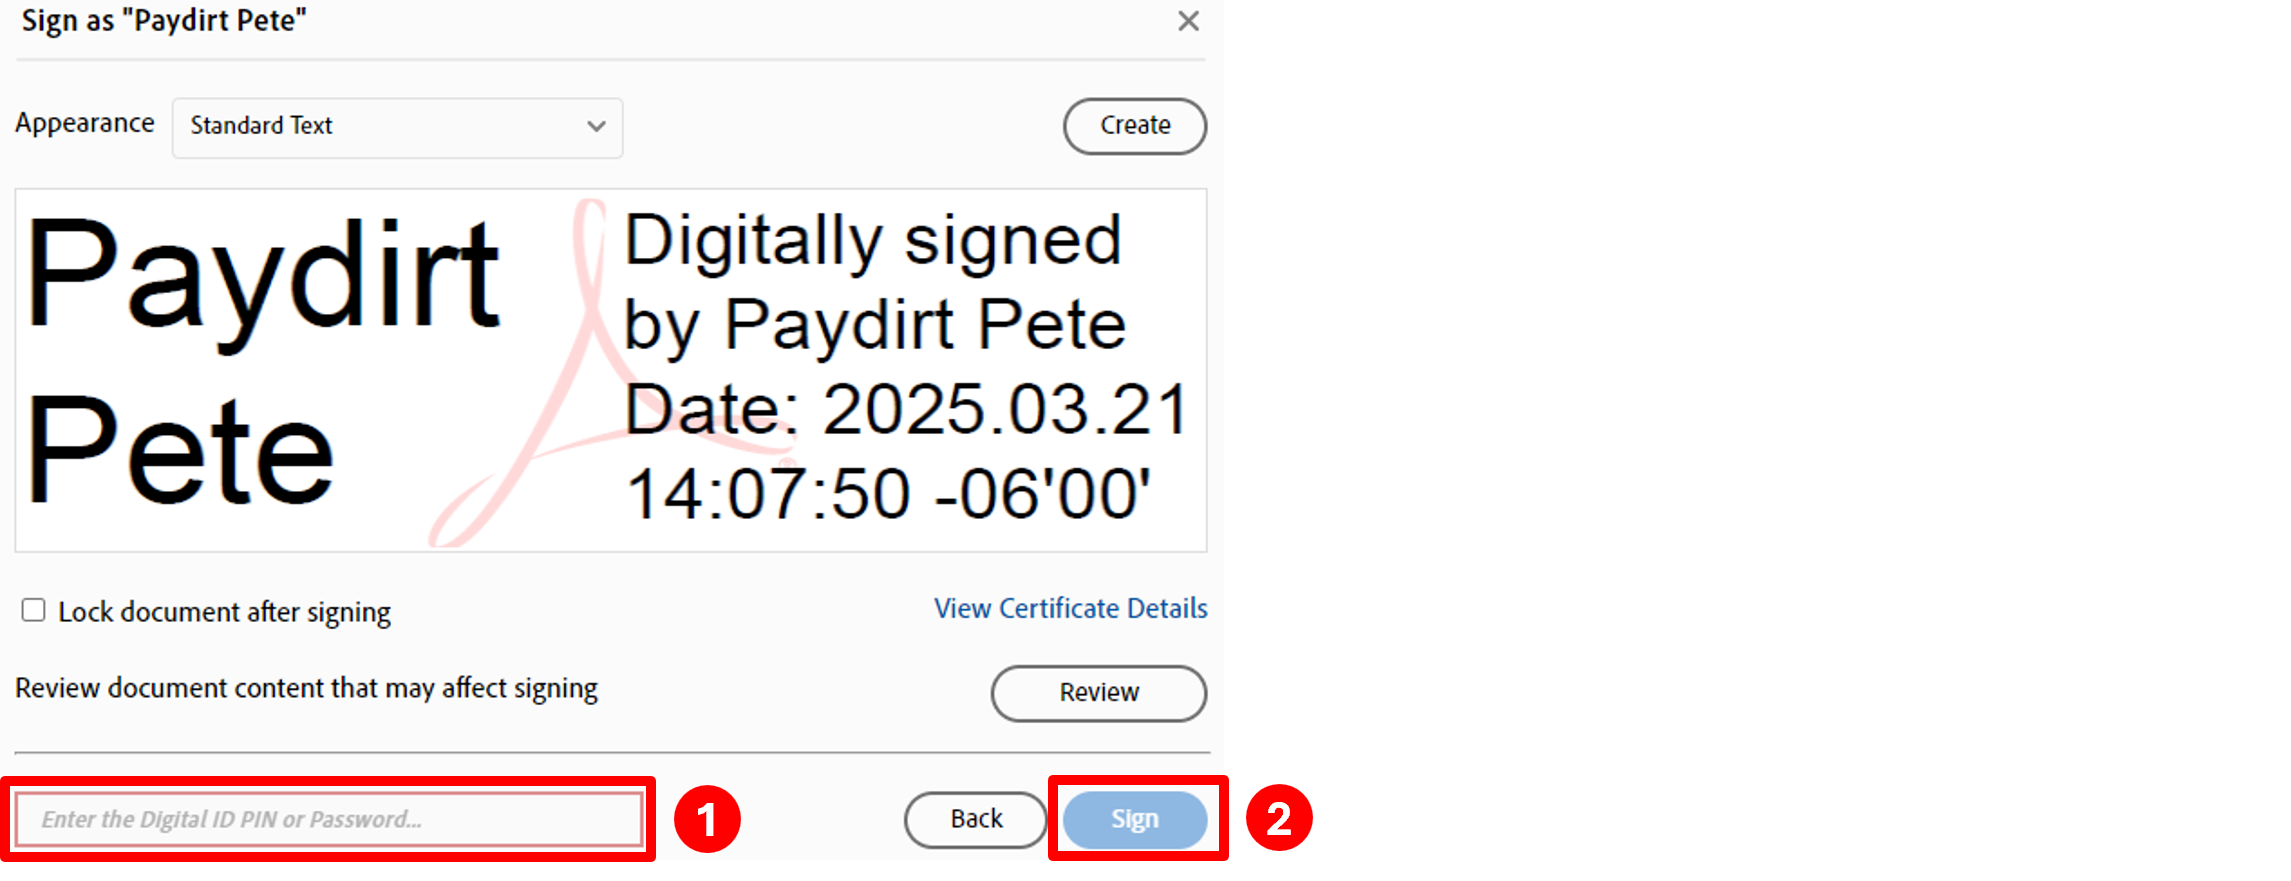
You will see an example of your digital signature and will be prompted to enter your Digital ID PIN or Password. Enter your password into the box, then click the Sign button:
You will be prompted to save the file. You can either overwrite the existing file, which will be the default name filled into the File name box, or type a different name. Once you select the file name, click the Save button. If you selected the same file, you will be prompted to confirm that you want to replace the existing file. Click Yes.
You will now see your digital signature with the time stamp that has been digitally signed:

Changing from a Typed Signature to a Digital Signature
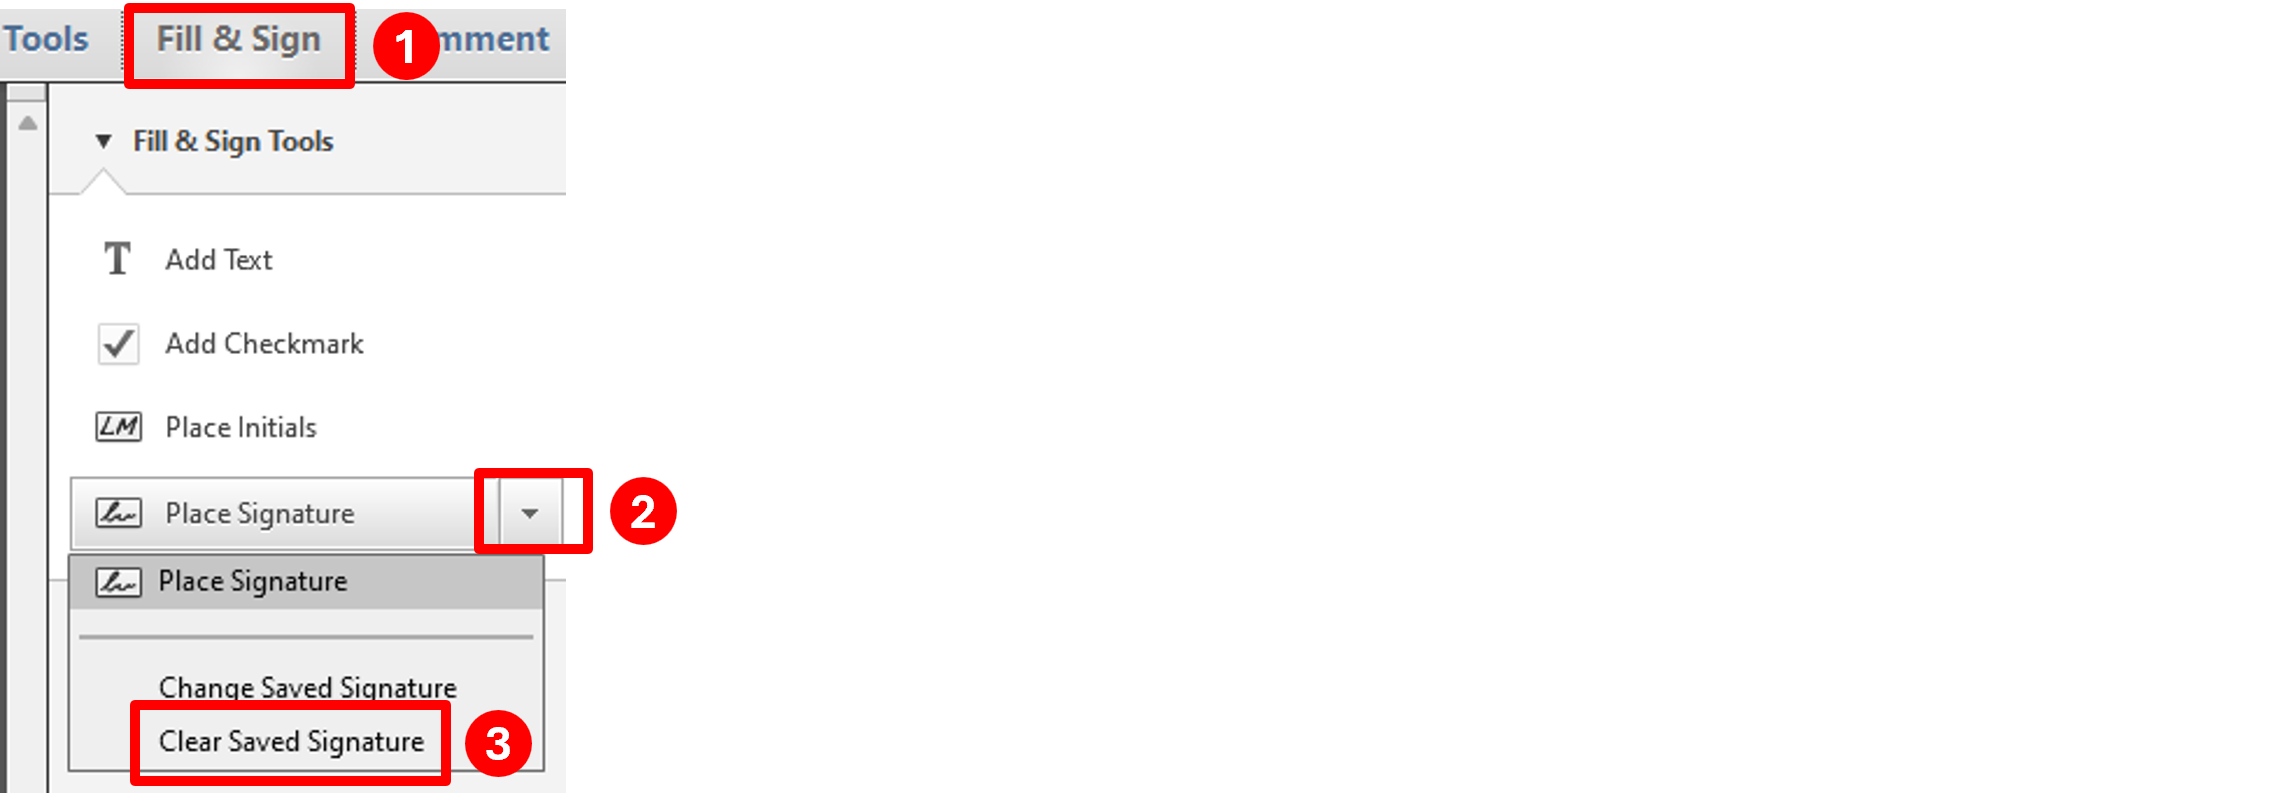
Click on Fill & Sign in the top-right corner, click the dropdown box next to Place Signature and select Clear Saved Signature:
Next you need to create a digital signature. Click on Fill & Sign in the top-right corner and click on Place Signature:
Click the Drag New Signature Rectangle button:
Draw a rectangle in your Adobe document, then you will get the Sign Document window. From the Sign As dropdown box, select New ID:
On the Add Digital ID screen, select A new digital ID I want to create now, then click the Next button:
On the next screen, select New PKCS#12 digital ID file, then click the Next button:
Fill in your Name, Organization Unit (Department), Organization Name (UTEP) and Email Address in the corresponding fields, change Key Algorithm to 2048-bit RSA, then click the Next button:
The next screen will prompt you for the location to save your certificate file and name of the file. You can either use the default location and name or click the Browse button and select a location that is easier to find, such as your Desktop or Documents folder. Once you have selected the location you want to save it to, click the Save button.
Type a password that is at least 6-8 characters long in both the Password and Confirm Password boxes, then click the Finish button:
You will then get the Sign Document screen that shows your digital signature - this is how your digital signature will appear on documents when you sign them:
These instructions are for the latest version of Adobe Reader. If you don't have the latest version of Adobe Reader, download it from Adobe.
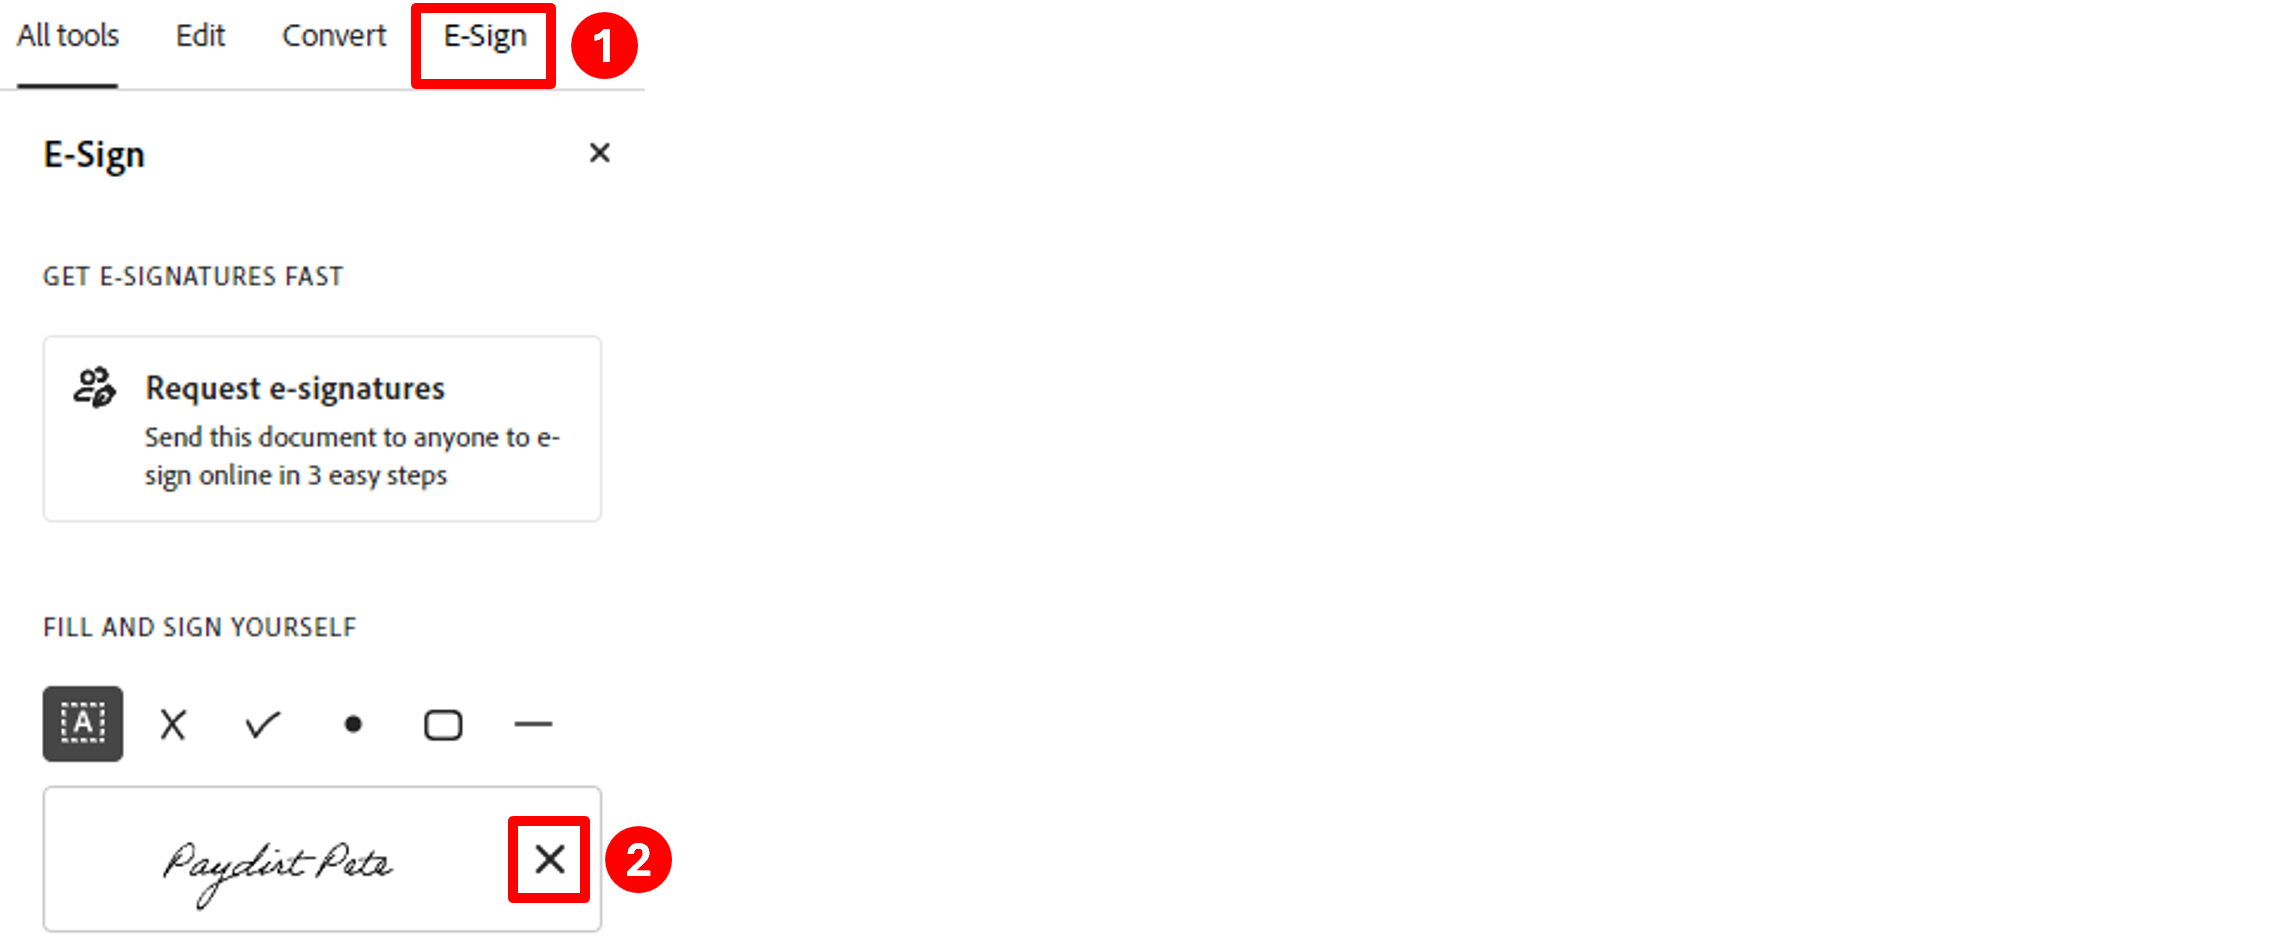
Select E-Sign from the menu on the top and click the X to the right of your typed signature:
Next you need to create a digital signature. Select Menu from the top left corner, then select Preferences:
Select Signatures from the list down the left side, then click the More button under the Identities & Trusted Certificates section:
Click the Add Digital ID button on the top:
Select A new digital ID I want to create now and click the Next button:
Select New PKCS#12 digital ID file and click the Next button:
Fill in the Name, Organizational Unit (Department), Organization Name (UTEP) and Email Address boxes, make sure the Key Algorithm box is set to 2048-bit RSA, then click the Next button:
The next screen will prompt you for the location to save your certificate file and name of the file. You can either use the default location and name or click the Browse button and select a location that is easier to find, such as your Desktop or Documents folder. Once you have selected the location you want to save it to, click the Save button.
Type a password that is at least 6-8 characters long in both the Password and Confirm Password boxes, then click the Finish button:
Close the Digital ID and Trusted Certification Settings window and click OK to close the Preferences window.