Using a Meeting Owl with Zoom
0a. On macOS, launch your Zoom application and make sure it loads properly.
0b. Connect both USB and power cables to the Meeting Owl. Connect the USB-A cable to your computer. Allow a few seconds for the Owl to power on and initialize. It will make a "hoot" sound once it's ready.
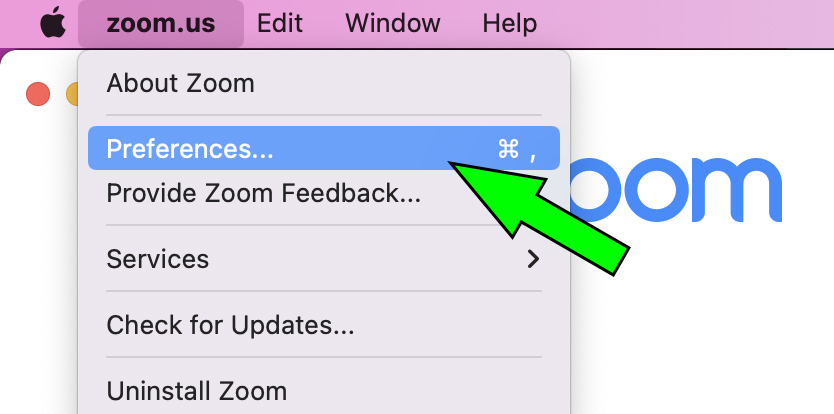
1. On macOS, from the "zoom.us" menu, select "Preferences..." to continue:
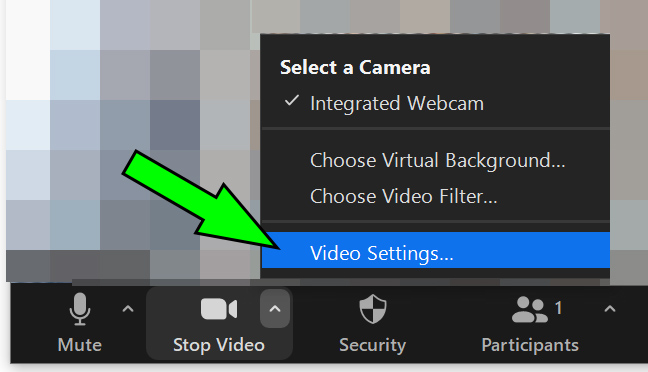
1. On Windows, start your Zoom meeting. On the lower-left hand area, click on the Up caret and select "Video Settings..." to continue:
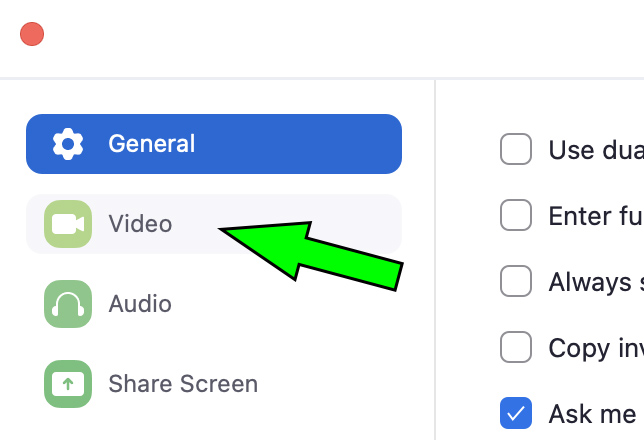
2. On macOS, in the "Settings" window, select "Video" to continue:
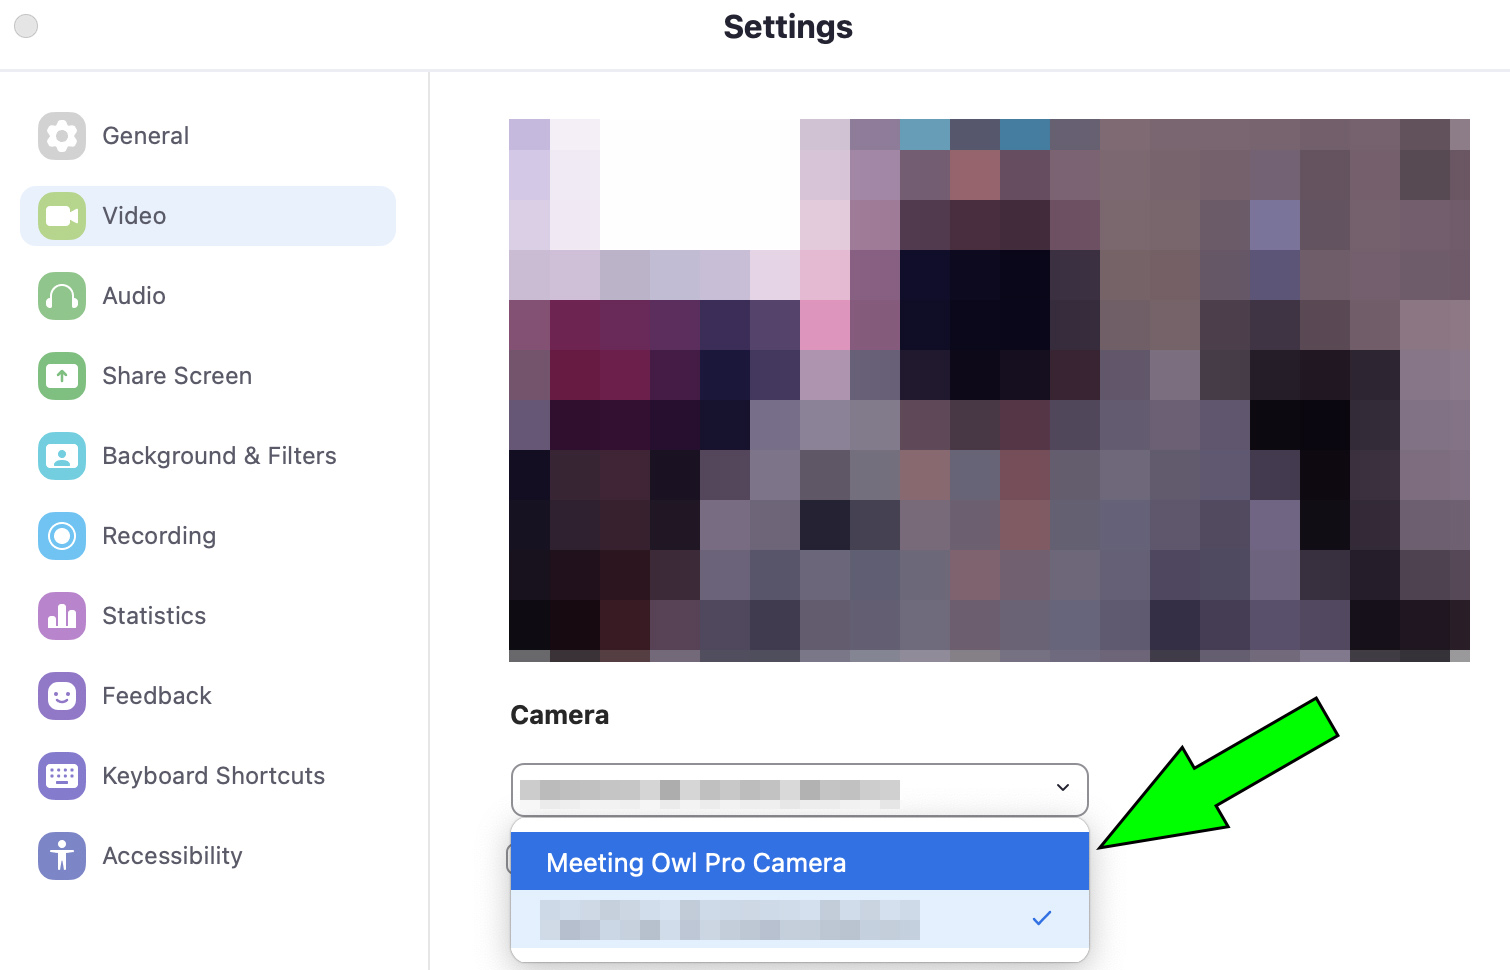
3. In the "Camera" section, select "Meeting Owl Camera" or "Meeting Owl Pro Camera" as appropriate:
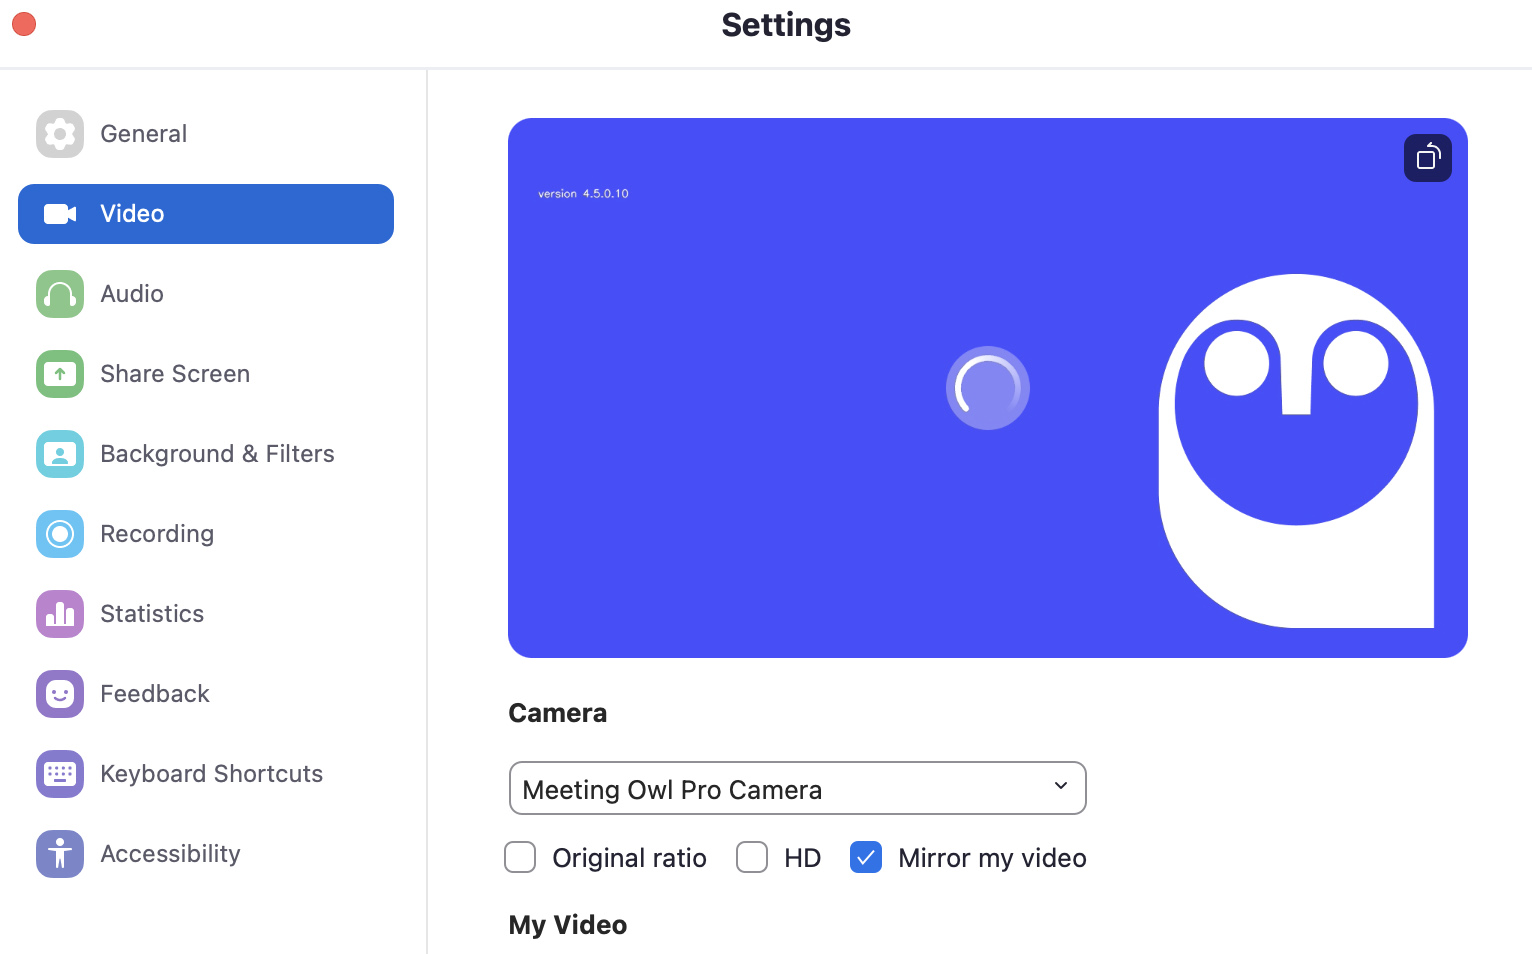
4. The "Preview" window will "wake up" the Owl (if needed) and display a "Loading" window. You can verify the Owl's version number, if needed, from this screen:
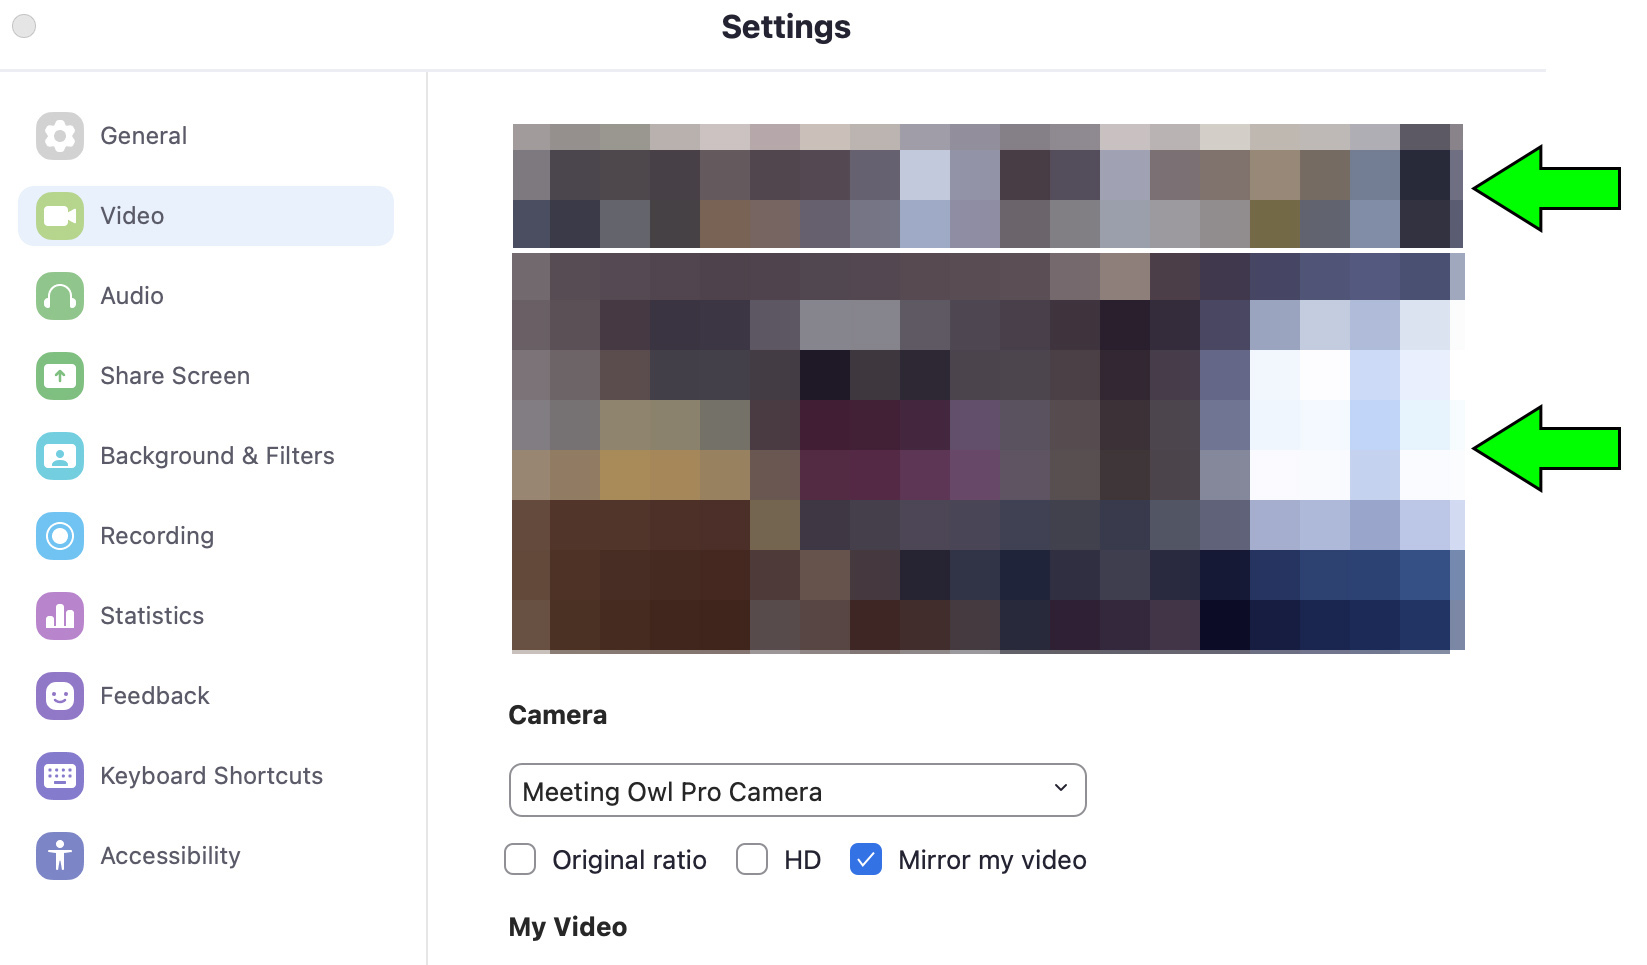
5. Once the Owl has finished initializing, the preview window will display two images: the top is a 360-degree view of the room; the bottom one is a dynamic window that will showcase the currently-active speaker(s).
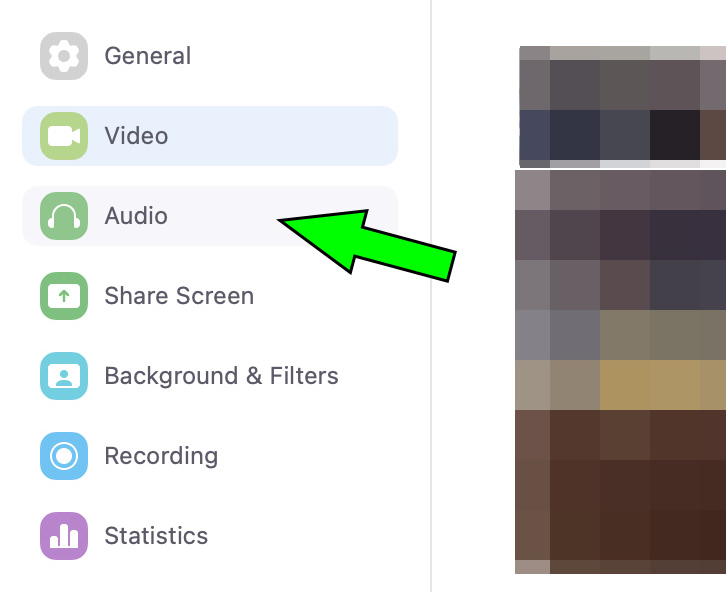
6. Once the "Video" setup has been completed, select "Audio" from the menu to continue:
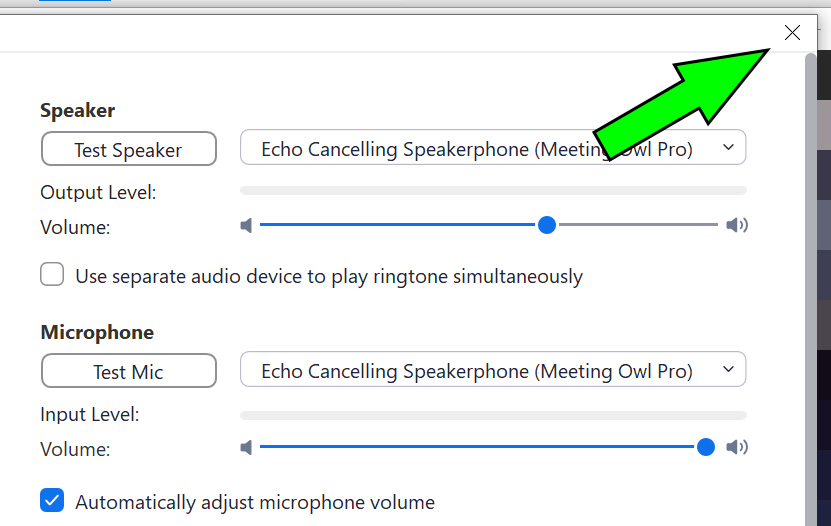
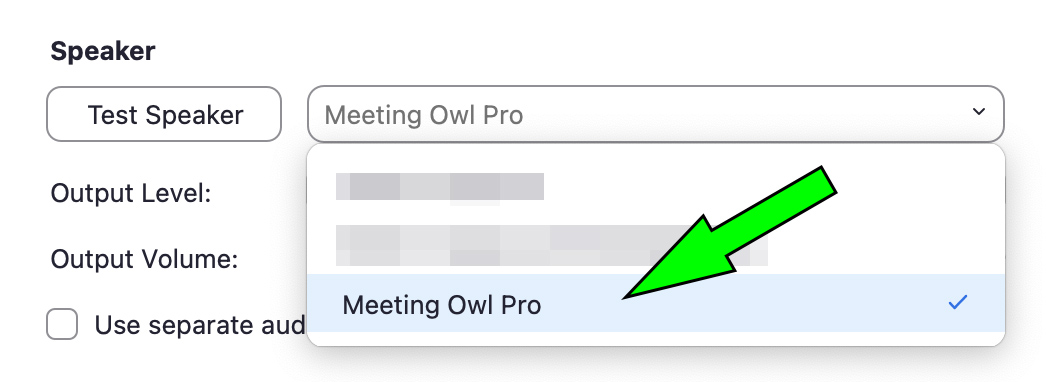
7. In the "Speaker" section, make sure the Owl is selected:
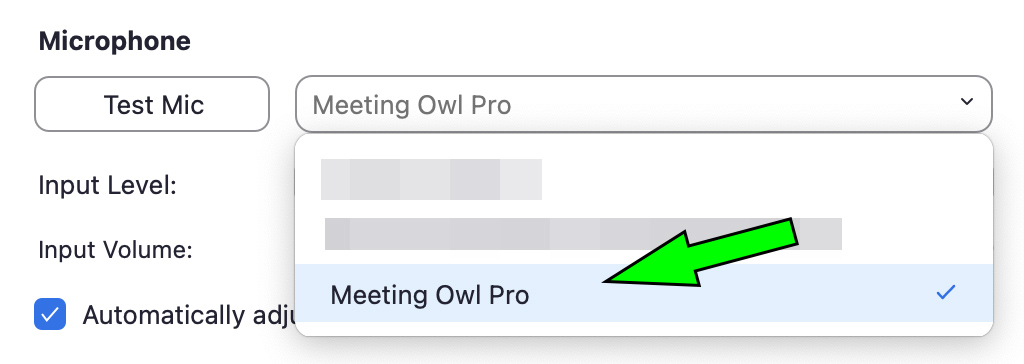
8. In the "Microphone" section, make sure the Owl is selected:
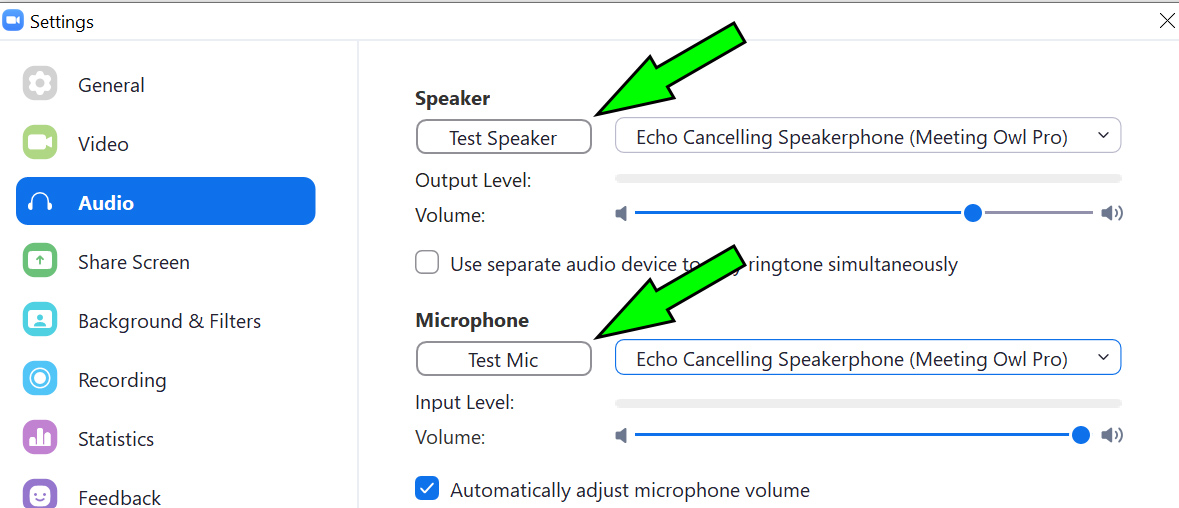
8b. If so desired, you have the option of testing the Speaker and Mic:
9. Once both Video and Audio configurations have been completed, click on the "X" button to close the "Settings" window. The Owl is now ready to be used with Zoom: