Connecting to a network shared drive on macOS
Please follow these steps to connect to a network shared drive from your Mac:
You must be on the UTEP network or connected to the UTEP VPN in order to connect to network shared drives. These instructions assume you are logged in to your UTEP-assigned computer using your UTEP credentials. If you are not, contact the Technology Personnel for further assistance.
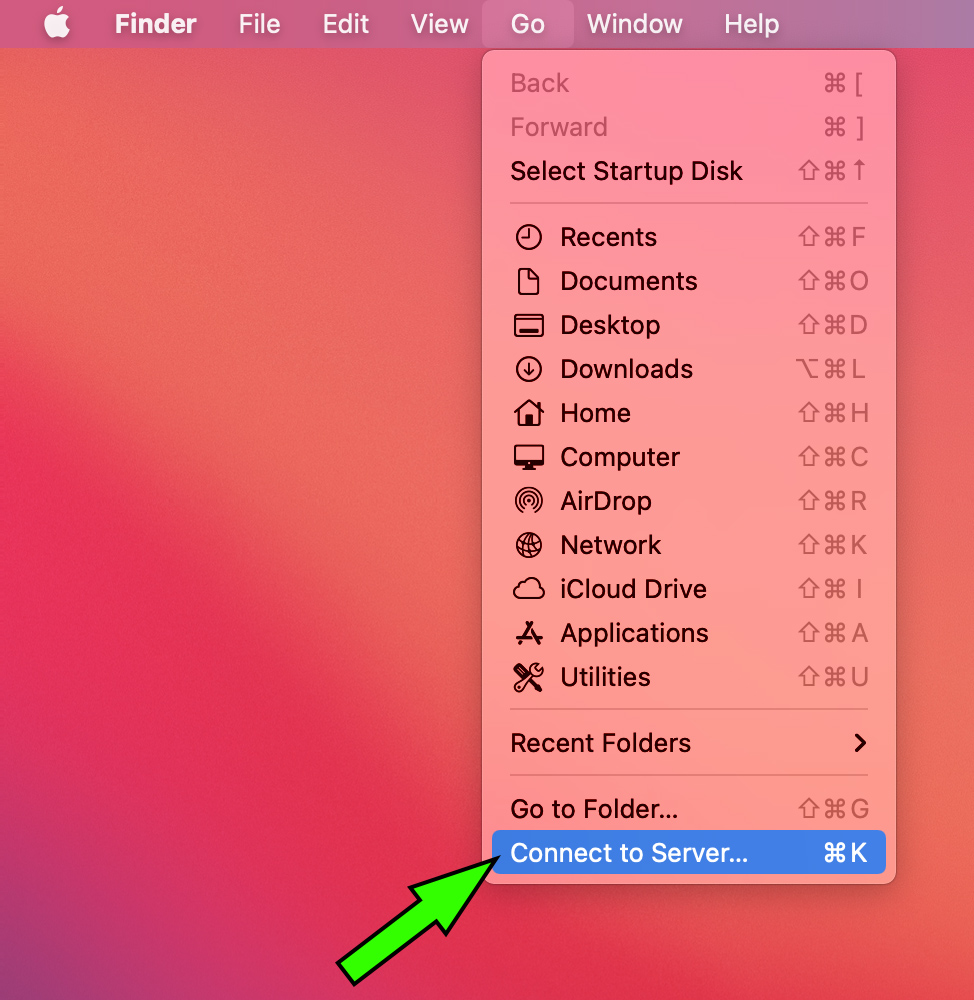
1. Go to "Finder" -> "Go" -> "Connect to Server..." (or you can press Command+K):
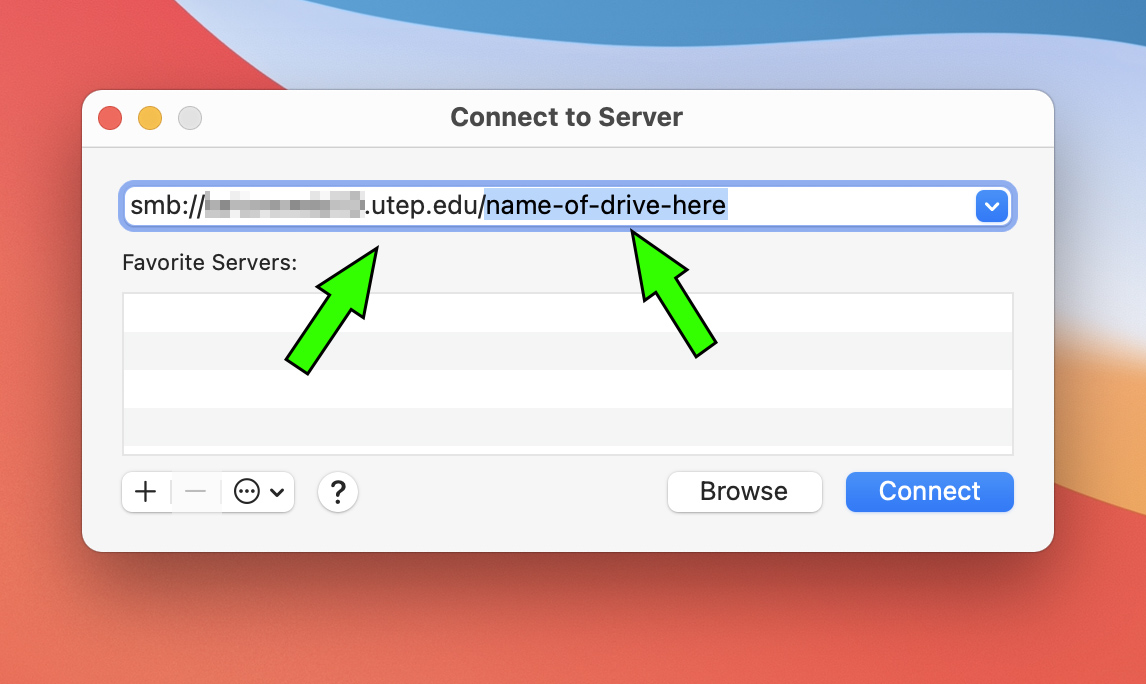
2. Enter "smb://" + the name of the server + ".utep.edu/" + the name of the shared drive (which may or may not include a $ sign) and then click "Connect":
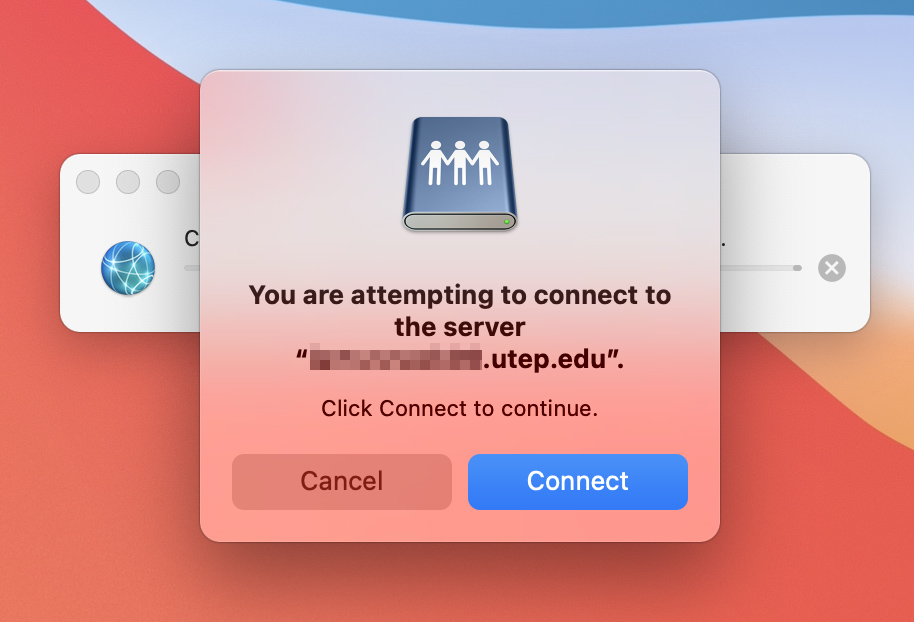
3. You will be presented with a confirmation window. Please click "Connect" if the name of the server is correct:
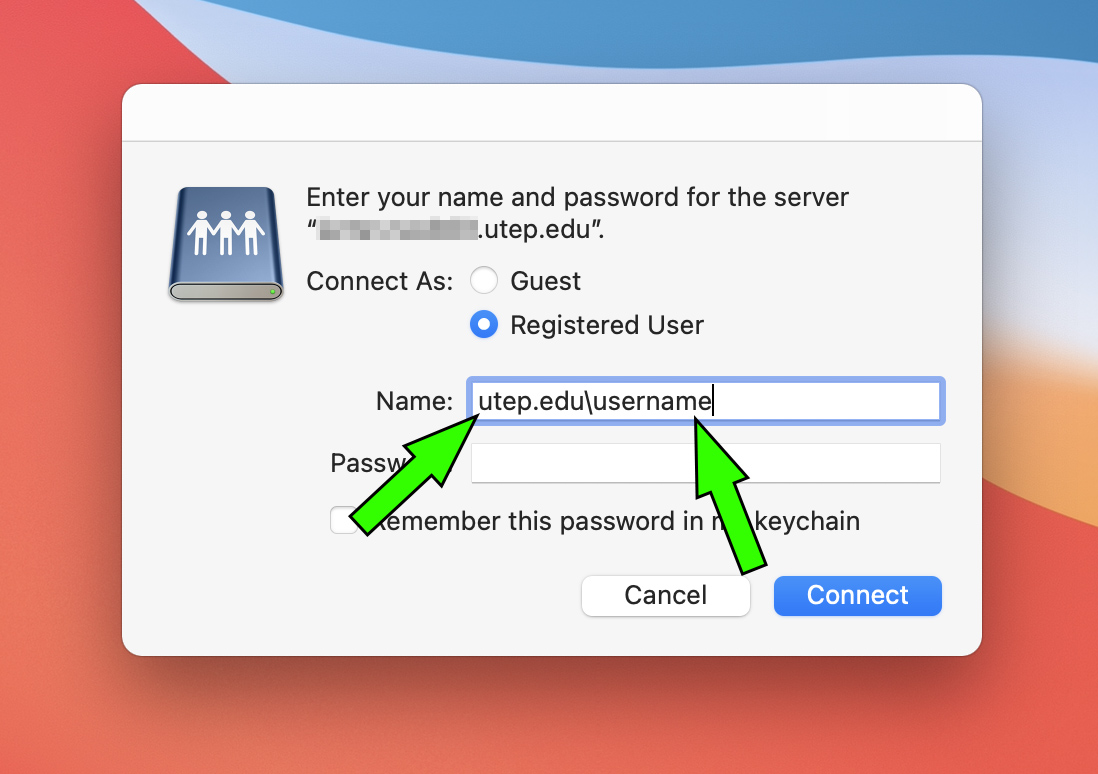
3a. If you are trying to connect from a Mac that is not connected to the UTEP domain, connect as a "Registered User" using your UTEP credentials. In the "Name" field, use "utep.edu\" followed by your username. Then enter your password and click "Connect":
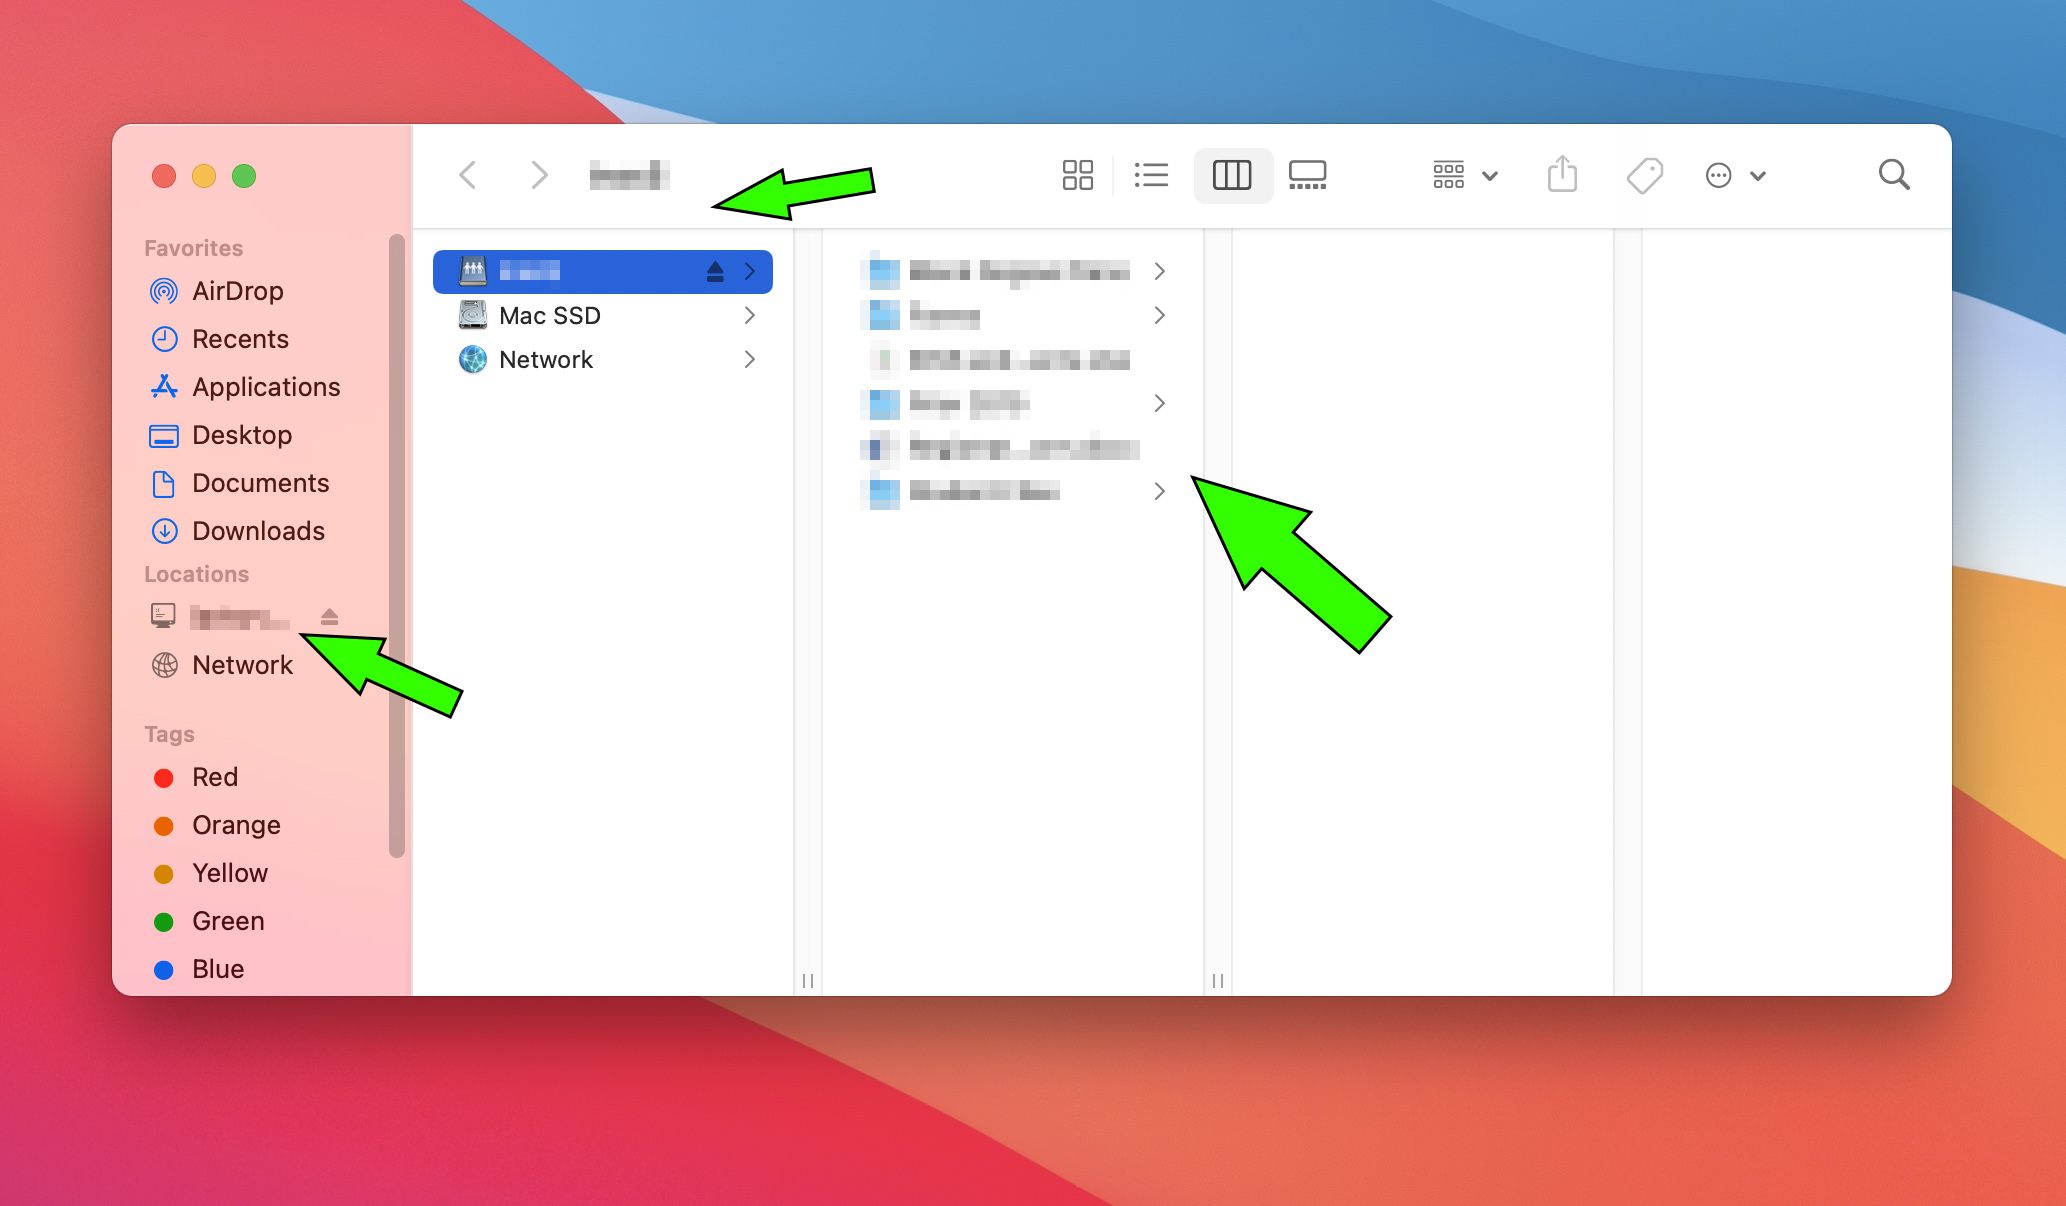
4. A Finder window with the name of the network shared drive will appear along with its contents. The name of the server will also be visible from the "Locations" section:
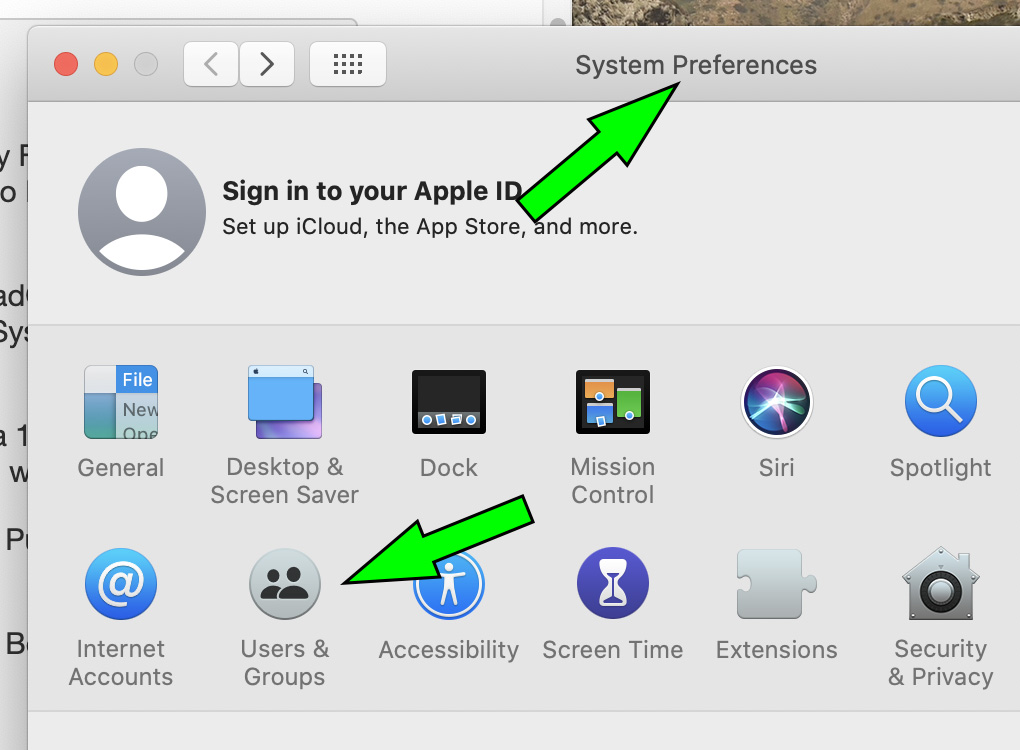
5a. If the connection is to be persistent (i.e. the drive is to be connected every time you are logged in), launch "System Preferences" from the Apple menu and select "Users & Groups":
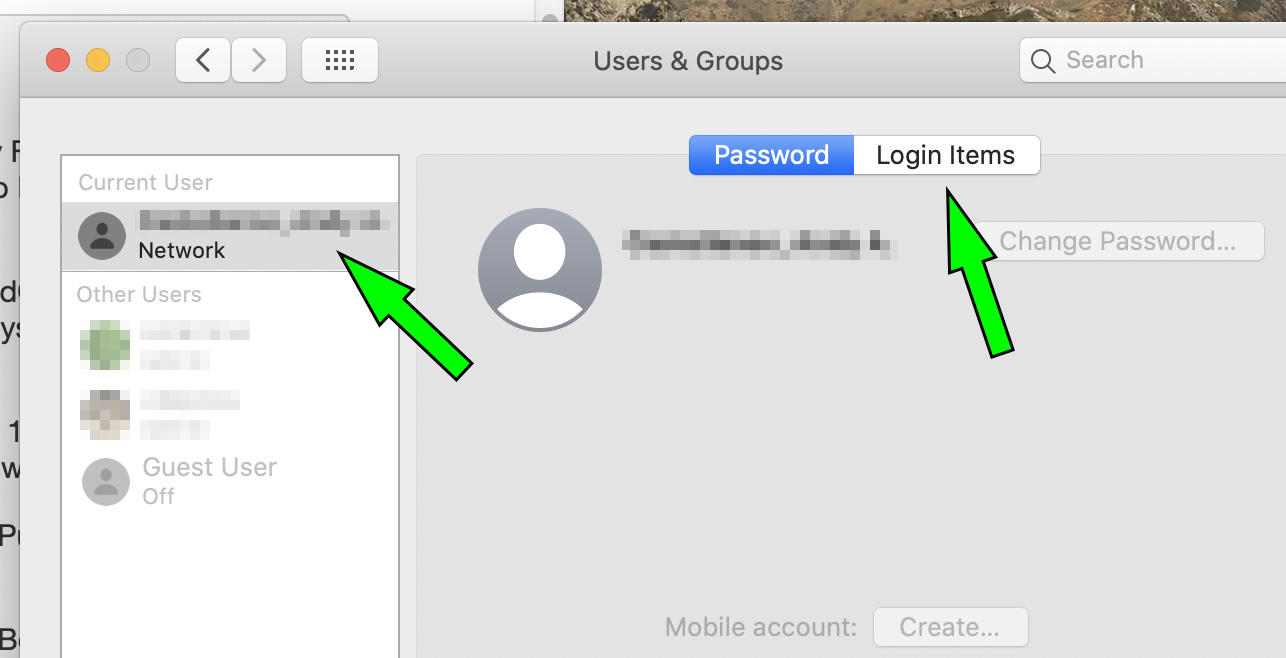
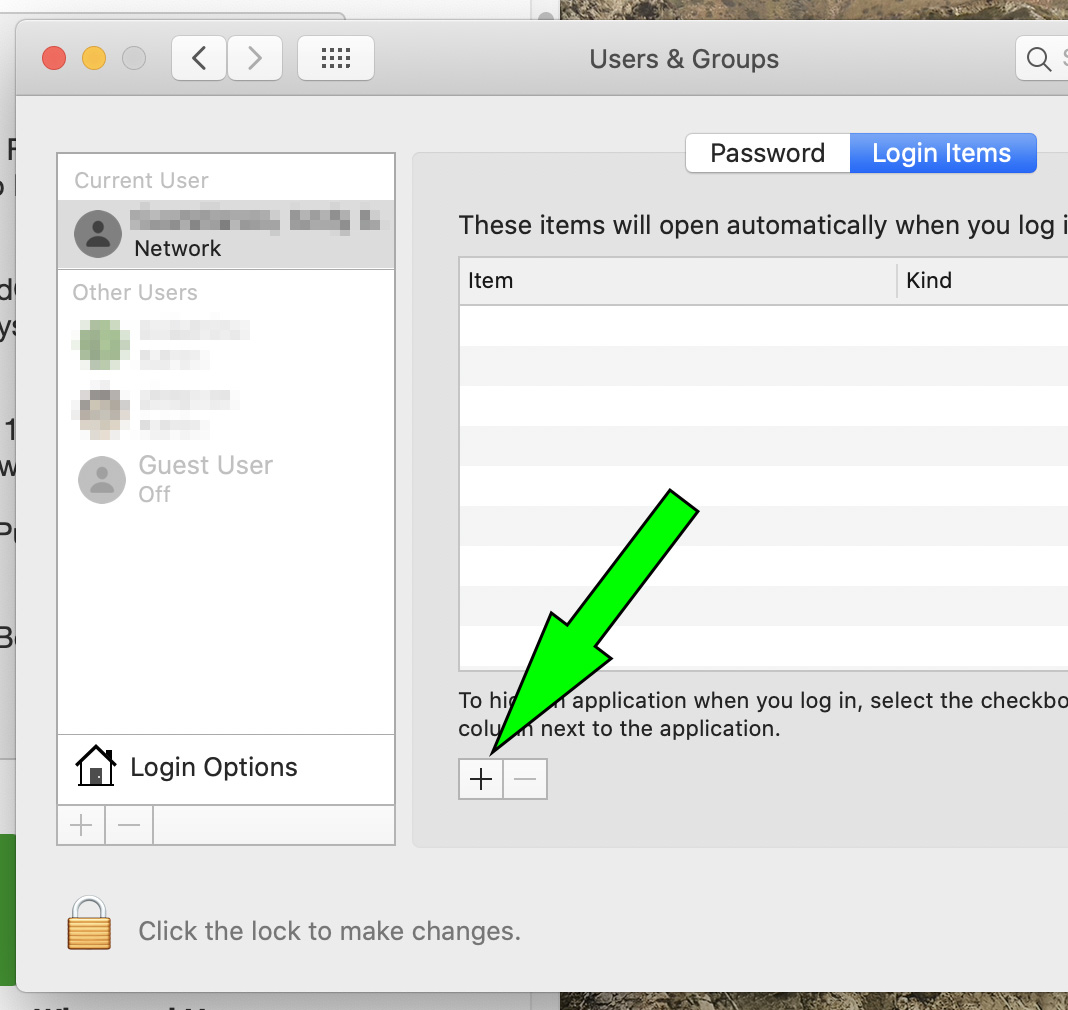
5b. Make sure your user is selected and click on "Login Items":
5c. On the "Login Items" screen, click on the "+" sign:
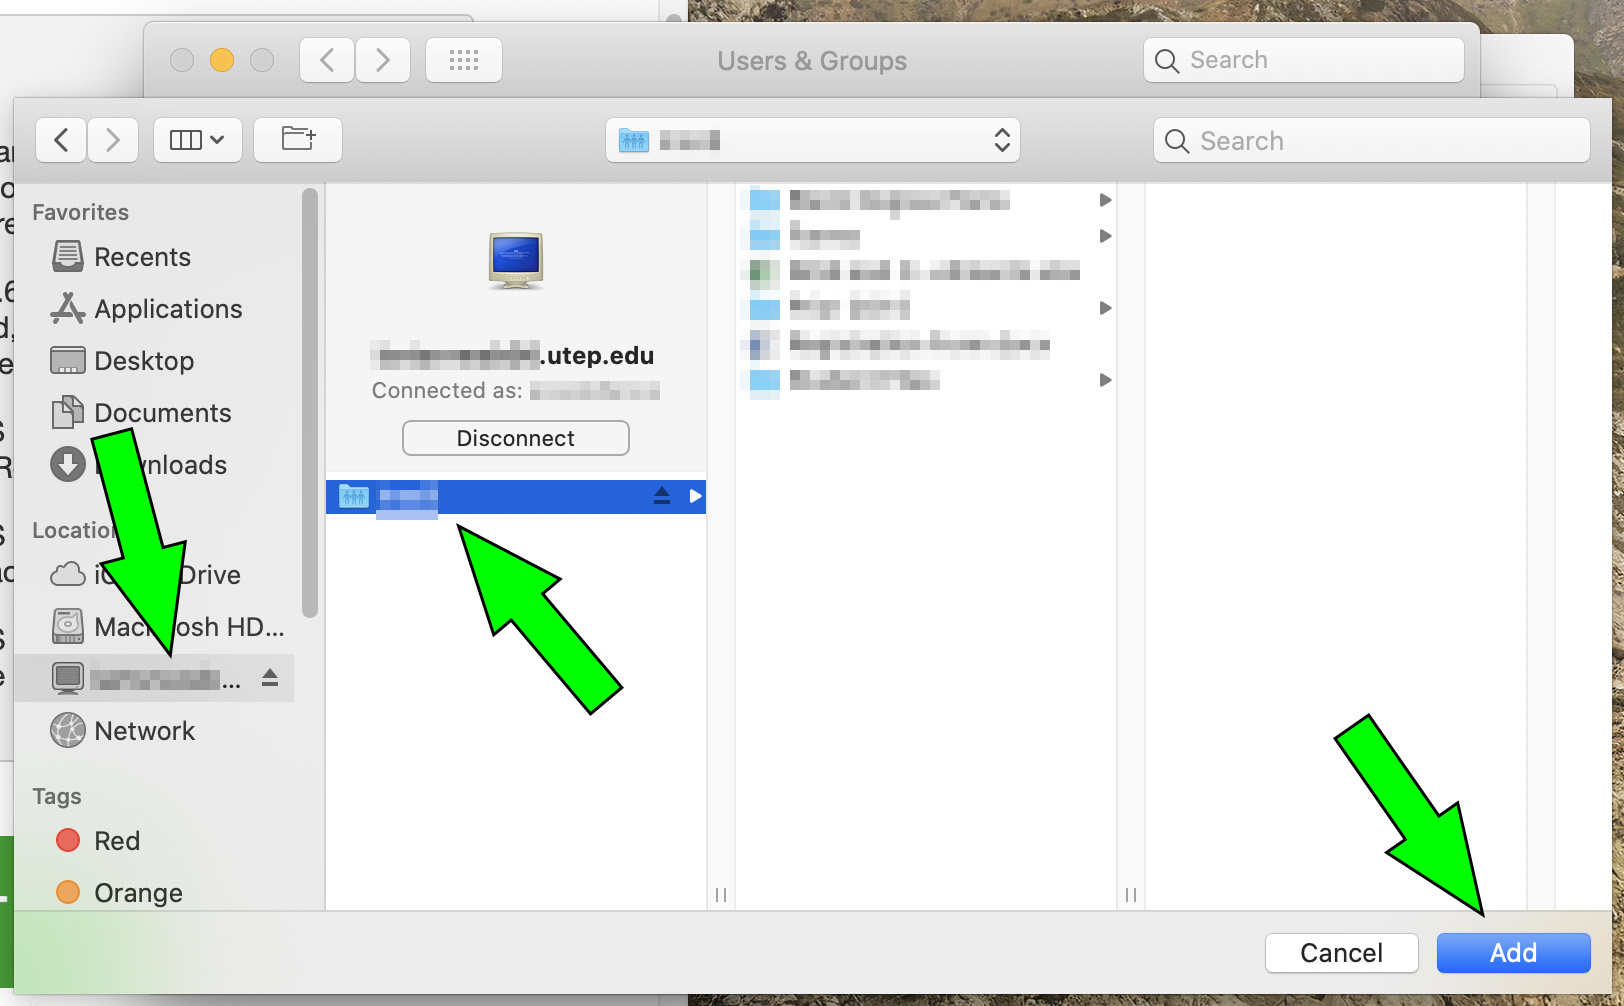
5d. A Finder window will open. Select the server from the "Locations" section on the left-hand column, then the folder with the shared drive name (will change to highlighted) and then finally click "Add." The drive will then be connected every time you are logged in:
