Connecting to a network shared drive on Windows
Please follow these steps to connect to a network shared drive from your Windows computer:
You must be on the UTEP network or connected to the UTEP VPN in order to connect to network shared drives. These instructions assume you are logged in to your UTEP-assigned computer using your UTEP credentials. If you are not, contact the Technology Personnel for further assistance.
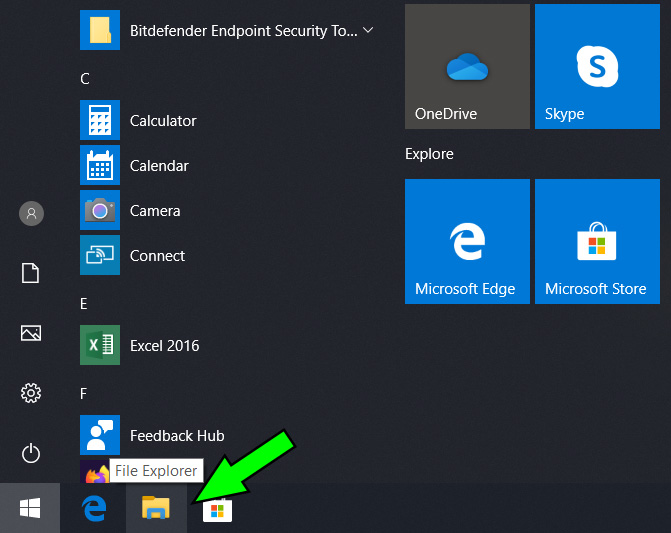
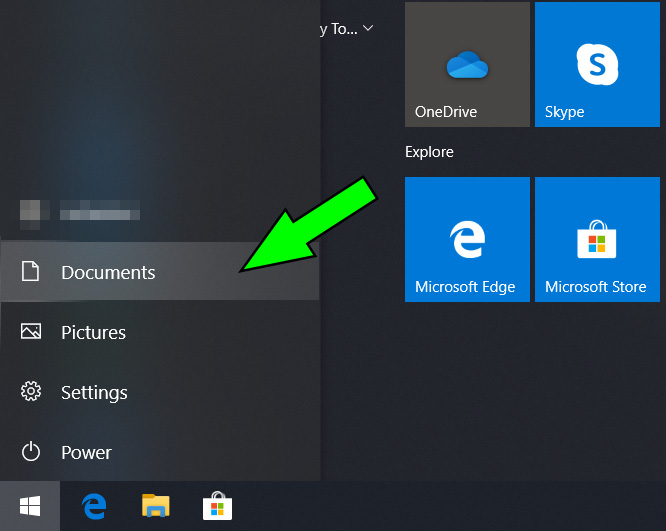
1. Open a File Explorer window by either clicking on the icon on the Taskbar or selecting "Documents" from the Start Menu:
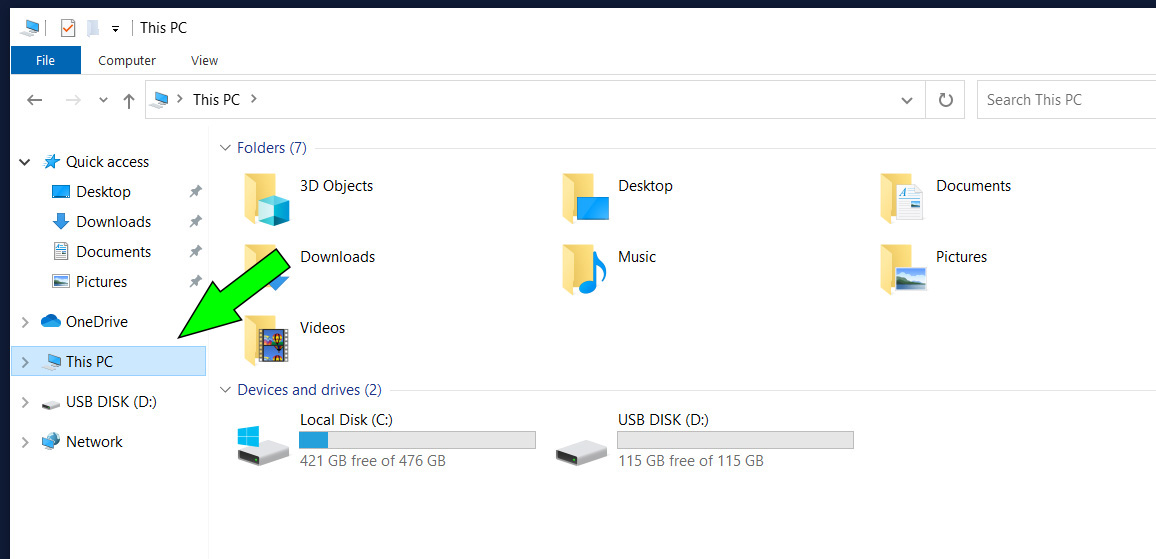
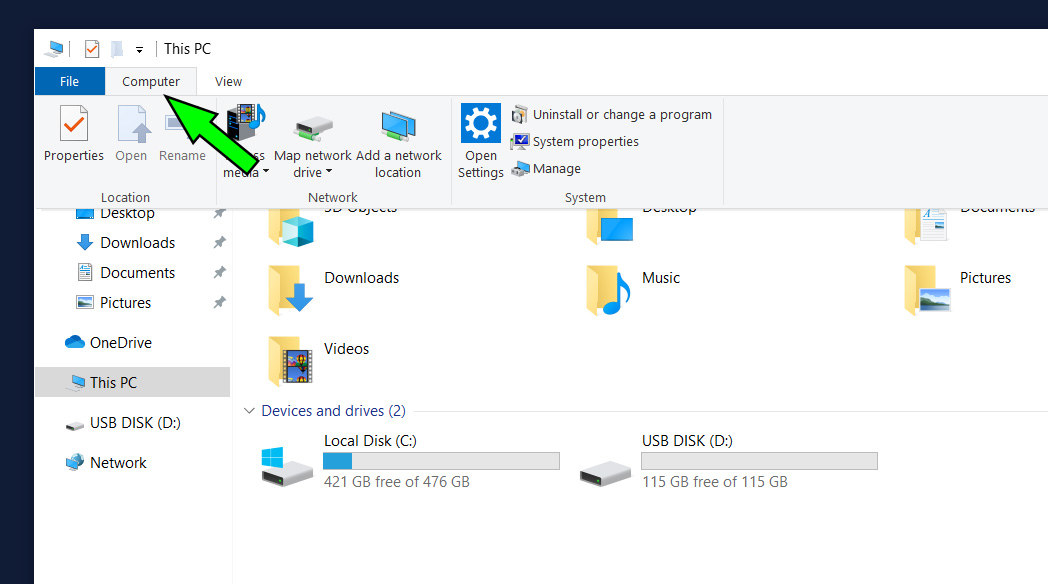
2. A new File Explorer window will open. Click on "This PC" on the left-hand column to list the drives the computer is connected to:
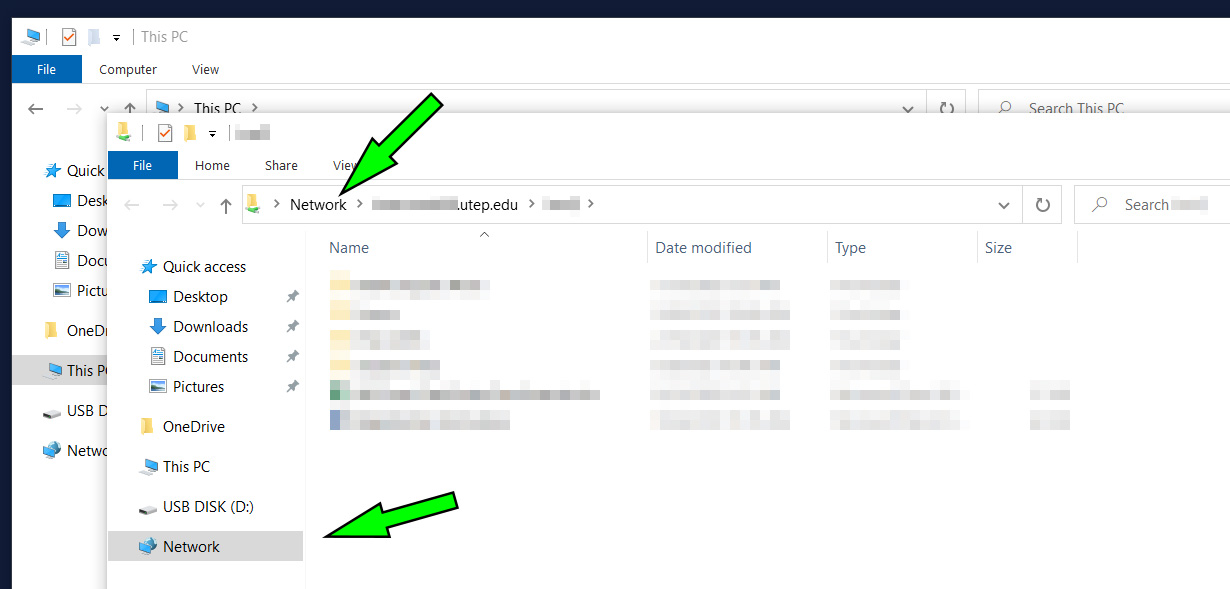
3. Click on "Computer" to access the Network options:
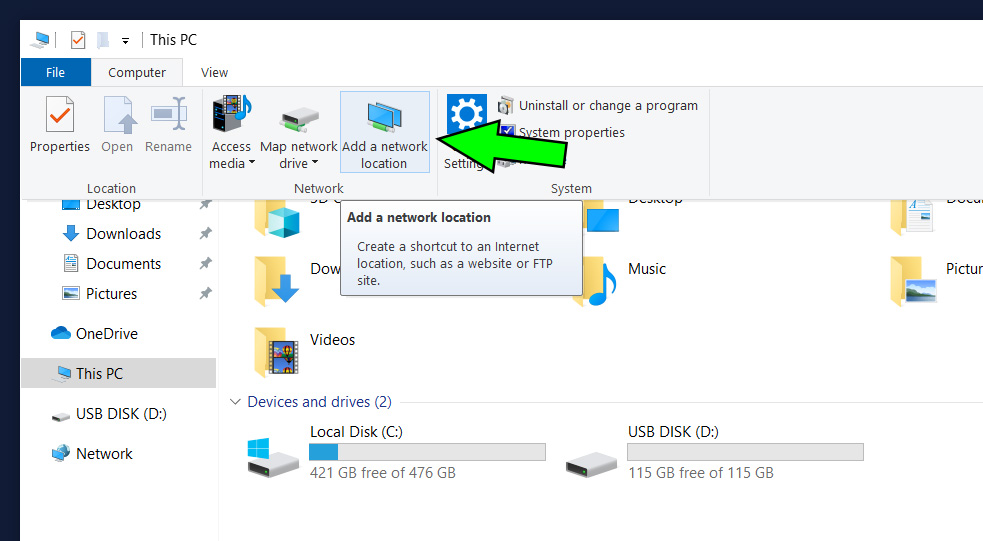
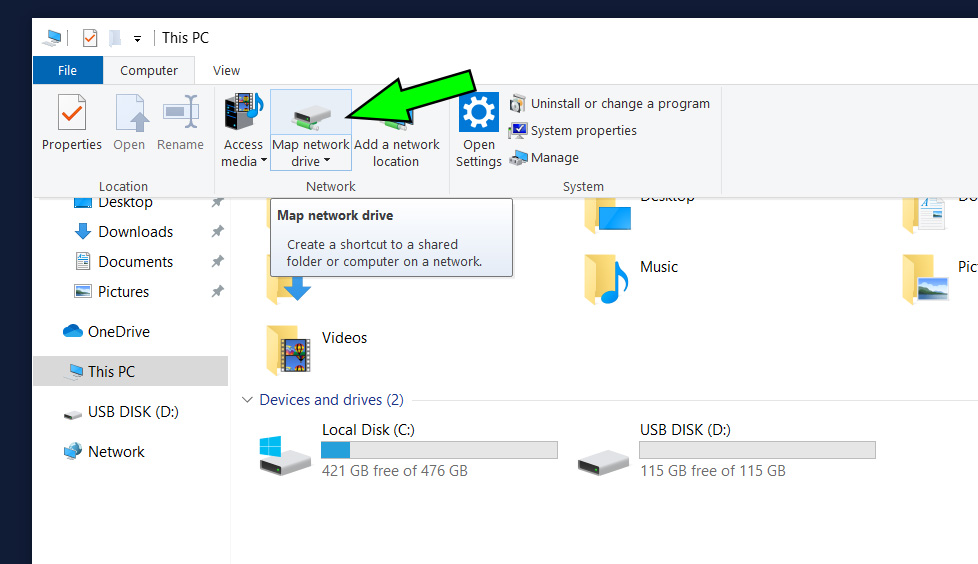
3a. If you would like to connect to a network shared drive and assign it a custom name, select "Add a network location". If you would like to assign it a letter (like "Z:" or "M:"), select the "Map network drive" option instead:
3b. If you selected the "Add a network location" option, click "Next" on the "Welcome to the Add Network Location Wizard" window...
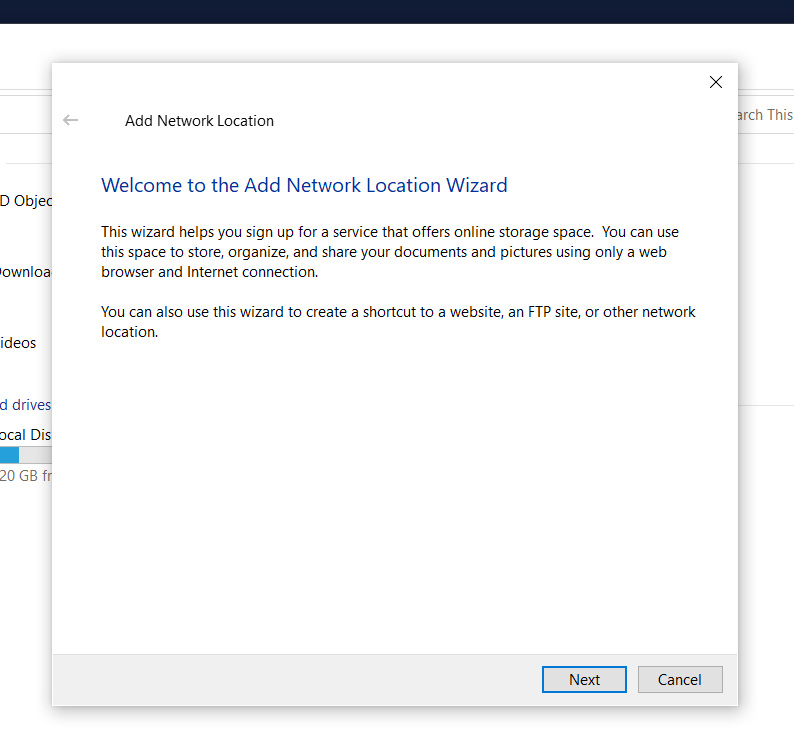
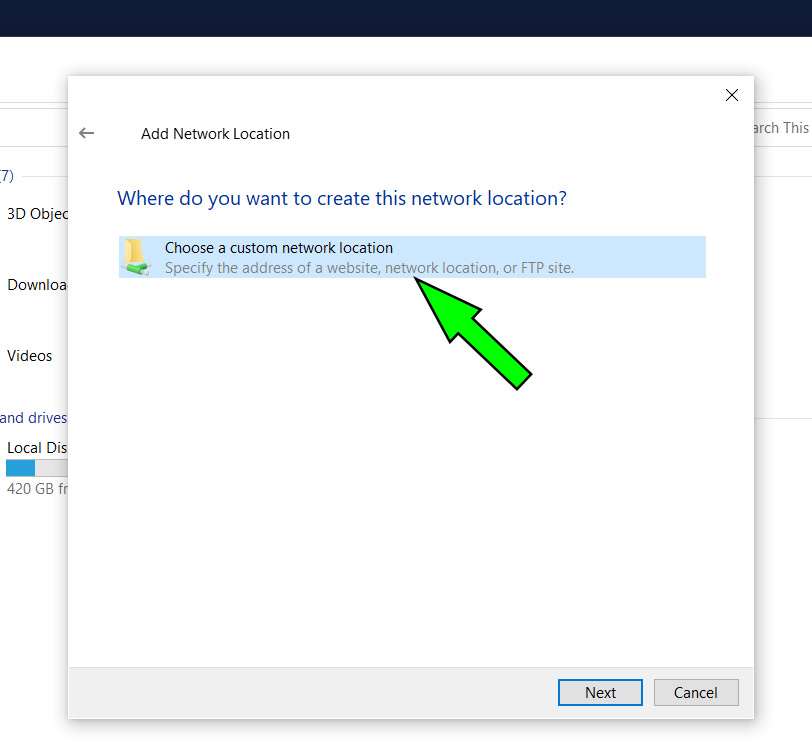
3c. ...and click on the "Choose a custom network location" option to highlight it blue. Then click on "Next":
4a. If you choose the "Map network drive" option, choose a drive letter (like "Z:" or "M:"). Please enter the full path to the drive (usually in the form of \\nameofserver.utep.edu\nameofntwrkdrive -- with or without a dollar sign). If the drive is to be persistent (i.e. connected every time you're logged in), check the "Reconnect at sign-in" box.
If you're using a non-domain computer, please check the "Connect using different credentials" and see item 7 for further instructions.

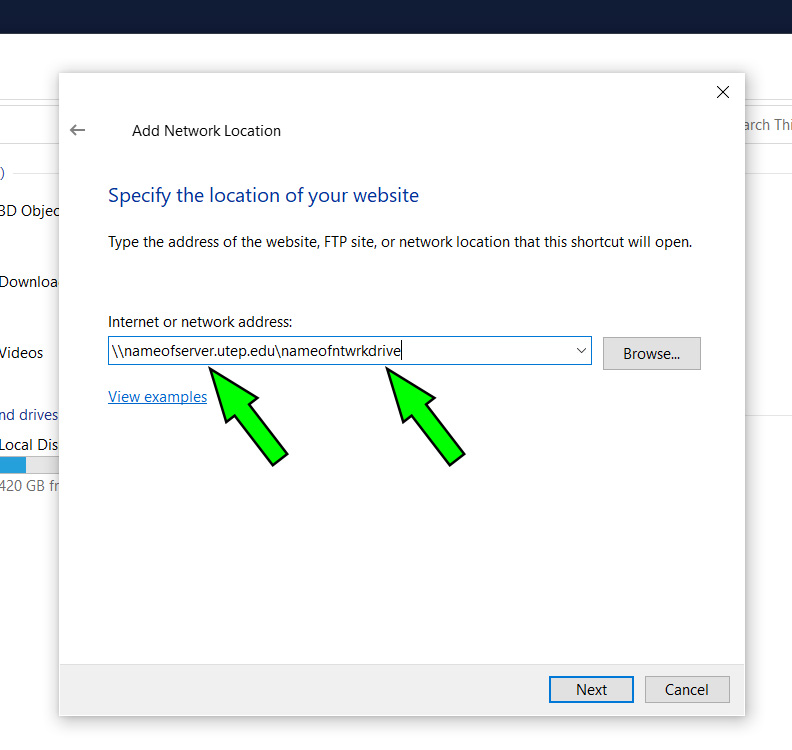
4b. If you selected the "Add a network location" option, please enter the full path to the drive (usually in the form of \\nameofserver.utep.edu\nameofntwrkdrive -- with or without a dollar sign) in the field and click "Next" :
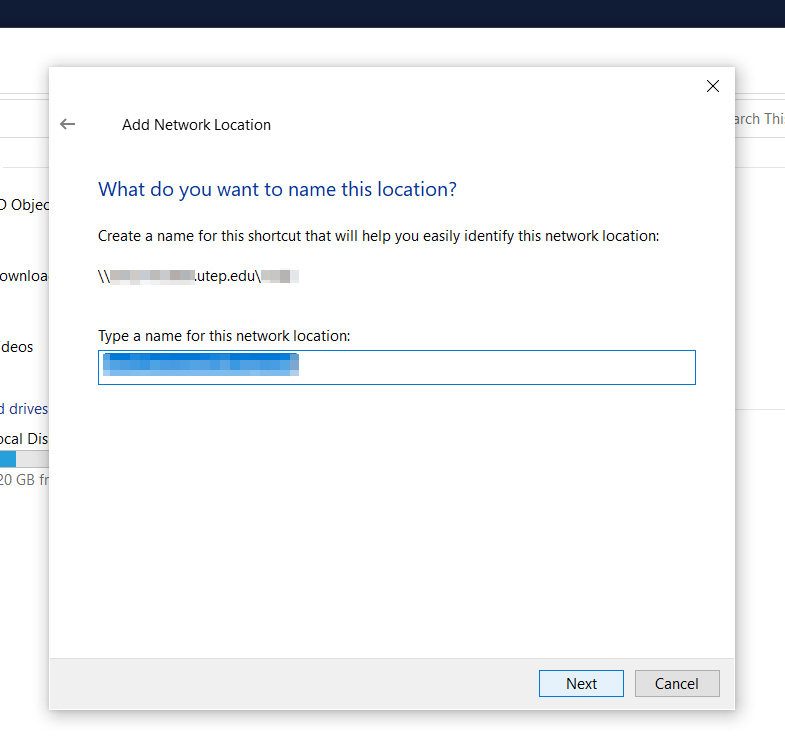
4c. Enter a name for the network location (you can leave the default name if desired) and click "Next":
5a. If you opted for the "Map network drive" option, a new File Explorer window will open with the contents of the network shared drive. The new drive will be assigned the letter you specified and be available from "This PC":
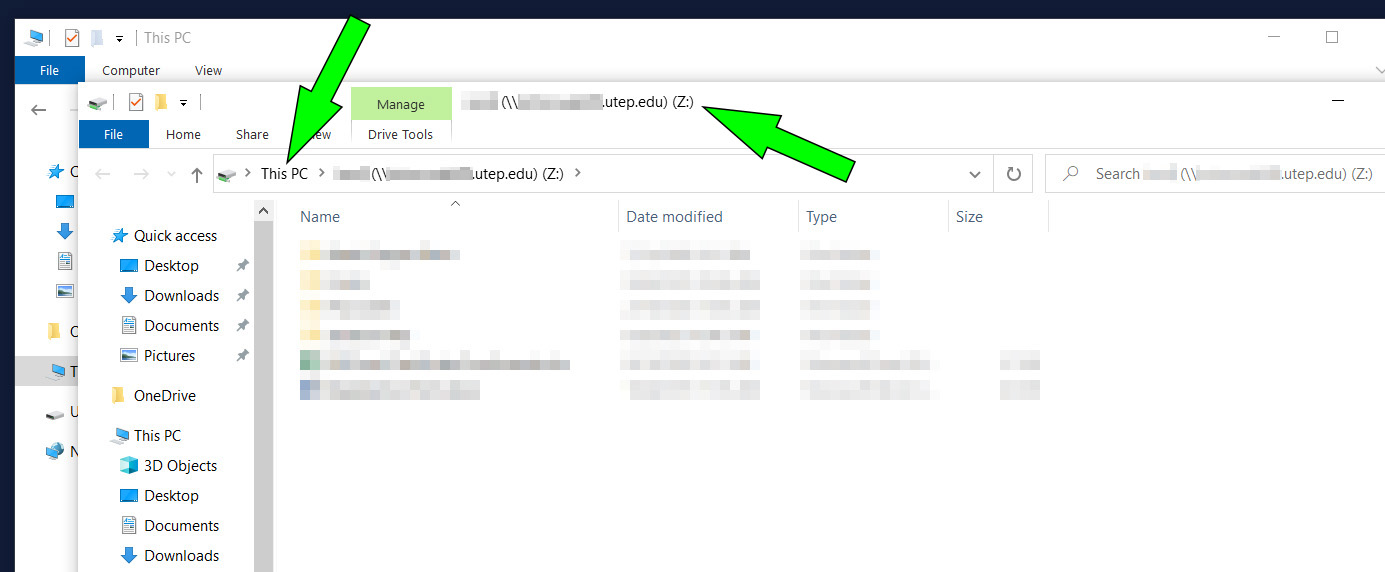
5b. If you opted for the "Add network location" option, a new File Explorer window will open with the contents of the network shared drive. The location will have the name you specified and be available from "Network":
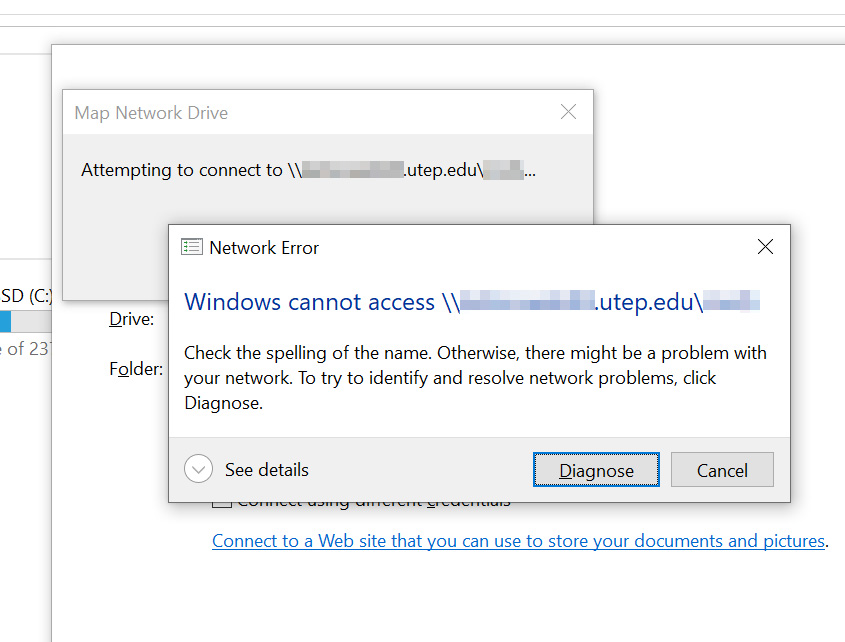
6. If you made an error typing the full path to the drive (of if you're trying to connect from off-campus without connecting to the VPN first), you will get a "Network error" window. Click "Cancel" and make sure you are entering the correct path or make sure you are connected to the VPN:
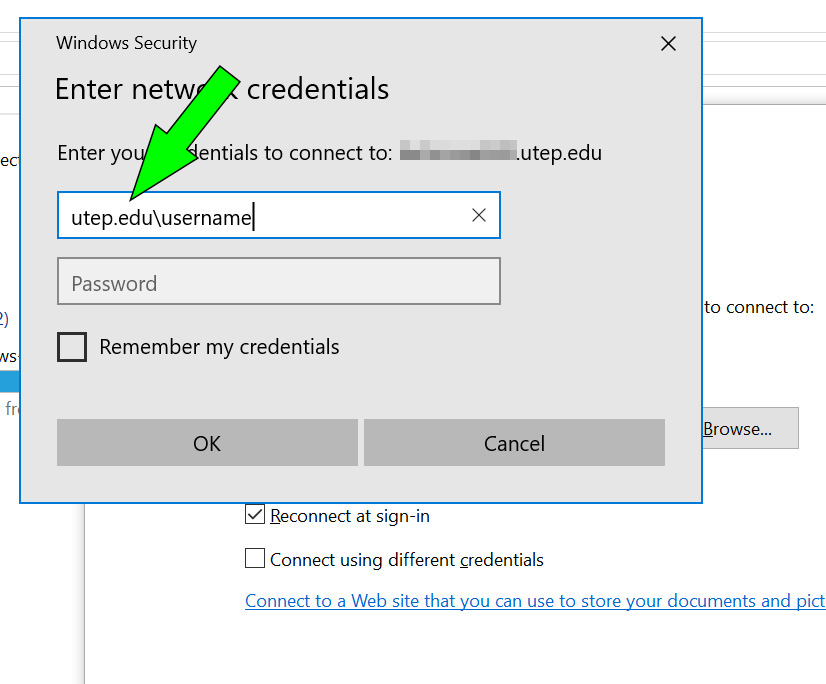
7. If you are connecting from a UTEP computer that is not using your UTEP credentials to log in, please enter "utep.edu\" and your UTEP username and password in the appropriate fields. If the connection is to be persistent (i.e. connected at all times), make sure the "Remember my credentials" box is checked. Click "OK" to continue: