
MinerAlert
MinerAlert
Last updated Sep 5, 2025
Recycle your Blackboard course properly and get off to a good start. This guide will show you how to copy your old course into your new one, how to adjust course dates, and give you some helpful reminders.
Ultra to Ultra course copies occur from inside the destination course.
To begin, enter the course you wish to copy content into.
Think of it as pulling the content in. On the top right, hit the 3 dots beside the magnifying lens, and hit "Copy Items".
Locate the course you wish to copy from. You can use the search bar to narrow down the results by title or CRN.
You can do a complete or a granular course copy.
Once you are ready, hit "Start copy". Please allow some time for the copy to complete, as copying a larger amount of content or copying during the beginning of the semester may result in longer wait times. Do not try to copy again as this will duplicate content.
IMPORTANT! - After the copy
After the course copy, you must view all content items (documents, links, etc.), dates, and settings to make sure that they work as intended and match your current course needs. Try using the Batch Edit function to speed up the process where necessary.
If there are any major conversion issues with the Course Copy, you will see the following message above the content panel.
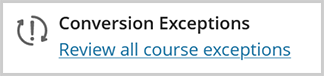
Click this option to open a new menu with the Conversion Details and a list of what did not copy properly.
View video demonstrating the steps.